Recipe of the Week - Yet Another Green Smoothie Recipe

Green SmoothieI feel like I have tried every green smoothie recipe known to man.  I love them all.  My toddler, not so much.  He’ll drink it, but only ever half, and sometimes with bribing.  I know, I know.  Many of you are aware that I’m a big fan of Baby-Led Weaning.  And bribing isn’t a word in their vocabulary.  But I just get so excited about the rawness and goodness of these drinks!  And in my opinion, what’s not to like, right? I finally thought that maybe I was adding too much.  Maybe the flavor palette was overwhelming him.  So I simplified, but still left the greens :).  He downs it now, and also has no idea that I put his probiotic in there ;).  It is now tasty, cheap, and easy.

I had the brilliant idea of adding a little frozen juice concentrate (we use this for vitamin C sometimes).  It adds great flavor, and though we’re not juice fans at our house, I felt this was such a small amount.

This recipe makes enough for all 3 of us.

Ingredients:

2 cups unsweetened coconut milk (more or less depending on how thick you like it)

2-3 bananas

1 + cup spinach leaves

2 + Tbsp. orange juice concentrate (the kind you find in the freezer section)

Blend all ingredients in a blender/food processor.  Adjust to taste.

If you want something more filling for breakfast, add ¼- ½ cup of oatmeal.  It thickens it nicely and is a wonderful grain for mamas and babies!

Recipe of the Week - Baked Parmesan Zucchini Chips

This recipe is simple and delicious and one of those 'tweakable' wonders that make you feel like a super chef instead of a tired mama... who most likely has some kind of food item or spit up in her hair. Plus, if you have a picky eater who has developed a fear of all things GREEN, getting a taste of these bad boys just might help give them the boost they need to be lean mean green eating machines! I give you the tasty and crispy, Parmesan Zucchini Chips.

To be honest with you I don't remember where the original recipe came from, but I DO remember tweaking a few things here and there so I snagged a basic one off of Food Network as a base to run off of. Instead of blabbing on and on about each step... which wouldn't take that long considering it's an incredibly easy recipe... I figured it would be more entertaining and MOUTH WATERING if I walked you step by step with photos of how it went down in my kitchen.

Step 1, of course, is to preheat your oven. Crank it up to 450 degrees if you please, and continue on to step 2: gathering your ingredients. (see Food Network link for measurements - but DON'T FORGET this is almost fail-safe when it comes to tweaking things to make it your own so have fun!)

parmesan zucchini chip ingredients

MY ingredients included: parmesan cheese Italian breadcrumbs salt pepper garlic powder paprika 1 egg yolk water zucchini

Slice the zucchini into 1/4" thick rounds. The thinner the slice the crispier the chip. I've never been a very meticulous slicer so you should know that even the thicker pieces turned out great, with a soft center and yummy crunchy crust!

zucchini slices


In a small bowl, combine egg yolk and water as a pre-seasoning bath for your zucc. In a separate bowl, combine your spices, breadcrumbs, and cheese.

parmesan mixture

Dip each slice of zucchini into the egg wash and then coat with cheese mixture on both sides. Lay slices on a foiled and greased baking sheet, making sure they are laying flat.

Parmesan Zucchini Chips

As a side note, I ended up sprinkling and pressing some of the larger pieces of Parmesan onto the tops of the zucchini for added flavor and because cheese is kind of the best thing in the world. TOTALLY up to you.

Next BAKE the chips for 25-30 minutes, turning 1/2 way through with a spatula to make sure the bottom sides gets nice and crispy.

Parmesan Zucchini Chips

FINALLY you can enjoy the crispy, cheesy, deliciousness of these bite-sized veggie chips. WOW your kids with your amazing cooking skills and watch their adorable little faces as they realize they actually LIKE this mysterious green food. Then, pat yourself on the back and add this recipe to your stack of go-to options for any night of the week!

What did I tell you, simple and delicious! I won't ramble on any longer, but instead let you get right into the recipe! So, in the words of Julia Child... Bon Appetit!

Recipe of the Week - Asian Style Fried Rice and Beans

Image Courtesy of:  http://www.bhg.com/recipe/asian-style-fried-rice-and-beans-1/  

We love fried rice, but it is hard to find a recipe that tastes as yummy with healthy ingredients and brown rice.  I came across this one in the Better Homes and Gardens magazine, and love it!  I never would have thought to add beans to fried rice.  It is super simple as well, and we always have leftovers.

Ingredients:

½ pineapple, peeled, cored, and sliced, or 8 oz. canned pineapple slices (I use canned)

1 Tbsp. oil (I use coconut oil.)

2 medium carrots, sliced

4 cloves garlic, minced

2 tsp. grated fresh ginger

2 cups cooked brown rice (Leftover works even better.)

1 15 oz. can garbanzo beans, rinsed and drained

1 cup frozen peas, thawed

3 Tbsp. reduced –sodium soy sauce

1/3 cup fresh cilantro

1 lime, halved (optional)

(You could also add scrambled eggs, for added protein.)

Directions:

In a 12-inch nonstick skillet, heat 2 tsp. of the oil over medium heat.  Add pineapple; cook about 2 minutes per side until golden brown.  Remove from skillet and set aside.  (Note:  Canned pineapple won’t get the same caramelized look, but it will still taste delicious).

Pour the remaining 1 tsp. oil into the hot skillet.  Add carrots; cook, stirring frequently, for 5 minutes or until just tender.  Add garlic and ginger; cook 30 seconds.

Stir in brown rice, garbanzo beans, and peas.  Add soy sauce.  Cook and stir about 4 minutes or until heated through.  Stir in cilantro.  Return pineapple to pan.

To serve, squeeze lime over all.  Top with additional fresh cilantro leaves, if desired.  Makes 4 servings.

Recipe of the Week - Carmelized Brussels Sprouts

First of all - did you know that it's Brussels sprouts, not Brussel sprouts?  Because I didn't until I started typing up this recipe. Oh, I know what you're thinking.

" Really, Erica, Brussels sprouts? Of all the recipes you could share? Really?"


Friends, please, give this one a try.  I saw it in a Better Homes and Gardens Magazine awhile back.  The picture looked good - really good.  I asked my husband if he was game to try them and he agreed...reluctantly.  My first attempt was a great success and now this recipe is in our regular "vegetable rotation".

So, here it is.  They are super simple, super fast and I promise, super delicious.


Brussels sprouts

Ingredients: 1/4 cup extra-virgin olive oil 4 cups Brussels sprouts, rinsed, trimmed, and halved lengthwise Salt and freshly ground black pepper 2 tablespoons water Juice of half a lemon, about 1 Tbsp.  (Sometimes I use balsamic vinegar instead of lemon juice.  It's also tasty.)


Directions: 1. In a pan, heat 3 tablespoons of the oil over medium heat. Arrange sprouts in a single layer, cut sides down. (That's what BHG says to do.  Honestly, I just dump the sprouts in the pan.  They aren't quite as pretty in the end, but it doesn't affect the taste.)  Drizzle with remaining olive oil and sprinkle generously with salt and pepper. Cover and cook for 3 minutes. Remove lid and sprinkle sprouts with water. Cover and cook for 2 minutes more. Sprouts should just be beginning to caramelize.  Stick them with a fork - they should be slightly tender.

2. Remove the pan lid and increase your heat a bit.  When the cut sides are well-caramelized, toss Brussels sprouts in the pan and drizzle with lemon juice.  Use a bit more salt and pepper to taste.


So that's it.  It's a delicious veggie in about 6 minutes of cooking.  Give this unpopular food a try.  You may be surprised at how yummy Brussels sprouts can be!

Original recipe can be found here: http://www.bhg.com/recipe/vegetables/caramelized-brussels-sprouts-with-lemon/

Recipe of the Week - Caramelized Onion Quiche with Whole Wheat Crust


I’m pretty set on owning chickens one day for this reason:  there are only 3 of us now, but we all love eggs, and we tear through a carton like nobody’s business.  This quiche is one of our favorite things to eat.  It’s super filling and makes a great dinner entree!  The whole wheat crust is also easy and tasty, and you mix it right in the pan.  You can take the time to sauté the veggies to give them beautiful color and flavor, or you can just add them raw.  Both will be successful!

Easy Whole Wheat Crust (taken from “100 Days of Real Food;” see link at end of post)

1.5 cups whole-wheat flour (I like to use whole white wheat)

1/2 cup oil (canola, olive, melted butter; I use olive)

1/2 teaspoon salt

2 tablespoons milk, preferably whole (I use coconut or almond milk)

In a 9-inch pie pan, combine all ingredients and mix with a fork. After mixing well, use your hand to form a ball in the pan and then press into pan. Bring it up on the sides and pinch the top (with your finger or a fork). Then mix and pour quiche filling right into the raw crust.  No more dreaded pie crusts!

100_4734-1


Carmelized Onion Quiche (inspired by “The Urban Poser;” See link at end of post)

Ingredients:

6 eggs

1/2 cup coconut milk (or other milk of your choice, dairy or non-dairy)

2-3 Tbls chopped basil (or 1-2 tsp. dried)

1 medium sized onion

1 bell pepper

1/2 Tbls coconut oil or olive oil

1 medium sized tomato

6  green onions

4 large garlic cloves

1/2 tsp coarse ground black peppercorns

1/2 tsp coarse ground sea salt

Optional cheese, meats, olives, etc.


For the quiche:

Preheat the oven to 350.

In a large bowl beat together the eggs, milk, black pepper, chopped basil and salt and set aside.  Letting the egg mixture get to room temperature is preferable.

Thinly slice the onions and caramelize them in a pan with the oil.

While the onions are cooking cut the tomato in half.  Slice one half and set aside to place on top of the quiche after it’s assembled.  Chop the other half and set aside to add to the egg mixture.

Next, slice the green onions into narrow strips and dice the garlic.  When the onions are done, fry the garlic in the leftover oil until crispy, then fry the green onion.

Add your half a tomato, half the onions, garlic, and half the green onions to the egg mixture.  You can also add any other veggies, meats, and cheeses that sound delectable!  Pour into the pie crust.

Bake at 350 for 15 minutes.  You may want to place the pie pan on a baking sheet if it is really full.

After 15 minutes, remove from the oven sprinkle the leftover tomato, onion, green onion.  Return to the oven and bake until just firm, another 15-25 minutes.  Make sure the center is done by jiggling the pan a little.

Let the quiche cool for a few minutes to finish setting.


Crust:  http://www.100daysofrealfood.com/2010/04/26/quiche-with-a-super-easy-whole-wheat-crust/

Quiche:  http://urbanposer.blogspot.com/2011/08/soppressata-caramelized-onion-and-green.html

Recipe of the Week - "You'll Never Go Back to Anything Else" Black Bean Cupcakes

Chocolate Peanut Butter Cupcakes {Gluten-free}

Black Bean Cupcakes

Our family went "grain-free" about a year ago, and I stumbled upon this amazing recipe when preparing for my daughter's 2nd Birthday! It is incredible, and  you will truly NEVER go back to dry boring cupcakes. Our leadership team at The Motherhood Collective© requests them for every gathering.

The original recipe is by Caroline Edwards of Chocolate & Carrots . You MUST visit her site for other delicious recipes! (The actual recipe can be found here: {Secret Ingredient} Chocolate Peanut Butter Cake)

Ingredients

  • 1 (15.5 oz) can of reduced sodium black beans, drained and rinsed
  • 4 eggs
  • 1 tablespoon vanilla extract
  • 5 tablespoons unsalted butter, or coconut oil
  • 3/4 cup cane sugar
  • 5 tablespoons special dark cocoa powder
  • 1 teaspoon baking powder
  • 1/2 teaspoon baking soda

Preheat oven to 350° Line a 12 cup muffin pan and SPRAY with cooking spray. (Spraying truly helps!)

Blend the beans, 2 eggs, vanilla and sugar in the blender on high until completely blended. In a large bowl, beat the butter/coconut oil until fluffy, then add the remaining two eggs, beating well after each. Add in the bean mixture. Sift in the cocoa powder, baking powder and backing soda. Beat for 1-2 minutes, or until well combined.

Pour batter into your prepared muffin pan, filling each about 2/3 full. Bake for 20-25 minutes, or until your cupcakes look like Caroline's beautiful photo below. I chill in freezer until firm and cool before icing.


Peanut Butter Frosting

Recipe can be found here: Something Shiny

This frosting is seriously my "go-to" frosting for everything currently.... thank you Caroline. Thank you.

Ingredients

  • 1 cup creamy peanut butter
  • 5 tablespoons unsalted butter, softened
  • 2 cups powdered sugar
  • 1/2 – 2/3 cup whipping cream (heavy cream)
  • 12 miniature Reese’s Peanut Butter Cups

Beat the peanut butter, butter and powdered sugar until combined. Add in the whipping cream and beat until light and fluffy, being careful not to under-beat or over-beat. Put in a ziplock bag, cut a hole, and decorate the cupcakes OR use a piping bag with your favorite decorating tip and decorate the cupcakes OR use a knife and spread to decorate the cupcakes. Finish with a mini Reese’s Peanut Butter Cup.

Recipe of the Week - Baked Oatmeal

Looking back to my engagement, I think the recipe exchange was my favorite part of bridal showers.  I loved getting to see what each friend brought as a tried-and-true family recipe that should be shared with a new couple starting off.  Of course, some were okay, some were just weird, and some became instant favorites. This baked oatmeal quickly filled the latter.  Amazing.  We will eat it any time of day, and you just might see it on the dessert menu as well. Baked Oatmeal Ingredients: 3 cups oatmeal 2/3-1 cup sucanat (or other sweetener) 2 tsp. baking powder 1 tsp. cinnamon 1 tsp. salt 1 cup milk (I use almond or coconut) ½ cup melted butter (or other oil) 2 eggs, beaten Fruit, optional—I LOVE adding mashed bananas.  Peaches also taste heavenly!

Directions:

Combine dry ingredients in a bowl.  Pour milk, eggs, and butter in and mix well.  Spoon into a greased 9” pan.  Bake at 350 for 35-45 minutes.

It’s great warm out of the oven.  You can add extra fruit, pour milk over it…yum.

Recipe of the Week - Healthy Turkey Chili

The last time Anne Hathaway hosted Saturday Night Live they did a hysterical Les Miserables spoof during her opening monologue. In it, the majority of the SNL cast sang about working hard during the week, performing on Saturday night, and making chili on Sunday. Between my own spouts of laughter, I couldn't help but think, "Ain't it the truth?"  There's really no better day to have a bowl of chili than on a rainy Sunday afternoon after church. To add to that, if there's one thing every housewife/mom should know how to make it's a great pot of chili. If you don't already have a go-to recipe, have no fear, you're about to get one. I was lucky enough to stumble across a really great healthy chili recipe a few years back on the Lovely Little Details blog. I made it as it was written the first time, and each time shifted things here and there until coming to a final chili resting place. I decided it is delicious and simple enough to share with my fellow mommies.

Here's what you'll need:

  • 1 lb Italian Turkey Sausage
  • 2 cups chopped onions
  • 1 cup chopped green bell pepper
  • 8 garlic cloves, minced
  • 1 lb ground turkey
  • 1 jalapeño pepper, seeded and chopped (leave the seeds if you want more heat!)
  • 2 tablespoons chili powder
  • 2 tablespoons brown sugar
  • 1 tablespoon ground cumin
  • 6 oz (1 can) tomato paste
  • 1 teaspoon dried oregano
  • 1 teaspoon cinnamon
  • 1/2 teaspoon freshly ground black pepper
  • 1/4 teaspoon salt
  • 2 bay leaves
  • 1 1/4 cups merlot or another fruity red wine
  • 2 (28 oz) cans diced tomatoes - undrained
  • 2 (15 oz) cans dark red kidney beans - undrained
  • shredded cheese to taste
  • sour cream to taste

And here's what to do with it all... it couldn't be easier:

healthy turkey chili

Cook sausage and ground turkey over medium-high heat until brown in a deep pot or Dutch oven. Drain the meat and return to pot. Add onion, bell pepper, garlic, jalapeño, chili powder, brown sugar, cumin, tomato paste, oregano, pepper, and salt. Mix together until fully incorporated. Add remaining ingredients and combine thoroughly. Bring to a boil. Cover and reduce heat to a simmer for 1 hour (at least), stirring occasionally. Discard bay leaves and serve with cheese and sour cream as desired. And of course, it will be extra delicious if served with some yummy cornbread!


This is absolutely delicious and like most chili recipes, tastes even better the next day. I'm all about changing things up to meet your personal taste, so if you happen to try this recipe and tweak a few things here and there be sure to leave it in the comments so other moms (including me) can consider your changes.

Enjoy!

Recipe of the Week - Cinnamon Puffs

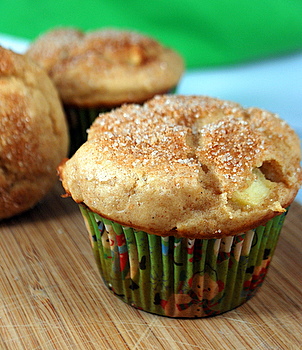
We are big fans of breakfast-for-dinner at our house. Especially when it's cold out! Because of our schedules we don't get to share breakfast together often in the morning. Many times we will whip up a morning favorite on a Saturday night. To me, breakfast isn't breakfast without a bread product. While I love pancakes and waffles, I am either eating cold waffles or standing by the skillet/waffle iron while my family eats. Either way, it's not ideal. My favorite solution to this is either cinnamon rolls or muffins. I thought I would share my favorite muffin recipe with you all. Some people call these doughnut muffins, but growing up we called them cinnamon puffs.(Note: These are NOT healthy, but every once in a while it's ok to splurge!)

Cinnamon Puffs

Cinnamon Puffs: ½ cup shortening ½ cup sugar 1 egg 1 ½ cup flour 1 ½ tsp baking powder ½ tsp salt ¼ tsp nutmeg ½ cup milk

Cream sugar and shortening until smooth. Beat in egg. Stir in dry ingredients alternately with milk. Put in greased muffin pans. Bake at 350 degrees for 20-25 minutes.

Topping: 1 ½ cup sugar 1 tsp cinnamon ½ cup melted butter

Mix cinnamon and sugar. Dip muffin in melted butter and roll in cinnamon sugar mixture.

Recipe of the Week - Gluten Free Sweet Potato Brownies

This is a FAVORITE in our house. Maybe even once a week...shh...don't tell!
The original recipe is from www.paleomg.com.

Sweet Potato Brownies

Prep time:  35 mins
Cook time:  30 mins
Total time:  1 hour 5 mins
Serves: 5-8
Ingredients
  • 1 sweet potato
  • 3 eggs, whisked
  • 1/4 cup Coconut Oil, melted
  • 1/3 cup honey
  • 1/2 cup Enjoy Life Chocolate Chips
  • 3 tablespoons Coconut Flour
  • 2 tablespoons unsweetened cocoa powder
  • 1/4 teaspoon baking powder
  • 1/4 teaspoon vanilla extract
  • 1/4 teaspoon cinnamon
  • pinch of salt
Instructions
  1. Time to bake that sweet potato. Preheat your oven to 425 degrees, use a fork to puncture holes all around it, then throw in the oven for 25-30 minutes.
  2. Once your sweet potato is soft and cooked through, peel off the skin and mash it up in a bowl. And turn your oven down to 350 degrees.
  3. Now add your wet ingredients: coconut oil, honey, vanilla, and whisked eggs to the bowl and mix together.
  4. Then add your dry ingredients: coconut flour, cocoa powder, baking powder, cinnamon, salt and chocolate chips.
  5. Mix well to incorporate all that goodness.
  6. Pour into an 8x8 glass baking dish
  7. Bake for 30-35 minutes.
  8. Let rest to cool a bit.
Recipe by PaleOMG - Paleo Recipes at http://paleomg.com/sweet-potato-brownies/

Recipe of the Week - Spinach and Cheese Strata

Spinach and Cheese Strata So...do you like breakfast? (Of course you do.) Well then, friend, let me introduce you to a recipe that will change your life.

One word: strata.

I make this when we have family in town or when I host friend-get-togethers or when it's a Tuesday and I want it.

Stratas are awesome. You make them ahead of time. They are totally customizable based on what you like. You can throw in whatever extra stuff you have in your frig. Well, as long as you have eggs. You need eggs. And lots of them.

I sort of follow this recipe (Thank you, Smitten Kitchen!):

1 bag of fresh spinach (Frozen spinach also works, but just be sure to thaw it and drain out the excess water.) 1 large onion, chopped fine 3 tablespoons unsalted butter 1 teaspoon salt, divided. 1/2 teaspoon black pepper, divided. 1/4 teaspoon grated nutmeg

8 cups (a large loaf) French or Italian bread, cubed - Use whatever you have. Dense breads are great!

2 cups of grated cheese - Gruyere is awesome, but I almost never have that in my frig. I always have some sort of cheddar-blend, so I typically use that. 1 cup of finely grated Parmesan - I also like to add feta. Sometimes I adjust the other cheese amounts. Sometimes I just throw caution to the wind and dump lots of extra cheese in the bowl. No one ever complains about extra cheese.

2 3/4 cups milk - skim, whole, buttermilk, a combination, whatever... 9 large eggs 2 tablespoons mustard - I've used yellow or Dijon.

Sauté the onion in butter for about 3-5 minutes. Carefully add the fresh spinach and let it cook down. Add 1/2 teaspoon salt, 1/4 teaspoon pepper and nutmeg and continue cooking for another minute.

Spread half of the bread cubes in a buttered casserole dish. Add some of the spinach mixture. Add some of the cheese mixture. Continue layering bread, spinach, cheese.

Whisk eggs, milk, mustard and remaining 1/2 teaspoon salt and 1/4 teaspoon pepper together in a large bowl and pour evenly over strata.

Cover the casserole dish and stick it in your frig overnight (or at least 8 hours).

The next day, let it stand at room temperature for 30 minutes while preheating the oven to 350°F. Bake strata, uncovered 45-60 minutes. (Mine always takes 60 minutes.) It will get all puffy and golden brown. Stick a knife in the middle and make sure that the eggs are set and fully cooked.

Let stand 5 minutes before serving.

Variations: Add veggies. Chopped zucchini, yellow zucchini, peppers, broccoli, whatever. When I add vegetables, I saute them with the onions.

Add meat. Sausage is my favorite. Just brown it until it's crumbly and add the sautéd onions. You can do bacon, too. Cook it, crumble it, throw it in there. Have some chopped ham? That'll work, too.

Try different breads. There's a local bakery here that makes a spinach and mozzarella bread. It is delicious in this! Also, feel free to clean out your bread drawer. Use whatever combination of breads you have laying around. Thicker cut bread seems to get fluffier, but thin-cut bread still tastes delicious. Sourdough, rye, Wonder Bread - anything will work!

Recipe inspired by: http://smittenkitchen.com/blog/2009/12/spinach-and-cheese-strata/

Recipe of the Week - Sausage, Salsa, Rice

Sausage, Salsa, RiceEvery mama needs an a few simple, easy-to-make recipes that require little to no prep and can be made in under 30 minutes. The best thing about this is that as simple as it is, you can adjust to make it more organic and health conscious if desired.

Ingredients: 1 package of good kielbasa sausage 2 cans of kidney beans (light or dark), drained 1 large jar of salsa 1 can of corn, drained cooked Rice

Slice sausage and toss into a hot skillet (or crock pot). Dump salsa, drained beans, and drained corn on top of sausage and heat until it's warm. Serve over your choice of rice. (We like white but it's also really good over brown or long grain.)

See. Easy!

Recipe of the Week - Cheesy Snack Pretzels

I have a recipe book called 365 Foods Kids Love To Eat. I think my mom got it when I was a kid! It has recipes for everything from baby food to lunch box fillers to party food. Best part is that most recipes are so simple that the kids can make them themselves! This is one of the recipes that we make over and over. Simple, easy and delicious! An added bonus; the dough can be formed into letters, numbers or any shape to help preschoolers learn! The "pretzels" taste like cheez-it crackers. 1 cup flour 2 tablespoons grated Parmesan cheese 1/2 teaspoon salt 1/2 cup butter or margarine 1 cup shredded sharp cheddar cheese 2-3 tablespoons cold water

Preheat oven to 425 degrees Fahrenheit . In a large bowl, stir together the flour, Parmesan cheese and salt. Using a pastry blender or two knives, cut in butter until mixture resembles fine crumbs. Stir in cheddar. Sprinkle water over mixture, stirring lightly with a fork. Shape dough into a uniform ball. Cut into as many as twelve equal parts. (I like making larger pretzels by cutting into only six parts.) Roll parts into logs and shape into pretzel or shape desired. Bake 12 minutes. They don't really brown at all so bake the full time.

Hope your kids enjoy this treat as much as mine do!

Cheese pretzels

Submitted by: Laura Cox

If you have a recipe you'd like to share, please email us: submissions@themotherhoodcollective.org

Recipe of the Week - Mandarin Sesame Salad

Mandarin Sesame Salad We love salads any time of the year, and this recipe is so tasty that we sometimes just make it our dinner entrée for the evening, served alongside a thick slice of French bread.
Asian Dressing:

2 Tbsp. brown sugar (I use sucanat instead; I’m guessing honey or agave would work as well) 2 tsp. soy sauce 1 Tbsp. sesame oil ¼ cup oil (I use olive) 3 Tbsp. rice vinegar

Combine dressing ingredients ½ hour before serving.

Salad Ingredients:    Lettuce (I use green leaf, or mixed greens) 1 package crunchy rice noodles (these act as the “croutons”) 1 can mandarin oranges in juice (I splurge and buy 2 since they’re so good) 2 green onions 1 Tbsp. sesame seeds Chicken breast, cooked and shredded (optional Bell peppers, boiled eggs, garbanzo beans (optional additions)

Directions: Toast the sesame seeds in a dry pan over medium heat.  Watch carefully and stir often, as they will go from just right to burnt in a matter of seconds.

Combine lettuce, optional chicken, oranges, onions, and toasted sesame seeds.  Let chill for 10 minutes.

Before serving, add the crunchy rice noodles and dressing.

Recipe taken from:  http://blogchef.net/?s=mandarin+chicken+salad

Recipe of the Week - Granola

Every since childhood, I've loved my mom's granola recipe. As far as I can remember, she only made it occasionally. The time I remember most vividly was when we spent time at the lake with some family friends. My mom made a giant batch and I ate it all weekend. When I came home from the hospital after my second c-section, we lived in a house with horrible air conditioning and one of the very few things that sounded good those hot summer weeks was my mom's granola. I ate it every morning for breakfast and every night over really good vanilla ice cream and hot fudge.

And now I here I am pregnant again and once again one of the few things that sounds good is my mom's granola. We have been making up batches of this and eating it for breakfast, lunch, snacks, etc. My kiddos love it and so do I. Hope you all enjoy! (P.S. It really is amazing over ice cream.) Granola Tray Granola Preheat oven to 250 degrees.

Combine in large bowl: 2 c. whole wheat flour 6 c. rolled oats (I use instant oatmeal.) 1 c. coconut 1 c. wheat germ

Blend together: 1/2 c. water 1 c. vegetable oil 1 c. honey or corn syrup 2 t. vanilla 1 T. salt

Add blended liquids to dry ingredients and mix thoroughly. Spread mixture out on 2 greased cookie sheets and bake 1 hour or until dry and golden. Store in covered containers.

Recipe of the Week - Mini Pancake Muffins for Toddlers

My 13 month old daughter has become a bit of a picky eater and has been going through spurts of not wanting to feed herself. What a little weirdo, right? Anyway. She's really active and a little skinny in my opinion (the pediatrician says she's just fine, thankfully) so I've been searching for some new toddler-friendly recipes to use to ensure she's getting enough in that skinny belly. Breakfast is generally the meal she's a pro at, so I decided to find a fun breakfast-esque snack that she could enjoy with just about any meal. I looked on a few 'baby food' websites and blogs and finally, because we all know it's like an online Bible for moms, found a great recipe on PINTEREST! With a name like "mini banana pancake muffins" you really can't go wrong, right?

So, I gave them a shot and my daughter went nuts for them. In fact, she totally poo poo'd her scrambled eggs (a normal favorite) and hopped on the pancake muffin train! She loves these little guys, and so do I! They are super easy to make, super easy to tweak (use your kid's favorite fruit), and super easy to store in large batches.

Here's the recipe from Once A Month Mom.

  • 1 cup complete pancake mix (the “just add water” kind)
  • 2/3 cup water
  • 2/3 cup syrup
  • 1 whole banana, sliced and quartered

Now, when I first saw the ingredients and quantities, I was a little shocked that there was so much syrup so I did a little tweaking of my own to start in an attempt to make them less sugary. I basically halved the amount of syrup and added more water.


You mix all the ingredients together, fill your greased mini muffin pan, and bake at 350 degrees for 12-14 minutes or until they are golden brown. They turned out great with my small change and after letting them cool slightly I was able to pop them in a large tupperware container and freeze them for an easy go-to snack.

They turned out so great (and were such a hit with the little one) that I immediately made another batch using peaches instead of bananas. Still great!

In my third attempt I tried switching things up a little more and I knocked down the syrup even more - about 1/8 cup. I used the same amount of water and pancake mix, but added some sugar free applesauce to make up for the missing sweetness from the syrup. Then I used assorted fruit including strawberries, raspberries, mango, and pineapple. The batter looked great but once I took them out of the oven and let them cool a bit they sank in the middle slightly. I think if I added more pancake mix and left them in the oven for a few extra minutes they would have turned out perfectly.

Do you have any other great breakfast/snack ideas that are easy to make and modify based on your child's taste? Please share in the comments below, or let us know how these turned out when you made them at home!


Recipe of the Week - Energy Fudgies

One year ago, I went off all dairy, cold turkey, in hopes of solving my health issues.  It was hard, and I was desperate.  I always wanted something sweet, but I wasn’t yet adept at substitutions.  My “Go Dairy Free” book arrived in the mail, and this was the first thing I made out of it.  It was delicious, healthy, simple, and I always have the ingredients on hand.  This is a great energy boost for the afternoon, filled with protein, healthy fat, and a small dose of calcium.  It is also great when you’re entertaining others with allergies, as it is grain, egg, and milk free! Carob Fudgies:  yields 20 bite-sized snacks

½ cup creamy almond, peanut, or sunflower butter (I love the almond the best) ½ cup agave nectar, honey, or light corn syrup (I do ¼ each of honey and agave) ½ cup sifted carob or cocoa powder (sift then measure) ½ cup sesame seeds ¼ cup unsweetened shredded coconut

In a small saucepan, combine the nut butter and the sweetener.  Stir over medium-low heat until the two are melted together, about 2-3 minutes.  Remove from the heat and gradually stir in the carob/cocoa powder, followed by the sesame seeds, until everything is well combined.  Place the mixture in the refrigerator for 10 to 15 minutes to set up.  Place the coconut in a small dish.  Remove mixture from the fridge, and using a small spoon, scoop up some fudge.  Roll it into a 1 inch ball, and roll it in the coconut.  Repeat with remaining fudge.  Store them in the refrigerator. Energy Fudgies

If you want them to set up more, place them in the freezer.

Recipe of the Week - Non-Recipe Recipes

I am great with opinions and humiliating stories, but I'm horrendous at creatively cooking. If you can add water and pop it in the oven, I'm all for it. If I can take some raw ingredients and put them in a bowl, consider it done. So here are my favorite recipes that are fast, easy, and painless. Breakfast for Dinner - Scramble some eggs, toast some toast, and defrost those frozen sausage patties you bought on sale a few months ago but never knew what to do with.

Pasta Salad - Boil pasta. Add italian dressing. Add other things like pepperoni or mozzarella cheese. - Put in the refrigerator to chill. Or eat immediately. I won't judge.

Taco Night - Get taco shells and ground beef. Cook beef. Chop some lettuce and tomatoes and other toppings. Add hot sauce. - Promise yourself to make it again soon because you don't need utensils to eat it.

Crock Pot Anything - Throw random ingredients into a crock pot for 4-5 hours and pray it fills the house with a delicious smell.

Chicken and Rice - Add chicken to instant rice.

Chicken and Beans - Add chicken to a can of beans that you nuke in the microwave.

Chicken and Rice and Beans - Add more chicken to the leftover rice and beans from your previous chicken meals.

Frozen Pizza - Add extra veggies on top so you feel better about yourself.

Hamburger Helper - Just add meat and water!

Burritos - Take leftover ingredients from the week's meals and roll it into a flour tortilla.

"But what about your favorite baking recipes, Laura?" asked no one ever.

If I just add water, I'll make it. If it comes refrigerated and all I do is put it on a sheet and into the oven, I'll do it. If I can chop up fruit and put it in a big bowl, I'm game. If it involves more than 3 ingredients, I have to be very inspired before I attempt it.

I'm very thankful for my creative husband - he's the real cook in the family! He is innovative and adventurous when it comes to food. I sometimes help him in the kitchen, but I usually keep my distance so I don't muck it up!

Swedish Chef

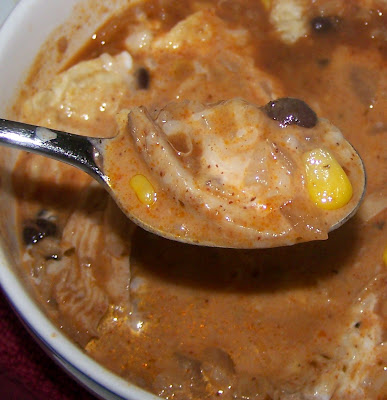
Recipe of the Week - Chicken Tortilla Soup

I love soup. I came up with this recipe when I was pregnant and made it all the time! It is full of protein, fiber, and all kinds of deliciousness. Make it as mild or spicy as you want. I like it spicy and because my husband and sons are not spicy fans, I make this huge pot just for me and then eat it for lunch every day for a week!
Ingredients:
2 bone in chicken breasts 7 cups water, divided
2 tbs olive oil 1 onion, chopped 2 cloves minced garlic 1 tbs chili powder 2 tsp cumin 1/2 tsp dried oregeno Red pepper to taste Salt to taste (I used seasoning salt) 1 can Rotel tomatoes 1/2 cup uncooked rice 1 can black beans, rinsed and drained 1 cup frozen sweet corn

In a large pot, bring 5 cups of water to a boil. (I added onion, garlic, a tsp of salt, and pepper.) Boil chicken breasts, covered, for 20-25 min or until juices run clear. Let chicken rest/cool. Strain chicken broth and set aside.

In the same pot, saute chopped onion in 2 tbs olive oil until tender. Add garlic and cook for 1 minute.
Add strained chicken broth, Rotel, 2 cups of water, beans, spices (not salt) and rice. Bring to a simmer and cook uncovered for 15-20 minutes or until rice is done.
Meanwhile, shred chicken. Add corn and chicken to soup and simmer, covered, for another 5-10 minutes. Taste and season with salt.
Serves 8.
Serve with shredded cheese, crushed tortilla chips and sour cream (or any other toppings you like!)
YUM!
Like many soups, this one is better the next day. Make it on a Monday and enjoy it for lunch for the next week!

Recipe of the Week - Weekly Granola

I have been a cereal addict for most of my life.  There have been many lunches and dinners where I was too lazy to put something together and just enjoyed a bowl of milky, crunchy goodness.  My husband and I wanted to get away from all the high-fructose corn syrup cereals, so we switched to more “natural” ones.  When Gabriel started wondering why he had to eat sugarless oatmeal while we pulled out the boxed breakfast, I realized I should evaluate our breakfasts a little more.  Even though all these cereals had no HFCS, they were still full of sugar, refined grains (aka, more sugar), and pretty pennies.  We did a couple weeks without cereal, but got tired of oatmeal and eggs. I had made granola before, for special treats, but they were always either full of sugar, tasteless, or pricey (because of all the delicious nuts and dried fruit).

I finally came across this recipe from “Pure Goodness,” and modified it to fit our needs.  We love it!  And I feel totally fine with giving this to Gabriel for breakfast, soaked in coconut milk happiness, or, when I get around to it, delicious homemade coconut milk yogurt (and before you think that sounds like way too much, I’ll confess that I have a yogurt maker appliance that literally just plugs into the wall.  It’s easy, and it works!).

I usually double this recipe, and make it every 10 days to 2 weeks.  This is the only cereal we have on hand anymore, and we can now have a variety of granola, eggs, and hot oatmeal.  It’s very flexible, so play around with it until you like it too!

If you want a “special treat” granola that tastes better than ANY store bought cereal I’ve ever had, check out this one:  http://ohsheglows.com/2012/10/12/cinnamon-bun-granola-recipe-halloween-treat-a-thon/.  While you’re at it, gorge yourself on the entire blog.

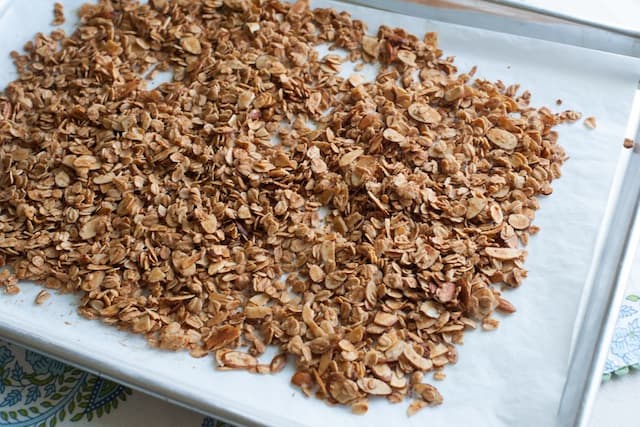
There are a couple tricks I use for every granola recipe now:  heat the liquids and salt together before combining with the dry oatmeal, bake on parchment paper, and let the granola sit for a while on the hot pan after removing from the oven (this is how you get the glorious clusters!). Coconut Granola Tropical Coconut Granola (Single Recipe)

3 cups rolled oats

1 cup unsweetened shredded coconut

¼ cup honey

1/6 cup coconut oil

1 Tbsp. vanilla extract

½ tsp. salt

Dash of cinnamon (optional)

1-3 Tbsp. ground flax seed (optional)

Raisins, dried fruits, nuts (optional)

  1. Heat oven to 300 F
  2. In a large bowl, combine oats, shredded coconut, and optional nuts
  3. In a small saucepan cook honey, oil, vanilla and salt over medium heat until the mixture just begins to simmer.
  4. Pour honey/oil mixture over oats and coconut flakes, optional cinnamon and flax seed, and stir with a wooden spoon until the well combined.
  5. Spread out granola on a parchment paper lined baking sheet.  Place in oven, bake for 10-15 minute increments, then stir granola.  Repeat until well-toasted, normally 30-40 minutes.
  6. Cool on baking sheet.  Add dried fruits when cooled.  Stir in airtight containers for up to two weeks.  Can also refrigerate or freeze for longer shelf life.

Recipe adapted from:  http://www.puregoodness.net/recipe-nutrition/tropical-coconut-granola/