Montessori Moods: The Color Tablets

Up to this point I have only discussed Montessori practical life activities. This is because they are some of the easiest to do at home and also because they are among the first activities introduced. The next category of activities is called sensorial. The sensorial activities are designed to allow the child to become familiar with the different aspects of the world—shape, size, color, texture. Some of the manipulatives in this category are very difficult to make yourself and are expensive to buy. Despite this, there are many interesting sensorial activities that you can make yourself and that your child will enjoy. I will mention that compared to modern toys, some of these Montessori activities will seem “boring” and you will wonder whether your child will enjoy them. Trust me, if the activity is suited for your child’s age and ability, they will! Montessori activities are designed to isolate the difficulty. That means if you want them to learn shapes, all the shapes will be of the same color and will look rather boring. This is so that they child is not distracted by different colors or patterns, and can focus on just the shape. In the activity I’m going to describe today, colors are learned using “tablets.” They are just colored rectangles. You don’t use a red ball and a yellow banana and a blue pencil to teach colors, because the object is a distraction and a complication to the color. Not that you can’t incorporate this kind of color sorting activity later, just that when you are first teaching colors, the colors need to be the main event.

DSC_0348

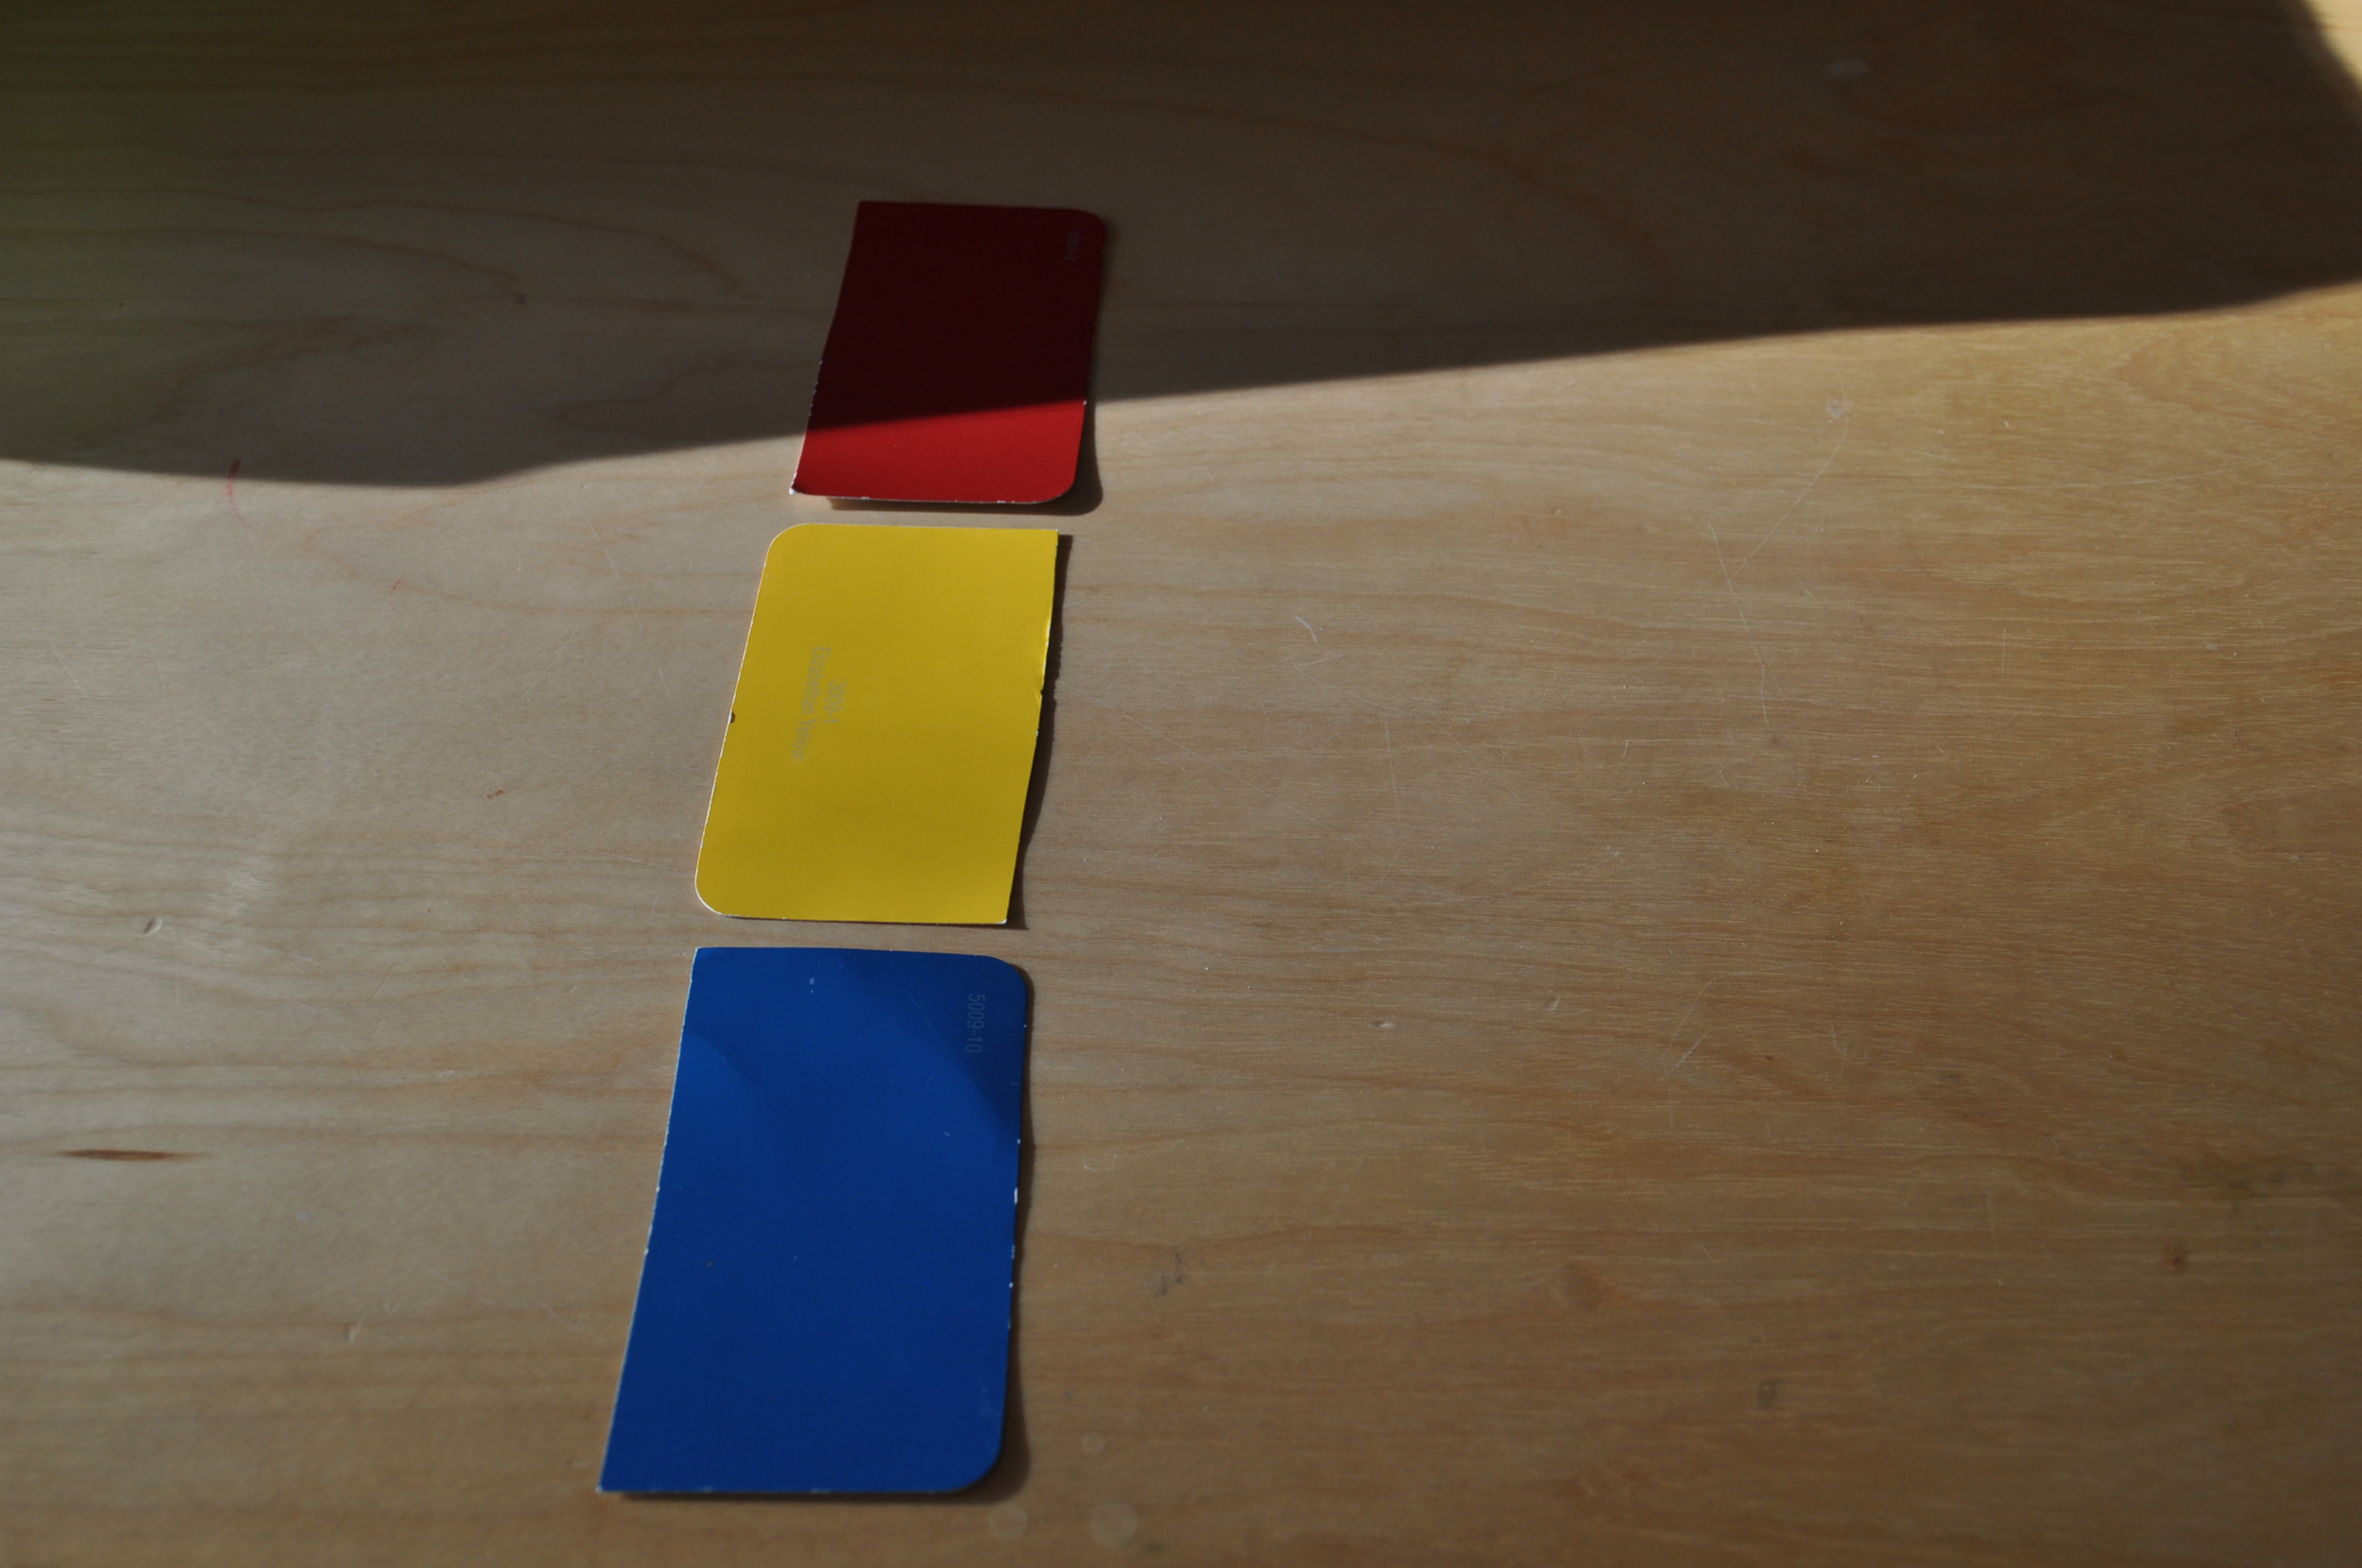
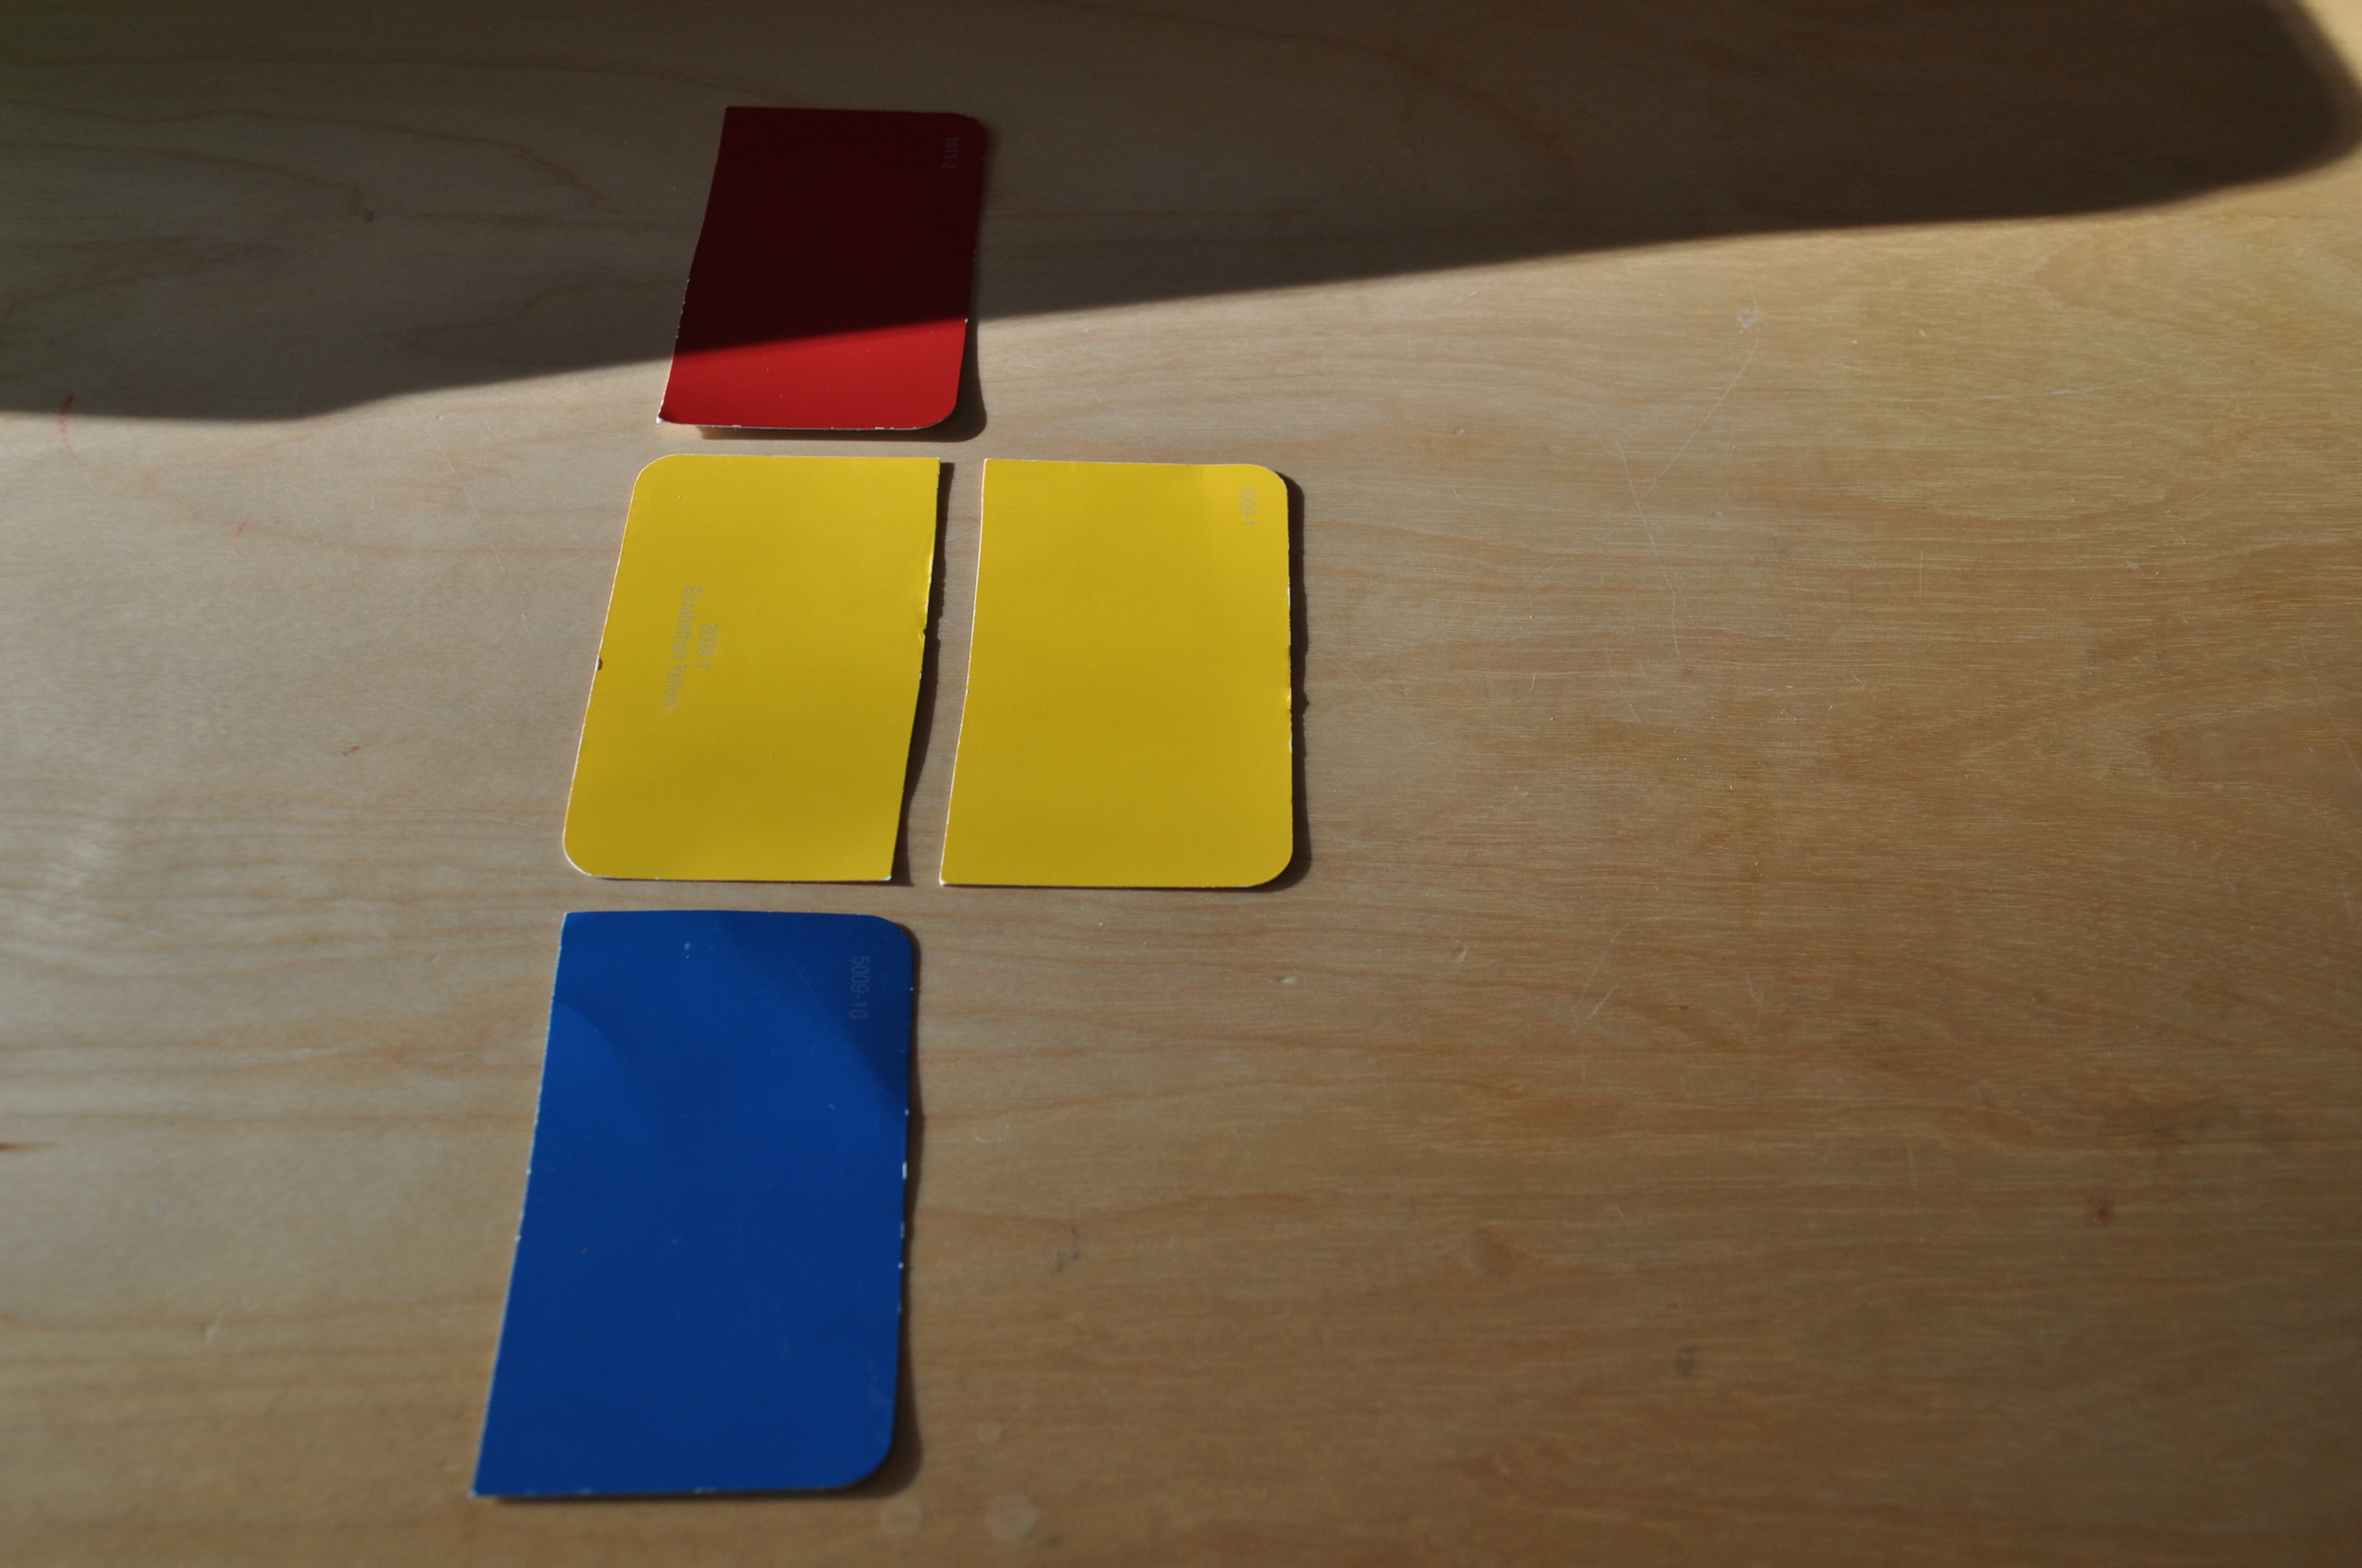
I have used large paint swatches cut in two for my first two color tablet activities. They work well. If you wanted something sturdier, you could use small pieces of wood painted.

The first color tablet activity uses just red, yellow, and blue and employs the three period lesson. The three period lesson is used throughout the Montessori method to teach nomenclature (the names of things). It takes a good bit of patience on my part, because my son doesn’t always “get it” as quickly as I think he should. Be prepared for this possibility.

1. Tell your child the name of the object. In the case of the color tablets, you would point to a card and say the color: “This is red. Red.” Say the word slowly and carefully.

2. Ask your child to show you the object. “Can you point to red?” You will want to mix this up a little bit to make it more fun and keep your child involved: “Put red on your head.” “Point to red with your toe.” “Can Lightening McQueen drive to red?”

3. During the third lesson, your child identifies the object independently. You point to red and ask “What is this?” You will spend the most time on steps one and two. Don’t rush these steps. Only move on to step 3 when you know your child can do it successfully. (At least that’s what you’re supposed to do! I have rushed in the past. If you start step 3 and realize that your child’s not ready, don’t make a big deal about it and move back to step 2.)

To present the first color tablets, make a vertical column of the red, blue and yellow tablets. Do a three period lesson with your child. Then show her a second set of red, blue and yellow and how to match the tablets. Let her begin matching whenever she seems ready.

DSC_0346

DSC_0347

The second set of color tablets includes the secondary colors (orange, green, purple), as well as grey, black and brown.

DSC_0349

There is a third color tablet activity that includes gradations of color and is introduced at a later age.

By the time the first color tablet activity is presented (traditionally at age 3), your child probably already knows the names of the colors. The matching part is still fun for them and it’s a good activity to practice the three period lesson.

Montessori Moods: The Book That Started My Montessori Journey

The book that started my interest in Montessori education was Mommy, Teach Me! by Barbara Curtis. I started reading Barbara's blog, Mommy Life, at the recommendation of a friend. Barbara had ten children, three of whom have Down Syndrome, two of those being adopted! I wasn’t even married yet, let alone a mom, but her life was fascinating and she wrote in an engaging way. At that time, much of her blog was devoted to Montessori and implementing Montessori in the home. She was a trained Montessori directress, but at some point had decided that having her young children at home was more important than having them in a Montessori school. And she realized that she could do Montessori with them herself at home. I loved her blog and I loved all her ideas, so I bought a number of her books. mommy teach me pic Mommy, Teach Me! made the Montessori method seem so logical and accessible. At that time I didn’t see how anyone could not want to use it. It was allowing your child to learn how to be a human being - following their interests and showing them how to live life. It seemed so natural and obvious and Barbara was so encouraging. Anyone could teach their child preschool. Everyone had things in their home they could use to teach their child.

The first four chapters of the book lay a foundation of why you can confidently teach your preschooler at home, how to teach them, how to encourage them to learn and how to prepare and understand Montessori activities. The rest of the book (chapters 5 – 11) describes specific activities in detail: how to prepare and present them, what your child is learning from them, as well as, appropriate age ranges for each (which I find really helpful!). It is a wonderful, laid-back introduction to Montessori education and a confidence builder for moms at home with their little ones.

Barbara is a Christian and she talks about her faith in this book. It’s not a dominate topic, but it comes up at relevant moments. I found it to be authentic and not distracting. If you’re an atheist, it might be annoying.

I still go back to this book when I get discouraged. The world of Montessori can be overwhelming with techniques and manipulatives and having to do things the “right” way. Mommy, Teach Me! reassures you that you don’t have to be perfect or do it perfectly, you just need to know and follow your child.

Note: Barbara passed away last fall, but her blog is still up and you can search the archives. Most of the Montessori posts are from years ago. She was active in the Catholic church and active politically and those two topics kind of took over her blog in her later years. Don’t let it scare you away. She wrote some wonderful posts, it just takes a little digging to find them.

Check back with the blog this Friday for a special giveaway featuring this book!

Montessori Moods: Floor Scrubbing (or How Montessori Makes Me Crazy)

The “work cycle” in a Montessori classroom is approximately three hours. My understanding is that they typically have some kind of group time, but the majority of the time the children are self-directed: choosing their own activities, concentrating and being baby geniuses. I get excited if my children will work on anything for more than 5 minutes.

Part of doing Montessori at home is missing the positive peer pressure that happens in the classroom. I’ve also missed the formal training that apparently turns one into a perfectly patient and sweet Montessori directress. So my children have a 15 minute work cycle and I correct them (and direct them) more often than I probably should and in a not-so-sweet voice.

Some reading I’ve been doing lately suggests that focusing on practical life activities helps to restore (or develop) a lack of concentration. I have been neglecting these lately since my older son turned four and I felt like I needed to push him into more math and language activities. We also do “practical life activities” everyday without really trying.

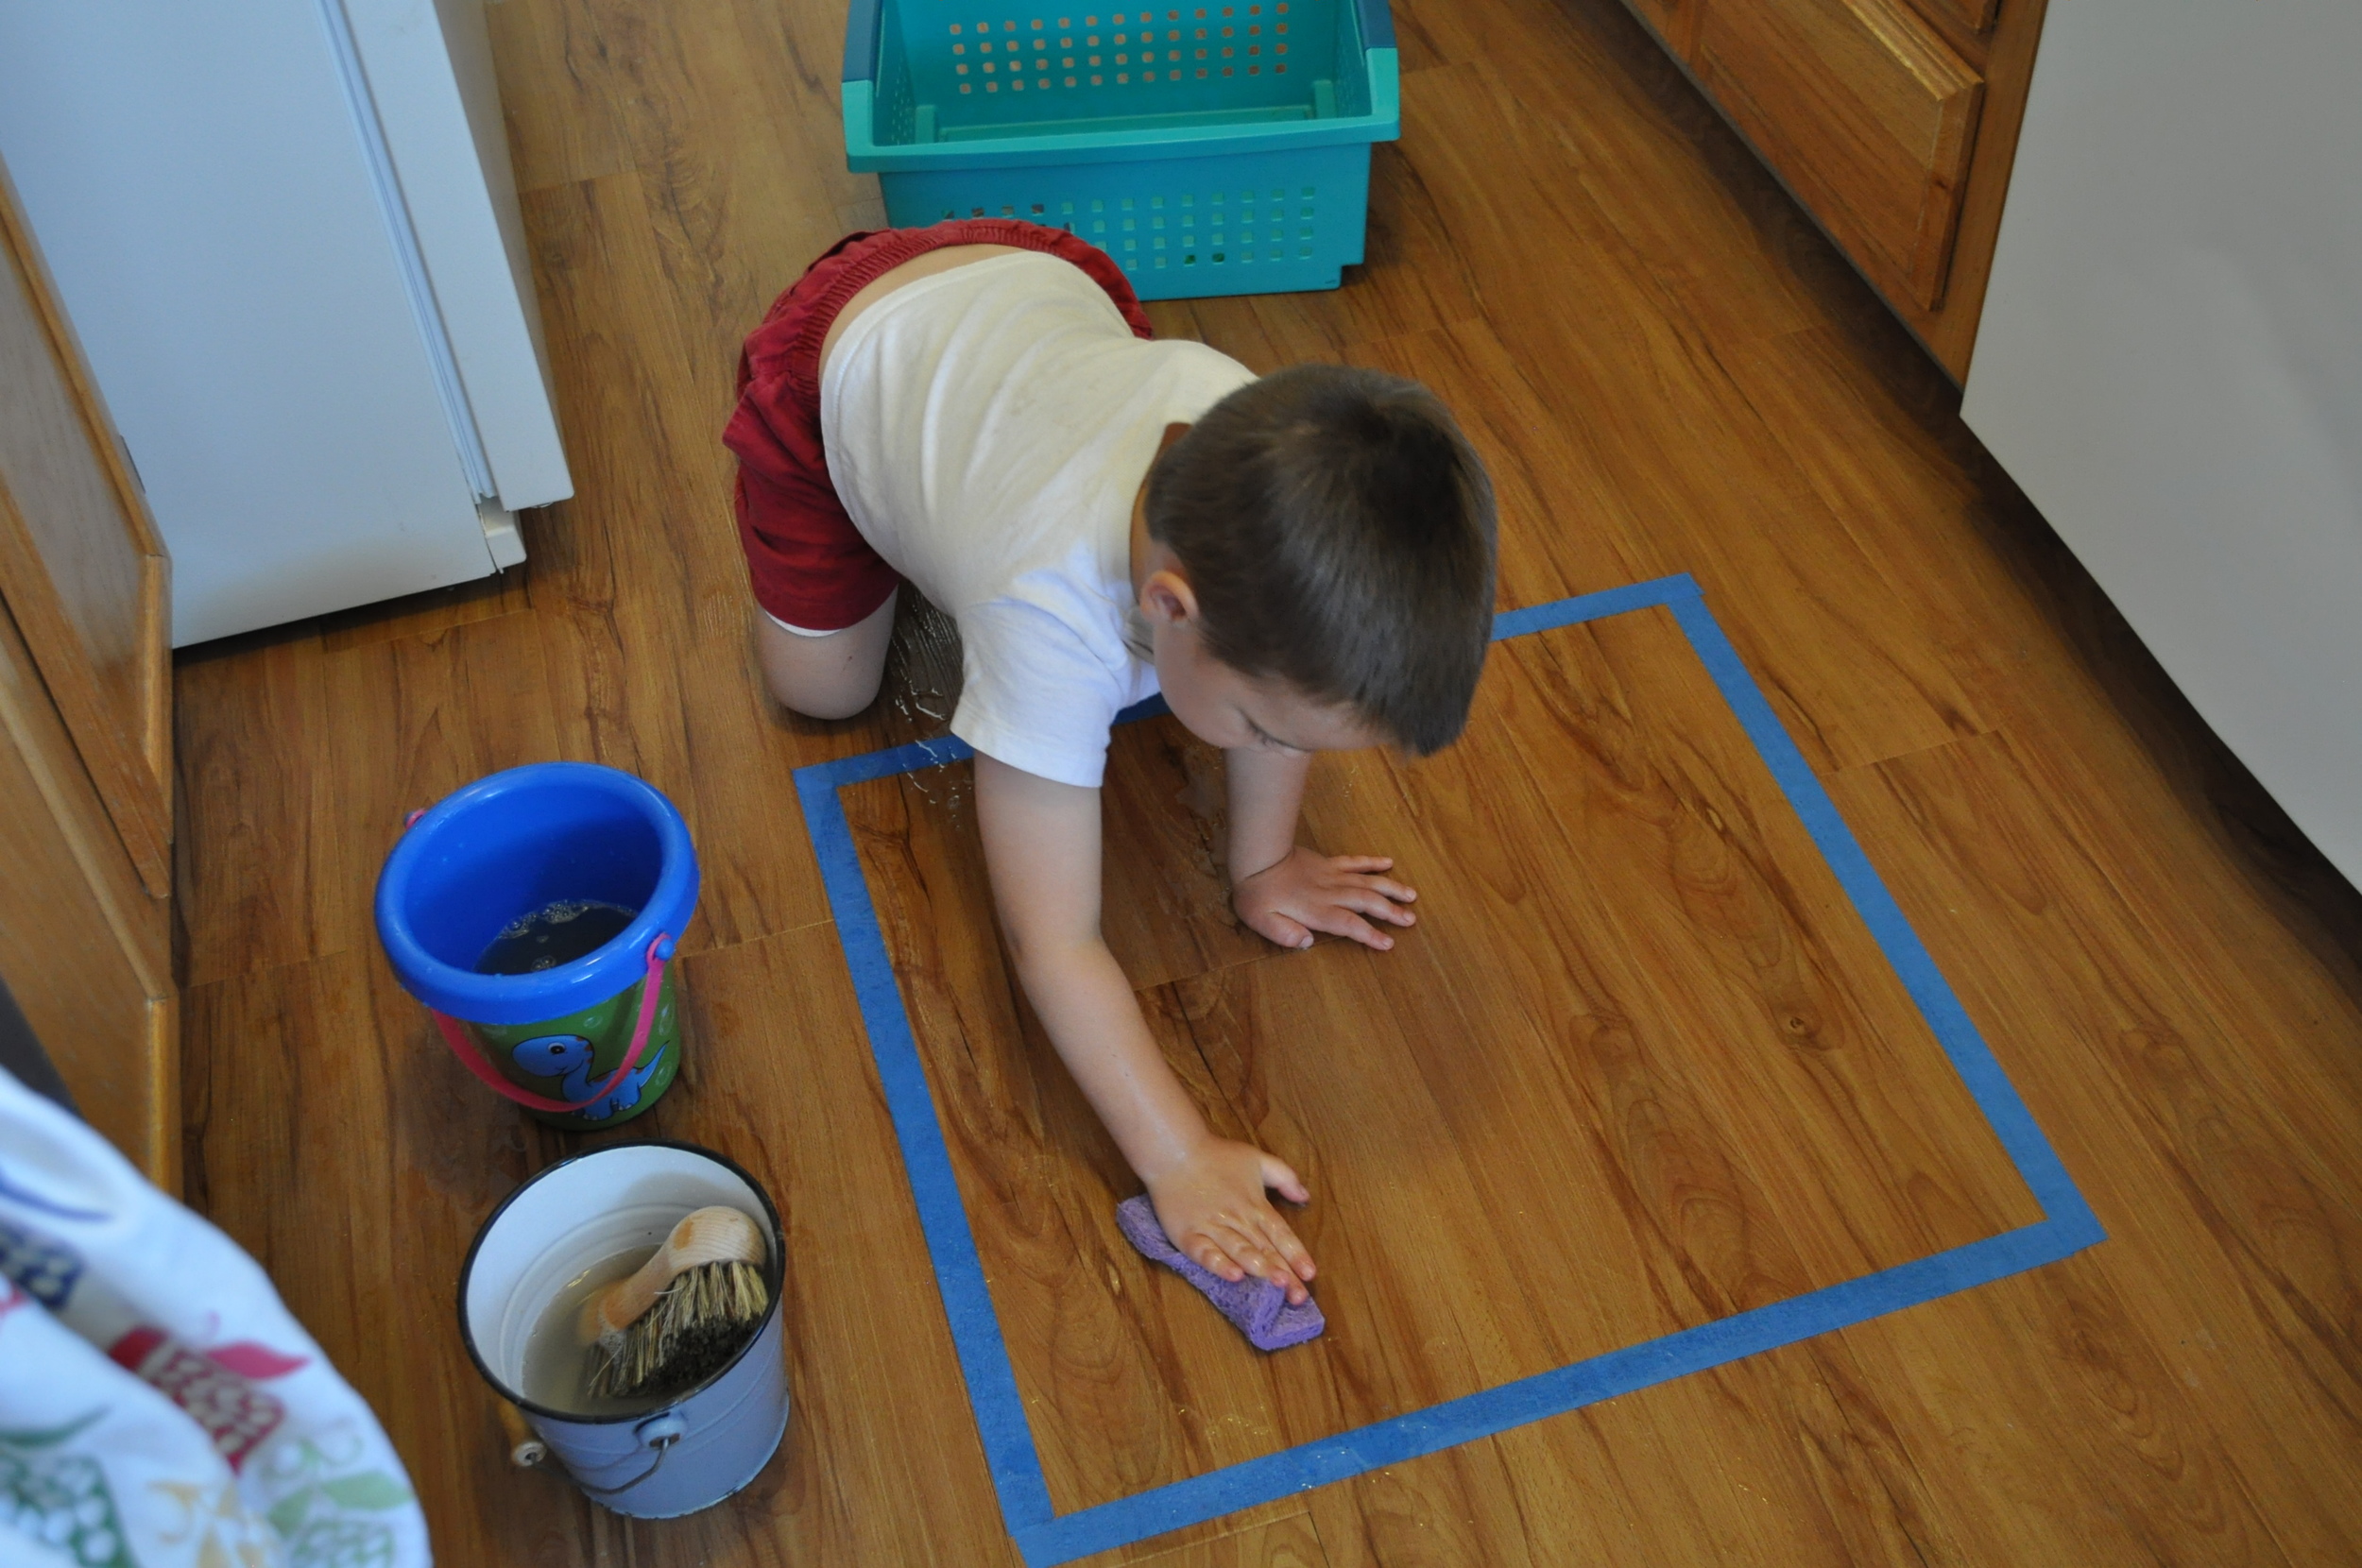
All to say that today I decided to show the children how to scrub the floor. Montessori tends to do these types of activities in a more old fashioned way, but I don’t think it’s necessary. You just need to make sure everything you use is safe for your kids. I forgot to take a before picture, but in the basket was a roll of painters tape, a pair of scissors, two buckets, a scrub brush, a bottle of dish soap and a sponge. I cut tape and made a square on the floor, had my oldest son get water in the buckets, and put a little dish soap in one of the buckets (should have done this before adding water). I showed them how to scrub with the brush and soapy water in small circles, starting at the top left and working to the right and down. Then we wiped up the soapy water with the sponge wet in clean water.

It all sounds very nice, but it resulted in a very wet floor, since unlike the baby geniuses, my children don't usually get things right after the first presentation. DSC_0776 And transitioned into table scrubbing (another actual Montessori activity that I’d shown my oldest before). DSC_0779 This then devolved into toy truck scrubbing. DSC_0780 All of this is very good and fine and I was “following the child,” but then I ran out of all my sweet, patient, untrained Montessori-ness and decided they just needed to go outside and wash toys.

(I was inspired by this blog post, although I don’t recommend using baking soda unless you’re sure your floor can handle it. You also want to be sure that your child is mature enough not to sprinkle it on her head/face or inhale it or anything.)

Montessori Moods: Transferring, Part 1

One of the subject areas in the Montessori classroom is practical life. These activities, if it’s not already obvious, are all somehow related to real-life, everyday tasks.Practical life activities are not just for learning everyday tasks. They also help with gross and fine motor skills, which include prerequisite movements for writing and even reading (left to right motions). Kids just think they’re fun!

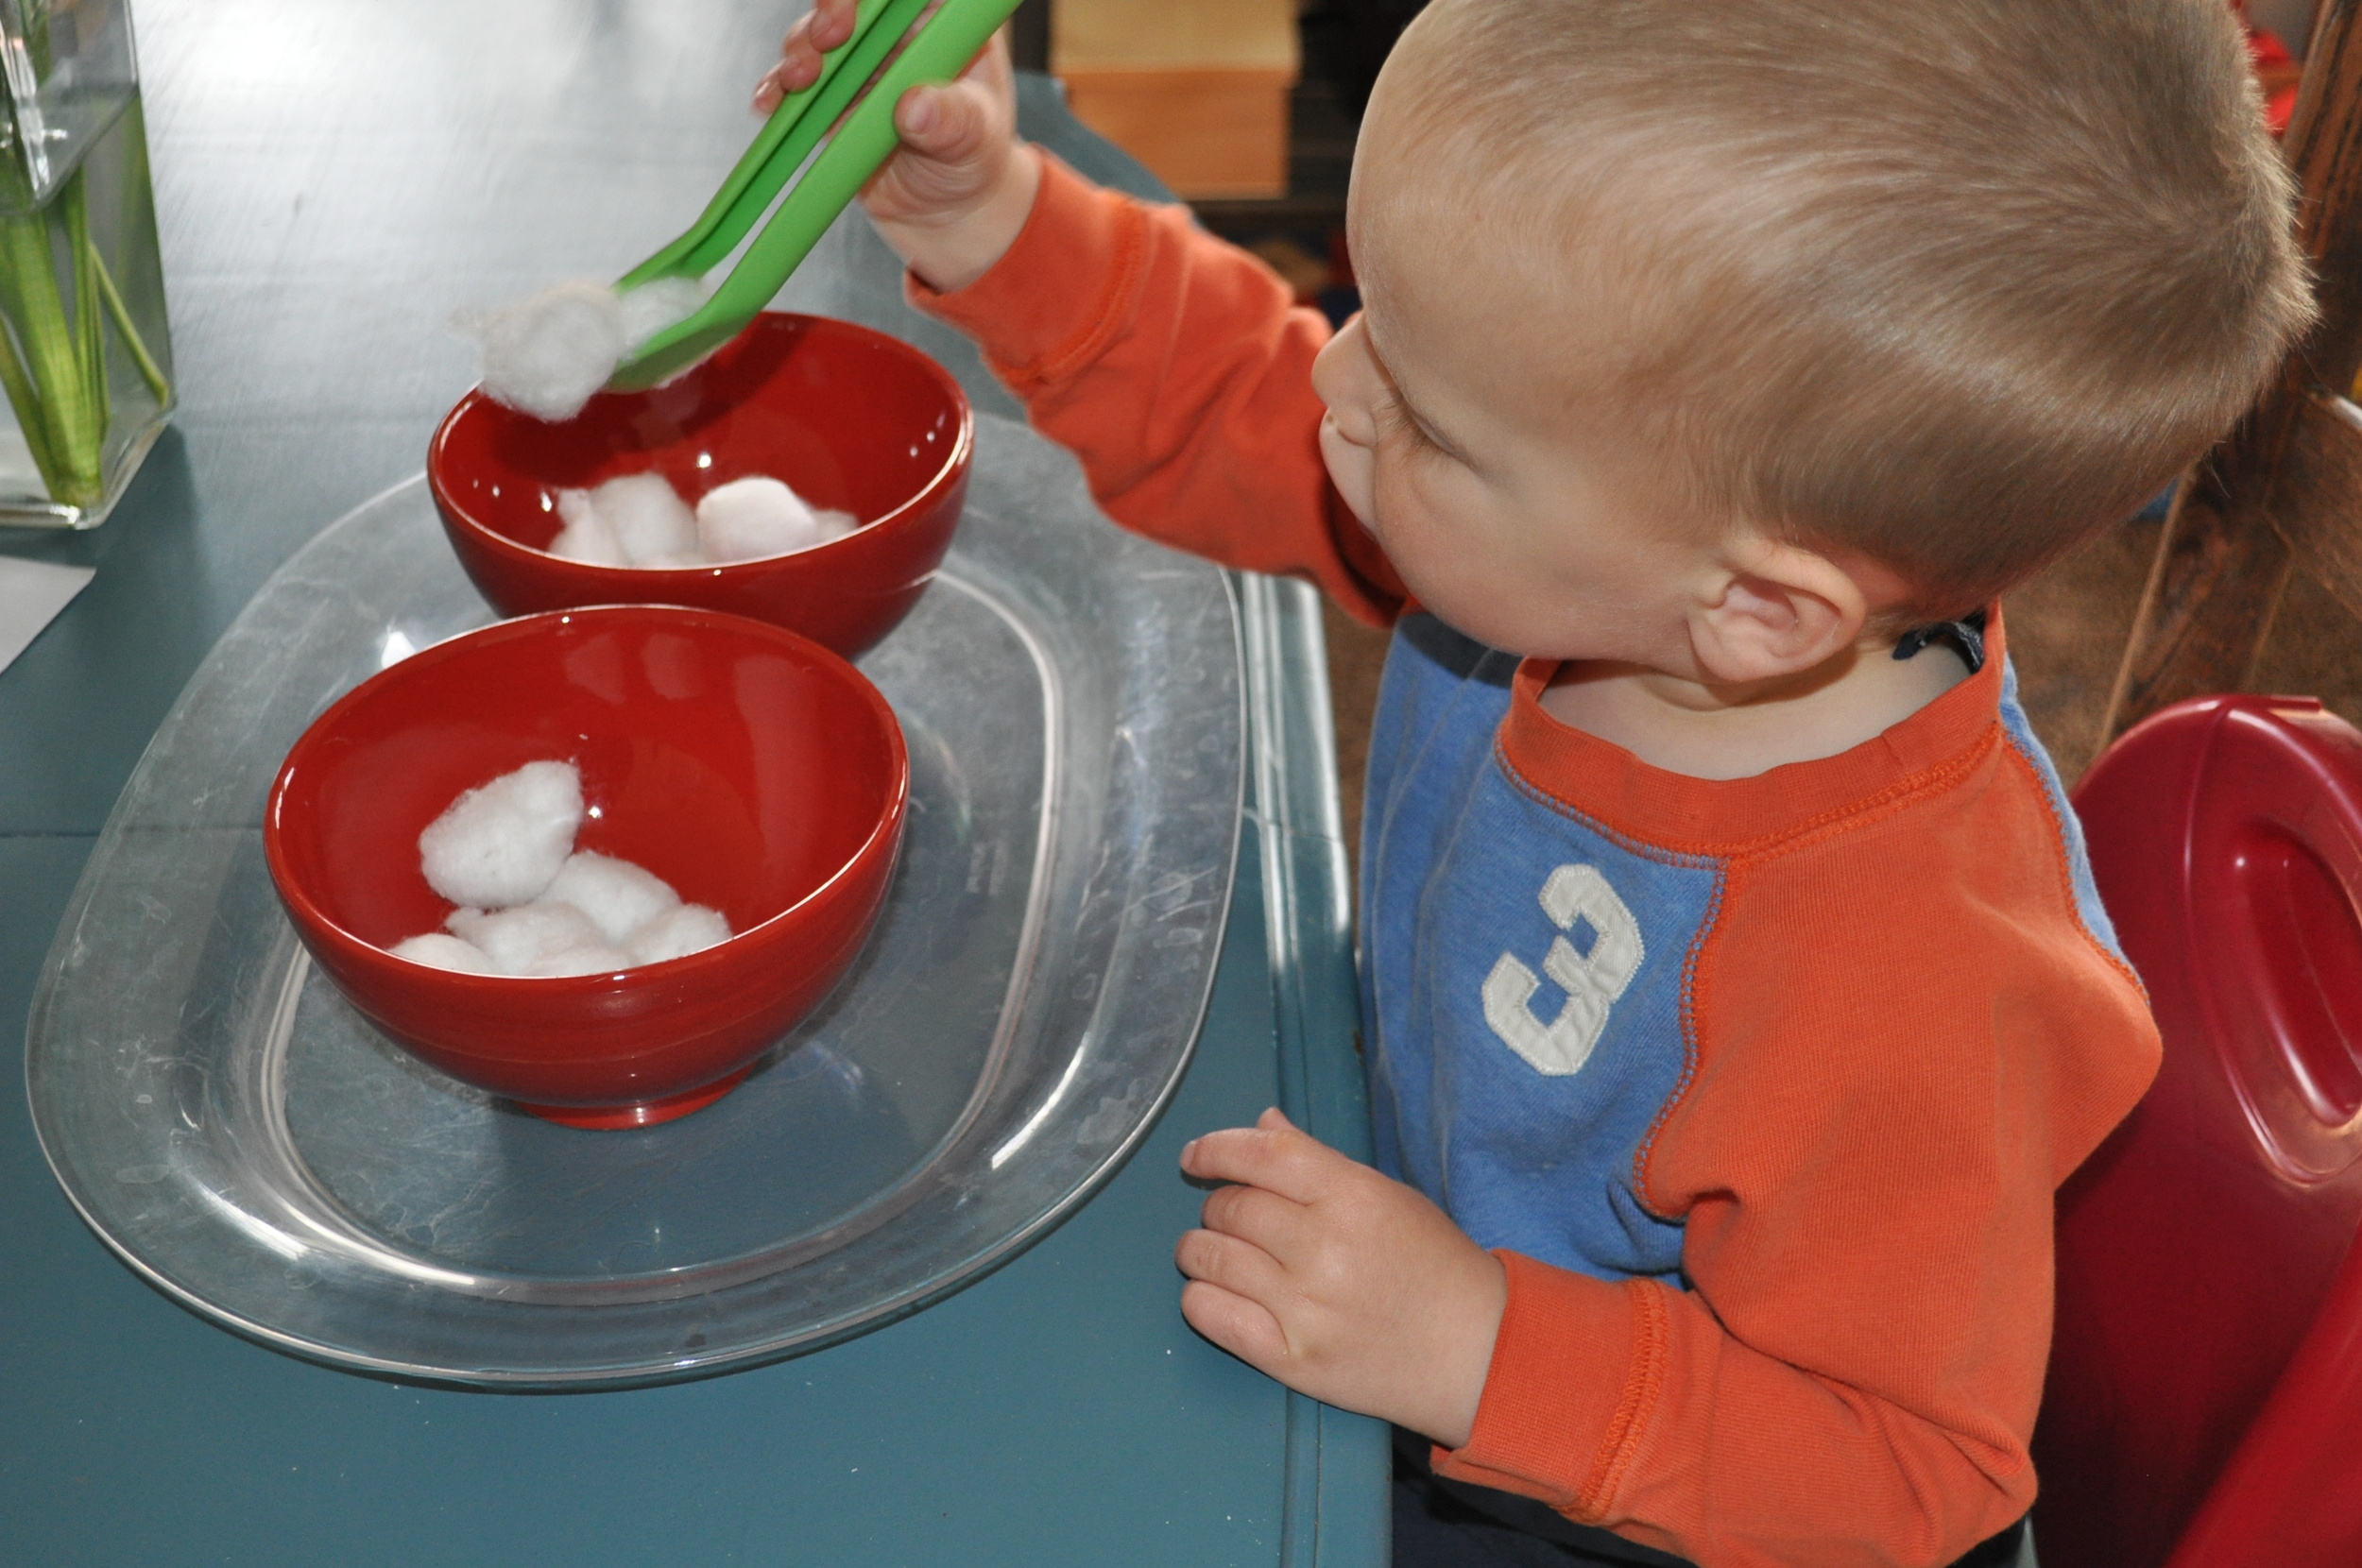
Transferring includes a pretty broad range of activities and you can find lots and lots of variations online. For the youngest ones (even as young as 18 months) you would start with big objects like beans (or even pom poms or cotton balls) and a big spoon or scoop. You have to try things out and see what works for your child. I originally thought a scoop would be easier for my youngest to deal with, but the motion of using a scoop is actually more complicated than just a regular spoon.

When presenting the activity, start with objects in a bowl (or other container) on the left and an empty bowl on the right. Sit to the left of your child. Carefully and slowly with a look of interest and concentration, scoop beans onto the spoon, carefully place the spoon over the empty bowl and pour the beans in. Do this until you’re finished or until your child wants to try. When the bowl is empty, you can either encourage your child to turn the tray so that the full bowl is on the left again, or not. I have seen it both ways. My kids didn’t really like the turning and it seemed to over-complicate the activity, so I ditched it.

Two transferring activities.  The one on the left would be more difficult with rice and a small spoon than the one of the right with cotton balls and big tongs.

If beans are spilled (it is good for you to spill some on purpose during the presentation), point it out to your child and then slowly pick up one at a time using pincer grasp (thumb and forefinger) and put them in the bowl.

A note about trays: In a Montessori environment each practical life activity (as well as some other types of activities) is usually kept on a nice-looking tray. It makes it easy for the child to choose it and take it to her workspace. You can find trays at dollar stores and thrift stores. You can also make use of large plastic food storage containers or even small cardboard boxes. Everything is supposed to be attractive, but sometimes you just need to work with what you have!

As your child gets adept at one combination of objects/tool/container, you can switch it up and make it a bit more challenging. You want it to be the right amount of challenging so that your child is neither bored or frustrated. Just watch your child to see.

My littlest tonging cotton balls.  The rice one proved unpopular with both children.

Here are some more ideas:

Objects: rice, barley, other grains, marbles, little erasers, beads, pebbles, water beads

Tools: big serving spoon, teaspoon, coffee scoop, Japanese soup spoon, big tongs, little tongs, tweezers

Containers: cereal bowls, clear glass bowls, tea cups, ice cube trays (one object in each section)

Notes: Keep close supervision of children who still put things in their mouths!! I let my children transfer beans at about 18 months, but I was always watching and made sure they weren’t putting the beans in their mouths. You also have to demonstrate (by example) how to properly handle breakable objects. Montessori believed that children could be careful with delicate objects and intentionally had them in the classroom and available to the children. They just need to be shown how to carefully handle breakable things. That said, my son did break a bowl while transferring one time, but I wasn’t paying close attention and he was just messing around by that point.

Montessori Moods: The "Prepared Environment"

My kids eating lunch at their table. The “prepared environment” is what Maria Montessori called the learning space in her children’s houses (preschools). It was designed to allow the children to respond to their desire to learn and “work”. It included child-sized furniture for working and eating, as well as the specially designed Montessori materials. Everything was designed to allow the children to do things for themselves. It was also designed to be beautiful, orderly and inviting.

Get down at your child’s level in your home and see what it looks like. Can your child wash his own hands? Get his own snack? Get out crayons and a coloring book for himself?

You don’t have to make everything accessible to your child at once, but you can take steps to allow your child to do things for himself. In the original Montessori classrooms, the children served lunch to one another. The older children (5-6 year olds) would carry tureens full of soup to the table and serve the younger children. Other children would carry pitchers of water to refill glasses. Montessori discovered that young children WANT to do things for themselves and can do them if carefully shown and provided the right environment.

You can easily take steps in your home to make it more accessible to your young children and even toddlers. One of the easiest things to do is to have a child-sized table and chairs. My children are truly delighted to be able to eat at their table, color, do puzzles and other activities.  Step stools help a lot. We have one at the bathroom sink and just recently got one for the kitchen sink. The stool allows our children to wash their own hands, brush their teeth, and sometimes they get to play in the sink! Having a cabinet in the kitchen with child-sized kitchen tools is also a great idea. You can put snacks in there and on a low shelf in the refrigerator so they can help themselves.

You can make these types of modifications all over your house to allow your child to do things for himself!

Today’s Activity: Hand Washing

When presenting an activity to your child, practice beforehand and notice all the tiny motions that go into the activity. You will primarily be showing your child what to do, not telling him. Use as few words as possible.

Stand at the sink with your child on a stool next to you so that he can see you. (This is where the prepared environment is important—he can’t see what you’re doing if he doesn’t have a stool!) Show him the whole process of hand-washing being unusually slow and exaggerating all the motions. When you’re finished, ask your child if he would like to wash his hands. If he says no, say okay and move on to something else. If he says yes, show him how to move his stool into place and allow him to wash his hands. Try not to correct him if he doesn’t do something “right” (unless he’s really doing something unacceptable). If it seems like he’s missing some crucial step, plan to present it to him again some other time.

You can also check out this link for official Montessori hand-washing presentation instructions.  In  my opinion, this is more involved than is necessary for me and my kids, but I just want to expose you to the different possibilities.

Montessori Moods: An Introduction

I have a confession: I am obsessed with Montessori education. So I have decided to bring you all along in my obsession and start a column all about my Montessori reading, experimenting and failures.

Maria Montessori was an Italian physician born in 1870 who began studying childhood development after visiting a “children’s asylum.” She discovered that these children who had been determined to be less-than-capable, with the right environment and stimulation were able to exceed the achievement of “normal” children in regular schools. (Her life story is fascinating and inspiring. A brief biography can be read here)

--

MARIA MONTESSORI VISITS SCHOOLI am hoping to introduce you (slowly!) to some of her ideas, because they are still very relevant and can help us mamas to understand our little ones better.

In addition, I’m hoping to show you one Montessori-inspired activity per post that you can do at home with your little ones.

Disclaimer: Learning about Montessori education (and trying to implement it in my home) is currently my hobby. I read a lot of books, blogs and discussion boards, but I am in no way an expert. I have not been trained in Montessori education, so am only sharing my take on it.

--

Stay tuned for next month's column!