yummy

Recipe of the Week - Garden Veggie Linguine with Cilantro Pesto

I may or may not have a secret love life with Pesto.  I love everything about him from his dairy free, herby, nutty, personality to his beautiful color and versatility.  And I love to just eat him up with a spoon. Every now and then, pesto and I go out on the town.  We normally meet up with pasta and veggies.  We have a grand ol’ time.

I thought I’d share this pairing with you.  This version of pesto is good for many reasons—summery, inexpensive, and easy.

So enough about my love life.  On to the ingredients to create your own affair.

Image sourced from: http://www.bhg.com/recipe/pasta/garden-veggie-linguine-with-cilantro-pesto/

Ingredients:

8 oz. dry linguine or fettuccine (I use half whole wheat and half white)

8 oz. zucchini, sliced

8 oz. pkg. peeled fresh baby carrots, halved

2 oranges

½ cup olive oil

1 cup fresh cilantro leaves

1 tsp. dry mustard (I prefer to use a little Dijon mustard instead)

1 tsp. minced garlic

½ tsp. crushed red pepper

Cilantro and/or finely shredded orange peel and/or orange juice (optional)

Meat or Cannellini Beans for protein (optional; we LOVE cannellini beans in any Italian recipe.  We normally sauté them with onions.  YUM!).

Note:  the veggie listings are easily substituted with whatever you have on hand and whatever sounds good.  I’ve used snap peas, cabbage, spinach, and they’ve all tasted great.

Directions:

  1. Cook pasta according to package, adding zucchini and carrots (and any other veggies) during the last five minutes.  Drain, reserving ¼ cup pasta water.
  2. For pesto, peel and quarter one orange.  You could also take some zest from the peel and add it to the pesto.  In a processor or blender combine orange, olive oil, cilantro, 1 tsp. salt (I don’t add this much), mustard, garlic, and red pepper.  Add pasta water or orange juice until you get the consistency you want.
  3. Peel and chop remaining orange.  Toss orange, pasta and veggies, and pesto all together.  Top with more cilantro and orange peel.  Makes 4 servings

Recipe adapted from Better Homes and Gardens.  You can view it here:  http://www.bhg.com/recipe/pasta/garden-veggie-linguine-with-cilantro-pesto/

Recipe of the Week - Yet Another Green Smoothie Recipe

Green SmoothieI feel like I have tried every green smoothie recipe known to man.  I love them all.  My toddler, not so much.  He’ll drink it, but only ever half, and sometimes with bribing.  I know, I know.  Many of you are aware that I’m a big fan of Baby-Led Weaning.  And bribing isn’t a word in their vocabulary.  But I just get so excited about the rawness and goodness of these drinks!  And in my opinion, what’s not to like, right? I finally thought that maybe I was adding too much.  Maybe the flavor palette was overwhelming him.  So I simplified, but still left the greens :).  He downs it now, and also has no idea that I put his probiotic in there ;).  It is now tasty, cheap, and easy.

I had the brilliant idea of adding a little frozen juice concentrate (we use this for vitamin C sometimes).  It adds great flavor, and though we’re not juice fans at our house, I felt this was such a small amount.

This recipe makes enough for all 3 of us.

Ingredients:

2 cups unsweetened coconut milk (more or less depending on how thick you like it)

2-3 bananas

1 + cup spinach leaves

2 + Tbsp. orange juice concentrate (the kind you find in the freezer section)

Blend all ingredients in a blender/food processor.  Adjust to taste.

If you want something more filling for breakfast, add ¼- ½ cup of oatmeal.  It thickens it nicely and is a wonderful grain for mamas and babies!

Recipe of the Week - Caramelized Onion Quiche with Whole Wheat Crust


I’m pretty set on owning chickens one day for this reason:  there are only 3 of us now, but we all love eggs, and we tear through a carton like nobody’s business.  This quiche is one of our favorite things to eat.  It’s super filling and makes a great dinner entree!  The whole wheat crust is also easy and tasty, and you mix it right in the pan.  You can take the time to sauté the veggies to give them beautiful color and flavor, or you can just add them raw.  Both will be successful!

Easy Whole Wheat Crust (taken from “100 Days of Real Food;” see link at end of post)

1.5 cups whole-wheat flour (I like to use whole white wheat)

1/2 cup oil (canola, olive, melted butter; I use olive)

1/2 teaspoon salt

2 tablespoons milk, preferably whole (I use coconut or almond milk)

In a 9-inch pie pan, combine all ingredients and mix with a fork. After mixing well, use your hand to form a ball in the pan and then press into pan. Bring it up on the sides and pinch the top (with your finger or a fork). Then mix and pour quiche filling right into the raw crust.  No more dreaded pie crusts!

100_4734-1


Carmelized Onion Quiche (inspired by “The Urban Poser;” See link at end of post)

Ingredients:

6 eggs

1/2 cup coconut milk (or other milk of your choice, dairy or non-dairy)

2-3 Tbls chopped basil (or 1-2 tsp. dried)

1 medium sized onion

1 bell pepper

1/2 Tbls coconut oil or olive oil

1 medium sized tomato

6  green onions

4 large garlic cloves

1/2 tsp coarse ground black peppercorns

1/2 tsp coarse ground sea salt

Optional cheese, meats, olives, etc.


For the quiche:

Preheat the oven to 350.

In a large bowl beat together the eggs, milk, black pepper, chopped basil and salt and set aside.  Letting the egg mixture get to room temperature is preferable.

Thinly slice the onions and caramelize them in a pan with the oil.

While the onions are cooking cut the tomato in half.  Slice one half and set aside to place on top of the quiche after it’s assembled.  Chop the other half and set aside to add to the egg mixture.

Next, slice the green onions into narrow strips and dice the garlic.  When the onions are done, fry the garlic in the leftover oil until crispy, then fry the green onion.

Add your half a tomato, half the onions, garlic, and half the green onions to the egg mixture.  You can also add any other veggies, meats, and cheeses that sound delectable!  Pour into the pie crust.

Bake at 350 for 15 minutes.  You may want to place the pie pan on a baking sheet if it is really full.

After 15 minutes, remove from the oven sprinkle the leftover tomato, onion, green onion.  Return to the oven and bake until just firm, another 15-25 minutes.  Make sure the center is done by jiggling the pan a little.

Let the quiche cool for a few minutes to finish setting.


Crust:  http://www.100daysofrealfood.com/2010/04/26/quiche-with-a-super-easy-whole-wheat-crust/

Quiche:  http://urbanposer.blogspot.com/2011/08/soppressata-caramelized-onion-and-green.html

Recipe of the Week - Baked Oatmeal

Looking back to my engagement, I think the recipe exchange was my favorite part of bridal showers.  I loved getting to see what each friend brought as a tried-and-true family recipe that should be shared with a new couple starting off.  Of course, some were okay, some were just weird, and some became instant favorites. This baked oatmeal quickly filled the latter.  Amazing.  We will eat it any time of day, and you just might see it on the dessert menu as well. Baked Oatmeal Ingredients: 3 cups oatmeal 2/3-1 cup sucanat (or other sweetener) 2 tsp. baking powder 1 tsp. cinnamon 1 tsp. salt 1 cup milk (I use almond or coconut) ½ cup melted butter (or other oil) 2 eggs, beaten Fruit, optional—I LOVE adding mashed bananas.  Peaches also taste heavenly!

Directions:

Combine dry ingredients in a bowl.  Pour milk, eggs, and butter in and mix well.  Spoon into a greased 9” pan.  Bake at 350 for 35-45 minutes.

It’s great warm out of the oven.  You can add extra fruit, pour milk over it…yum.

Recipe of the Week - Mandarin Sesame Salad

Mandarin Sesame Salad We love salads any time of the year, and this recipe is so tasty that we sometimes just make it our dinner entrée for the evening, served alongside a thick slice of French bread.

Asian Dressing:

2 Tbsp. brown sugar (I use sucanat instead; I’m guessing honey or agave would work as well) 2 tsp. soy sauce 1 Tbsp. sesame oil ¼ cup oil (I use olive) 3 Tbsp. rice vinegar

Combine dressing ingredients ½ hour before serving.

Salad Ingredients:    Lettuce (I use green leaf, or mixed greens) 1 package crunchy rice noodles (these act as the “croutons”) 1 can mandarin oranges in juice (I splurge and buy 2 since they’re so good) 2 green onions 1 Tbsp. sesame seeds Chicken breast, cooked and shredded (optional Bell peppers, boiled eggs, garbanzo beans (optional additions)

Directions: Toast the sesame seeds in a dry pan over medium heat.  Watch carefully and stir often, as they will go from just right to burnt in a matter of seconds.

Combine lettuce, optional chicken, oranges, onions, and toasted sesame seeds.  Let chill for 10 minutes.

Before serving, add the crunchy rice noodles and dressing.

Recipe taken from:  http://blogchef.net/?s=mandarin+chicken+salad

Recipe of the Week - Energy Fudgies

One year ago, I went off all dairy, cold turkey, in hopes of solving my health issues.  It was hard, and I was desperate.  I always wanted something sweet, but I wasn’t yet adept at substitutions.  My “Go Dairy Free” book arrived in the mail, and this was the first thing I made out of it.  It was delicious, healthy, simple, and I always have the ingredients on hand.  This is a great energy boost for the afternoon, filled with protein, healthy fat, and a small dose of calcium.  It is also great when you’re entertaining others with allergies, as it is grain, egg, and milk free! Carob Fudgies:  yields 20 bite-sized snacks

½ cup creamy almond, peanut, or sunflower butter (I love the almond the best) ½ cup agave nectar, honey, or light corn syrup (I do ¼ each of honey and agave) ½ cup sifted carob or cocoa powder (sift then measure) ½ cup sesame seeds ¼ cup unsweetened shredded coconut

In a small saucepan, combine the nut butter and the sweetener.  Stir over medium-low heat until the two are melted together, about 2-3 minutes.  Remove from the heat and gradually stir in the carob/cocoa powder, followed by the sesame seeds, until everything is well combined.  Place the mixture in the refrigerator for 10 to 15 minutes to set up.  Place the coconut in a small dish.  Remove mixture from the fridge, and using a small spoon, scoop up some fudge.  Roll it into a 1 inch ball, and roll it in the coconut.  Repeat with remaining fudge.  Store them in the refrigerator. Energy Fudgies

If you want them to set up more, place them in the freezer.

Recipe of the Week - Weekly Granola

I have been a cereal addict for most of my life.  There have been many lunches and dinners where I was too lazy to put something together and just enjoyed a bowl of milky, crunchy goodness.  My husband and I wanted to get away from all the high-fructose corn syrup cereals, so we switched to more “natural” ones.  When Gabriel started wondering why he had to eat sugarless oatmeal while we pulled out the boxed breakfast, I realized I should evaluate our breakfasts a little more.  Even though all these cereals had no HFCS, they were still full of sugar, refined grains (aka, more sugar), and pretty pennies.  We did a couple weeks without cereal, but got tired of oatmeal and eggs. I had made granola before, for special treats, but they were always either full of sugar, tasteless, or pricey (because of all the delicious nuts and dried fruit).

I finally came across this recipe from “Pure Goodness,” and modified it to fit our needs.  We love it!  And I feel totally fine with giving this to Gabriel for breakfast, soaked in coconut milk happiness, or, when I get around to it, delicious homemade coconut milk yogurt (and before you think that sounds like way too much, I’ll confess that I have a yogurt maker appliance that literally just plugs into the wall.  It’s easy, and it works!).

I usually double this recipe, and make it every 10 days to 2 weeks.  This is the only cereal we have on hand anymore, and we can now have a variety of granola, eggs, and hot oatmeal.  It’s very flexible, so play around with it until you like it too!

If you want a “special treat” granola that tastes better than ANY store bought cereal I’ve ever had, check out this one:  http://ohsheglows.com/2012/10/12/cinnamon-bun-granola-recipe-halloween-treat-a-thon/.  While you’re at it, gorge yourself on the entire blog.

There are a couple tricks I use for every granola recipe now:  heat the liquids and salt together before combining with the dry oatmeal, bake on parchment paper, and let the granola sit for a while on the hot pan after removing from the oven (this is how you get the glorious clusters!). Coconut Granola Tropical Coconut Granola (Single Recipe)

3 cups rolled oats

1 cup unsweetened shredded coconut

¼ cup honey

1/6 cup coconut oil

1 Tbsp. vanilla extract

½ tsp. salt

Dash of cinnamon (optional)

1-3 Tbsp. ground flax seed (optional)

Raisins, dried fruits, nuts (optional)

  1. Heat oven to 300 F
  2. In a large bowl, combine oats, shredded coconut, and optional nuts
  3. In a small saucepan cook honey, oil, vanilla and salt over medium heat until the mixture just begins to simmer.
  4. Pour honey/oil mixture over oats and coconut flakes, optional cinnamon and flax seed, and stir with a wooden spoon until the well combined.
  5. Spread out granola on a parchment paper lined baking sheet.  Place in oven, bake for 10-15 minute increments, then stir granola.  Repeat until well-toasted, normally 30-40 minutes.
  6. Cool on baking sheet.  Add dried fruits when cooled.  Stir in airtight containers for up to two weeks.  Can also refrigerate or freeze for longer shelf life.

Recipe adapted from:  http://www.puregoodness.net/recipe-nutrition/tropical-coconut-granola/

Recipe of the Week - Bananas Soft Serve with Chocolate Sauce

My new absolute favorite “I can’t believe this is healthy” treat to make is Bananas Soft Serve with Agave Chocolate Sauce.  Seriously.  You will not be disappointed!  The best thing about these recipes is they’re very allergen conscious.Banana Soft Serve Bananas Soft Serve:  this has the consistency of ice cream which pretty much makes it amazing!  I love it by itself and a la mode style.

Ingredients: Bananas

Directions: Peel and break bananas into thirds.  Place in Ziploc bag and freeze.  Blend in your food processor for about 5 minutes.  It takes a while but after a few minutes they will turn into ooey-gooey consistency.

Agave Chocolate Sauce:  tastes amazing and is so healthy!  Again, allergen conscious.

Ingredients: 1 Tbsp. unsweetened cocoa powder 2 Tbsp. agave nectar

Mix the two together and pour over Bananas Soft Serve!

Recipes taken from:  http://www.choosingraw.com/banana-soft-serve/

Recipe of the Week - Vegan Mac and 'Cheese'

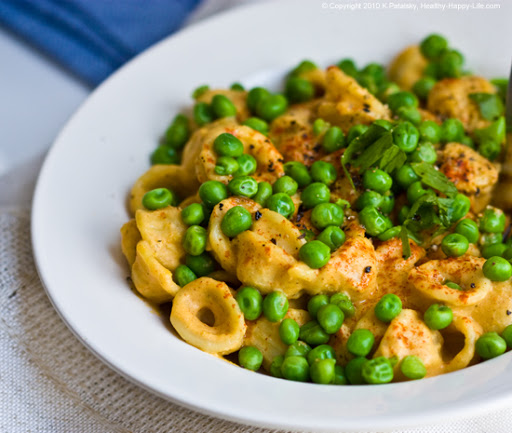
Not long after our son was born, we discovered he had GERD (severe acid reflux), which was aggravated by a protein intolerance. This has made for some incredibly hard times over the past year, but also a lot of growth. One of the ways we grew, (by force) was in our eating adventures! I breastfed for the first 4 1/2 months, and any proteins I ate that our son couldn't digest made for an unpleasant few days (to put it mildly). This caused us to search out foods that wouldn't bother his digestive system, but also didn't taste like cardboard. This was one of our favorites; even a year later, my meat-loving husband asks for this frequently - it's that good!

Recipe adapted from http://kblog.lunchboxbunch.com.

1 bag orecchiette pasta, 16 ounces 3/4 cup nutritional yeast flakes (or to taste - we usually use a bit more) *start small and add more nutritional yeast as needed 3 Tbsp Dijon mustard 2 tsp garlic powder 1 medium or 2 small sweet potatoes, peeled/baked 1 1/4 cups plain non-dairy milk (we have used rice and coconut - both work well!) 1/2 tsp black pepper 3 Tbsp EVOO

1/2 tsp sea salt (to taste) 1 Tbsp maple or agave syrup 2 Tbsp paprika a few dashes cayenne powder (opt'l-a little goes a long way) 1 Tbsp apple cider vinegar

Instructions:

1. Cook your sweet potato until soft (in microwave or oven).

2. Start a pot of salted water to boil on the stove. Add your pasta when boiling. Cook pasta for about 8-10 minutes, or until tender.

3. In a bowl combine: milk, mustard, spices, nutritional yeast, agave, salt, vinegar and oil. Stir well until all ingredients are blended.

4. Drain pasta and pour into another large bowl; toss with additional nutritional yeast flakes if desired.

5. Remove skin from your sweet potato. Add it to the sauce. You can mash by hand, or if you own a handy-dandy immersion blender, use that to incorporate into the sauce until smooth.

6. Add sauce to the pasta and coat well.

7. Steam peas (or other veggies) and mix in.

8. Add salt and pepper to taste!

This is wonderful re-heated as well, and I promise, you won't even miss the cheese!

Recipe of the Week - Homemade Cream of Mushroom Soup

I was determined to have my traditional Green Bean Casserole this holiday season, even with my milk allergy.  I was very excited when I came across this Homemade Cream of Mushroom Soup recipe to make it possible!  I’m still not one of those people who wants to pour it over everything, but I do like the occasional creamy vegetable bake.  Even if you’re not sensitive to milk, this recipe will help cut back on the fat and salt content.  Hmmm…now I need to pull all those old family recipes back out that I had given up.  The wow factor: it’s very simple to make! Homemade Cream of Mushroom Soup Ingredients:

1 ¼ cups cold unsweetened alternative milk (cashew, rice, soy, almond, coconut—I’ve made the twice and I recommend the coconut milk way over the almond milk)

2 Tbsp. flour (can use rice flour for gluten free option)

1 Tbsp. cornstarch

1 Tbsp. oil

¾-1 tsp. salt

1/8 tsp. onion powder

Generous pinch of garlic powder

½ cup canned mushrooms (pieces and stems), drained

Directions:

In a small saucepan, whisk together all but the mushrooms until smooth.  Stir in the mushrooms.  Place the soup over medium-low heat and whisk continuously until the mixture thickens significantly, about 10 minutes.  Remember, you are looking for a very thick, condensed cream of mushroom soup consistency.  Once complete, it will weigh out to roughly 10 ¾ ounces or 1 ¼ cups.

Use in recipes as you would the original.

Condensed Cream of Celery option: Briefly sauté 1 cup of diced celery in 1 tsp. of oil over medium low heat, just 2-3 minutes.  Add the celery to the original recipe in place of the mushrooms.

Recipe taken from the book “Go Dairy Free.”

Recipe of the Week - White Chicken Chili

Chili is my husband’s favorite  soup/stew, but we get tired of the mainstream beef, tomatoes, corn and kidney beans.  This is an excellent one to mix things up!  It is very flexible, and my favorite way to make it now is to sauté the onions, garlic, spices, and green chilies, then throw everything in the crockpot to let the flavors really meld together.White Chicken Chili

Ingredients:

1 Tbsp. oil

1 onion, chopped

3 cloves garlic, crushed

2 4 ounce cans chopped green chile peppers

2 tsps. ground cumin

1 tsp. dried oregano

1 tsp. ground cayenne pepper

2 cups low-sodium chicken or vegetable broth (you can add more if you want it to go further)

3 cups chopped/shredded cooked chicken (I’ve used way less than this, or none at all)

3 15 ounce cans white cannellini beans (drain 1 can, use a whole can, and puree one whole can in a food processor to thicken the chili)

1 can pinto beans, drained

1-2 cans black beans

Optional cilantro, lime, Monterey jack cheese

Directions:

Heat the oil in a large saucepan over medium-low heat.  Slowly cook and stir the onion until tender.  Mix in the garlic, green chiles, cumin, oregano, and cayenne.  Continue to cook and stir until the mixture is tender, about 3 minutes.  Mix in the chicken and stir briefly.  Add broth and beans.  Simmer 15 minutes, stirring occasionally (or place in crockpot on low 4-6 hours or high 2-3 hours).

You can always add more beans or broth to adjust texture, as well as to make the chili go further.  Dried beans would work as well, you would just have to add more cooking time and much more broth or water to desired preference.

Adapted from http://allrecipes.com/recipe/cha-chas-white-chicken-chili/detail.aspx?event8=1&prop24=SR_Title&e11=cha%20cha%27s%20white%20chicken%20chili&e8=Quick%20Search&event10=1&e7=Home%20Page

Feeding Your Future Foodie

I've heard "wisdom is knowledge applied." So, as we read books and blogs, talk to experienced moms, live in community with other wise parents we take in their knowledge and turn it into wisdom. Let's not just read these words, but try to apply them and share them! I only started on my health journey after my 3rd son was born. Unfortunately, the wisdom of whole foods, foundational nutrition for my kids and their development, and the simple tips to follow when feeding them were not presented to me. Or maybe, I didn't listen to my healthy friends.

When my daughter started eating solid foods, I remember feeling lost, nervous, and scared. It's an incredible responsibility to be sure she was receiving all that she needed.  I thought I had to buy the expensive magical jars on the shelf that had been there for who knows how long, cooked to oblivion, and filled with some unnecessary ingredients. This was 10 years ago! We are so blessed now with Pinterest and amazing blogs to help us now. Admittedly, I did not feed her very well. Now, I'm happy to share with moms about some easy and wonderful tips to feeding your baby! I wish someone had sat me down and shared this with me.

Today, by some amazing act of grace, my 3 kids are all very healthy. I believe it's never too late to start building their immunities up again. They love fruits and vegetables now, and we do our best to keep an abundance of fruits and vegetables in our systems with smoothies, soups and salads!

First, is your baby ready for solid foods? Here are a few signs that he or she is ready, but be sure to talk to your pediatrician to be certain.

  • Lets you know she's full from a meal of nursing or bottle by turning away
  • Can sit up and hold her head up without assistance
  • Newfound interest in your food
  • Doubling of birth weight

Some basic tips about starting solid foods:

  • Try one per week to be sure there are no allergies
  • Start with non-sweet veggies first (babies will enjoy sweet fruits more, and possibly not enjoy veggies when introduced)
  • No salt or sweeteners are needed for their foods
  • Room temperature is best to avoid burning their tender mouth
  • Don't assume they don't like something, re-introduce it another week
  • Talk to your pediatrician

Handy tools you might need:

  • A food processor, or high powered blender like a VitaMix
  • A good vegetable peeler
  • Apple corer
  • Small mason jars for storage
  • Ice cube tray for freezing
  • Potato masher or fork

One day on a trip to Our Father's Farm, I learned of an interesting food for babies. An egg yolk a day beginning at 4-6 months. The egg yolk supplies cholesterol needed for mental development as well as important sulphur-containing amino acids.

The white, which contains difficult-to-digest proteins, should not be given before the age of one year.

Please make sure to find egg yolks from pasture-fed hens or hens raised on flax meal, fish meal or insects are also rich in the omega-3 long-chain fatty acids found in mother's milk but which may be lacking in cow's milk. These fatty acids will assist in the proper development of the brain. Parents who feed egg yolk to baby have been known to have children who speak and take directions at an early age.

A couple ways you can serve an egg yolk:

  • Place and egg yolk in a bowl and pour simmering water to lightly cook it, let cool and serve.
  • Mix in an egg yolk with hot cooked rice cereal, cool and serve.

First foods for baby:

Avocado

A great first food for baby, avocados burst with essential fats and nutrients that a growing baby needs. Smooth and creamy, avocados are easily digested and well tolerated by most babies! Like the banana, it's a portable food in its own wrapper!

Vitamins: A, C, Niacin, Folate Minerals: Potassium, Phosphorus, Iron, Magnesium, Calcium

1. Peel and take out the pit of a ripe avocado - do not cook 2. Cut “meat” out and mash with a fork 3. There should be no need to use a machine as just like bananas, avocados have a very soft consistency and texture. Avocados do not need to be cooked 4. Add breast milk or water to thin or add cereal to thicken up if you'd like

Acorn or Butternut Squash 

1. Cut acorn, hubbard, or butternut squash in half, scoop out seeds 2. Place an inch of water in a baking pan, then place squash halves "face" down in the pan. Check on water level while baking 3. Bake in a 400 degree oven for 40 minutes or until the “shell/skin” puckers and halves feel soft then scoop squash “meat” out of the shell 4. Place squash "meat" into the food processor and puree 5. Add water as necessary to achieve a smooth, thin consistency 6. You can also peel the squash, scoop out the seeds and then cut into chunks and boil/steam until tender (like when boiling potatoes for mashed potatoes) 7. Follow steps 4 and 5

Yams/Sweet Potato
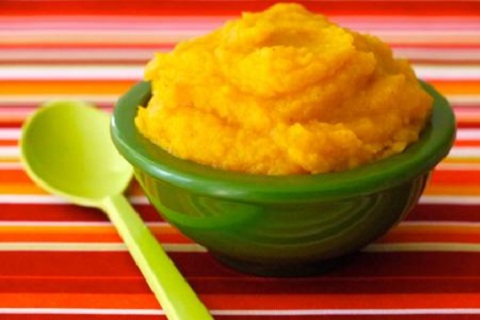
Vitamins: A (24,877 mg ), C, Folate Minerals: Potassium, Sodium, Selenium, Phosphorous, Magnesium, Calcium

1. Wash and poke holes in sweet potato with fork then wrap sweet potatoes in tin foil - do not peel for baking 2. Place in a 400 degree oven and bake for 30 minutes or until soft 3. Let cool and puree the potato in a blender or food processor

OR

1. Peel sweet potatoes and cut into small chunks 2. Place chunks into a pan with just enough water to slightly cover potato 3. "Steam" boil until tender, be sure to check on the water level 4. Reserve any left over water to use for thinning out the sweet potatoes 5. If you have baked your sweet potato, remove skins and use liquid from your preferred source 6. Place sweet potato into the processor and puree 7. Add the reserved water or other liquid as necessary to achieve a smooth, thin consistency minutes or until a knife inserted near center comes out clean

Peas

Peas are high in protein, vitamin C and A! Anything green has amazing detoxifying properties. As with any of these fragile vegetables, don't over cook them as you will lose some of their valuable nutrients.

1. Bring a cup of water to boil 2. Add frozen peas, cook until just tender 3. Blend in food processor or blender 4. Cool and serve

Bananas

Bananas are another great first food for your baby. Research indicates that bananas and their mucosal properties actually help coat the tummy and help aid in digestion. Bananas are sweet, which may help baby more readily accept the first food experience.

Vitamins: A, C, Folate Minerals: Potassium, Phosphorus, Selenium, Magnesium, Calcium

1. Peel a ripe banana - do not cook 2. Place banana in a food processor/food mill or blender and puree 3. You can also mash the banana in a bowl using a regular fork – heat in microwave for 25 seconds prior to mashing for extra softness 4. Add breast milk or water to thin or add cereal to thicken up if you'd like

Apples (Applesauce)

Vitamins: A, C, Folate Minerals: Potassium, Magnesium, Calcium

This recipe is written so that you may use any amount of apples you wish 1. Peel, core and cut apple into slices/chunks 2. Place slices or chunks into a pan with just enough water to slightly cover apples 3. Boil/steam until tender; be sure to check on the water level and stir. 4. Apples may be mashed with a potato masher to achieve a smooth applesauce consistency. If your masher will not achieve a puree type of consistency, then follow steps 5 – 7 5. Reserve any leftover water to use for thinning out the apples 6. Place into your choice of appliance for pureeing and begin pureeing 7. Add the reserved water as necessary to achieve a smooth, thin puree 8. Add cereal to thicken if you'd like 9. Ask your pediatrician about adding some cinnamon for new tastes

Pears

Vitamins: A, C, Folate Minerals: Potassium, Phosphorus, Magnesium, Calcium

1. Peel and cut into chunks so as to avoid the little seed portion. 2. Steam gently until tender; 3. Place in a blender/food processor and puree until smooth. You may be able to just use a fork too. 4. Use the leftover cooking water if needed but Pears tend to be very runny and watery without adding liquid - Add some baby cereal to thicken if needed.

Mango (6-8 months or older)

Vitamins: A (1262 IU in one cup), C, E, K, Folate Minerals: Potassium, Phosphorus, Magnesium, Calcium, Sodium

1. Peel 2. Scoop our the "meat" 3. Puree in a food processor, or mash up until smooth

Organic Brown Rice Cereal

If you decide to make homemade baby cereal, make it with brown rice (organic if preferred). Whole grains are more healthy and nutritious for your baby (and for the whole family).

1/4 c. rice powder (organic brown rice ground in blender or food processor) 1 cup water

1. Bring liquid to boil in saucepan. Add the rice powder while stirring constantly. 2. Simmer for 10 minutes, whisking constantly, mix breast milk, egg yolk and fruits if desired Serve warm

For more tips on a healthy family and a community of healthy minded friends, please check out www.puregoodness.net and our facebook page!

Recipe of the Week - Sweet Potato Casserole

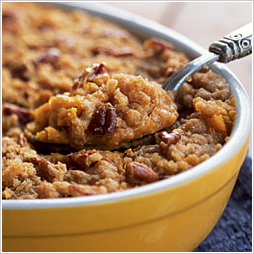
My favorite part of Thanksgiving is the Sweet Potato Casserole. Those of you who attended the Café a few weeks ago know why. It’s sweet yet salty, creamy yet crunchy. I eat the leftovers for breakfast, lunch and dinner all weekend long if I’m lucky enough to have any leftovers. This year I’ll probably get smart and do what I did for the Café – double the recipe and prepare my own little bowl just in case! Sweet Potato Casserole Sweet Potato Casserole 3 cups sweet potato, drained ½ cup sugar ½ tsp salt 2 eggs 1 stick of butter ½ cup milk 1 tsp vanilla ¼ tsp cinnamon

Topping ½ cup sugar 1/3 cup flour 1 stick butter Optional – pecans and/or walnuts

Mix all together. Put in casserole dish. Cover with topping. Bake at 350 for 35-45 minutes uncovered.

**The most important thing to remember about this recipe is that you can (and should) cut the butter and sugar in half and you will not taste a difference.  I’ve also used raw sugar instead of cane and I always use whole wheat (white) flour. Enjoy!

  If you have a favorite recipe you'd like to share with our readers, please submit it here or email us at submissions@themotherhoodcollective.org

Reducing the Sugar Rush During the Holiday Rush

Last month our writers shared some of their holiday traditions and plans for the upcoming season. In November, we continue our conversation about holidays. How do we juggle visitors, travel with small children, eat well amidst all that delicious food and most importantly, take time to just BREATHE? This time of year can very quickly become stressful, so we hope our writers' words this month will give you a few moments to slow down, think about how you're spending your energy and encourage you during this busy, but wonderful time of year. ~TMC Simple Sugars The newest change to our eating philosophy has been a different approach to sugars, and it’s just in time for the holidays!  A couple years ago we made a point to cut out all high-fructose corn syrup, and I highly suggest this as a great “first step” if you’re considering a healthier food intake.  I still couldn’t shake myself of good old cane sugar—you know, every girl’s first love.  Even with wanting a healthier lifestyle, I’ve still tried to hold on to two points that I think are very important with how we view food in our house.

1.  Food is meant to keep us alive. 

Shocking, I know.  I just feel like too many foodies view what they eat (and what our society eats) as something that is killing them and not sustaining them.  True, the wrong kind of food should be avoided, but…it’s still food.  Something to be thankful for, first and foremost.

2.  Food is meant to be enjoyed.

Enough of the self-martyred, suffering vegan (spoken from a vegan 3 days out of the week).  Enjoy feasting!  Especially during the holiday season.  (Stepping down from soap box…)  All that to say, I was afraid that if I cut the sugar, we would cease to employ point number 2—enjoying food.

Slowly, we have made a few changes, and I haven’t bought sugar for a few months now, and we don’t feel like we’re missing anything!

The first thing I did was start to use fruit purees instead of eggs when making sweets/fruit breads.  The fruit adds natural sweetness which then helps you lessen the amount of added sugar.  Here are some easy conversions:

Applesauce, Mashed Bananas, and Pumpkin Puree—work well in sweetened baked goods, just make sure the flavor would be compatible with other flavors, as the fruit will likely shine through a bit.  1 egg=1/4 cup fruit puree (one medium mashed banana will normally substitute for 2 eggs)

Prune Puree—since stronger in flavor, works well with dense desserts such as brownies.  1 egg=1/4 cup fruit puree

After sweetening with fruit, I started cutting the amount of sugar.  Stat with using ¾ of the amount called for, and then cut back to half.  If you’re having company, offer frosting or honey to be added if someone has more of a sweet tooth.  I promise, you will get used to it over time, and the more you cut out, the less often your brain will send sugar signals.

I also read this awesome article about decoding sweeteners—there are just so many out there!  http://www.puregoodness.net/nutrition/sweeteners-decoded/  We now use mostly honey, agave, and molasses for sweetening.  We keep some stevia and sucanat on hand, and we occasionally buy maple syrup.  These are all sugars, but they’re not nearly as refined as white sugar or hfcs (high fructose corn syrup) and they do not raise the glycemic level as much.

Conversions:  for honey and agave, use ¾ cup for 1 cup of sugar the recipe calls for, reduce liquids by ½ cup for every cup of honey you add, and reduce oven temp. by 25 degrees to prevent browning.  For sucanat—equal amounts as sugar.

I am a little timid about this holiday season, as this will be my first one completely dairy free, mostly corn free, as well as (six days out of the week) ovo-vegetarian (no meat or dairy products, but I still love me some eggs!).  I know…there go all my dinner invitations!  My way of coping so far when I go to parties is either eat a lot beforehand so I’m not tempted, or, better yet, always take a dish with me so I have something to enjoy with friends.  Whether or not you have allergy/dietary restrictions, I would suggest offering to bring food.  If you’re opting for a healthier holiday season, prepare a sweet dish with less sugar, or an appetizer that’s homemade, and that way you will get to enjoy the food—and have it too.

How do you cope with allergy and special diet restrictions during the holidays?

Recipe of the Week - Pumpkin Cookies

spoon_edited-1.jpg


These are a fall family favorite in the Earl household. We typically only last a few days without before making a new batch. The best thing about them, besides the taste, is they can be relatively healthy if you follow my directions in bold and avoid the frosting. They are delicious both ways; I prefer them without the frosting but they make a festive addition to any party if you frost and top with a piece of candy corn.

Pumpkin Cookies 2 cups flour – I use whole wheat flour. 1 cup quick oats 1 teaspoon baking soda 1 teaspoon ground cinnamon 1/2 teaspoon salt 1 cup butter softened – I substitute at least ½ cup coconut oil. 1 cup firmly packed brown sugar – I only use ½ cup and sometimes replace with honey. 1 cup of sugar -  I only use ½ cup of raw cane sugar. 1 egg 1 teaspoon vanilla 1 cup Libby’s Solid Pack Pumpkin 1 cup semi sweet chocolate chips or M&M’s (optional) I skip this. 1 cup raisins (optional) – I skip this. 1 cup nuts (optional) – I skip this.

Preheat oven to 350 degrees. Combine flour, oats, baking soda, cinnamon and salt. Cream butter, gradually add sugars, beating until light and fluffy. Add egg and vanilla; mix well. Alternate additions of dry ingredients and pumpkin,  mixing well after each addition. Stir in morsels. Drop dough, using cookie scoop or teaspoon, onto lightly greased cookie sheet. Bake 10-11 minutes until cookies are firm and lightly browned.  This recipe will make close to 60 cookies.


Cream Cheese Frosting 1, 3-ounce package cream cheese 1/4 cup butter 1 teaspoon vanilla 2 cups powdered sugar

In a mixer bowl beat together cream cheese, butter and vanilla till light and fluffy. Gradually add powdered sugar, beating until smooth.

Recipe of the Week - Natilla, A Cold Morning Delight

Its hard to believe that fall is just around the corner! You know what, that's just fine with me. Having grown up in Massachusetts, fall is the perfect time to think of my favorite cold weather foods.

None comes to mind quicker than the crema that my Abuela Elena used to make. According to Puerto Rican Cookery its name is Natilla (pronounced nah-tee'-ya) and it's classified as a cold custard dessert. But to me, it will always be a breakfast similar to oatmeal.

My abuela passed away when I was young, yet whenever I make this cold morning treat, I remember how I felt when my grandmother would place that warm plate in front of me. Unfortunately, food that comforts the soul does not always do well for the body and this natilla is no different.

The recipe is provided as it appears in the Puerto Rican Cookery, but as my mother pointed out, it can be adapted. For instance, as a child I was never a fan of the lime peel, so now I don't add it. My mother adds vanilla and decreases the amount of sugar. Both of us double the cornstarch to make it a little thicker, and as I've said before, we prefer it warm.

One thing I know for sure, I can't wait to share this with daughter, Elena, named for the the woman who inspired this recipe.

Group A 1 tablespoon cornstarch 1/8 teaspoon salt 2 egg yolks 2 cups milk

Group B 1/2 cup sugar 1 thin cinnamon stick 1 lime peel, rinsed and drained

In saucepan, blend cornstarch and salt with part of the milk. Add egg yolks and mix well. Add remaining milk and ingredients included in Group B. Place saucepan over moderate-high heat and bring to a brisk boil, stirring constantly with a wooden spoon. Remove immediately and strain into a dessert bowl or 4 individual cups. Allow to cool and set in refrigerator.