DIY

Montessori Moods: Sound Cylinders

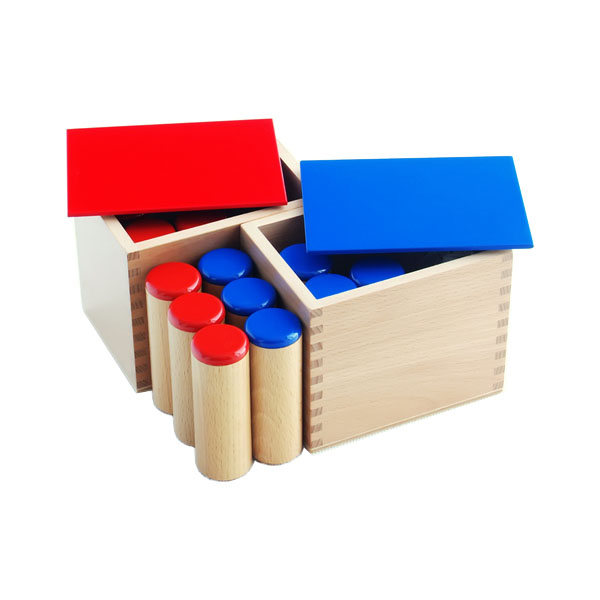
The sound cylinders are a very fun sensorial activity. The purpose is to refine the sense of hearing and to teach vocabulary such as “loud,” “soft,” “loudest,” “louder,” etc. Traditionally the activity consists of twelve wooden cylinders, six with red tops and six with blue tops. Each set is filled with six different fillings that each makes a different sound, such that there are six matching pairs. Image from Montessori Outlet
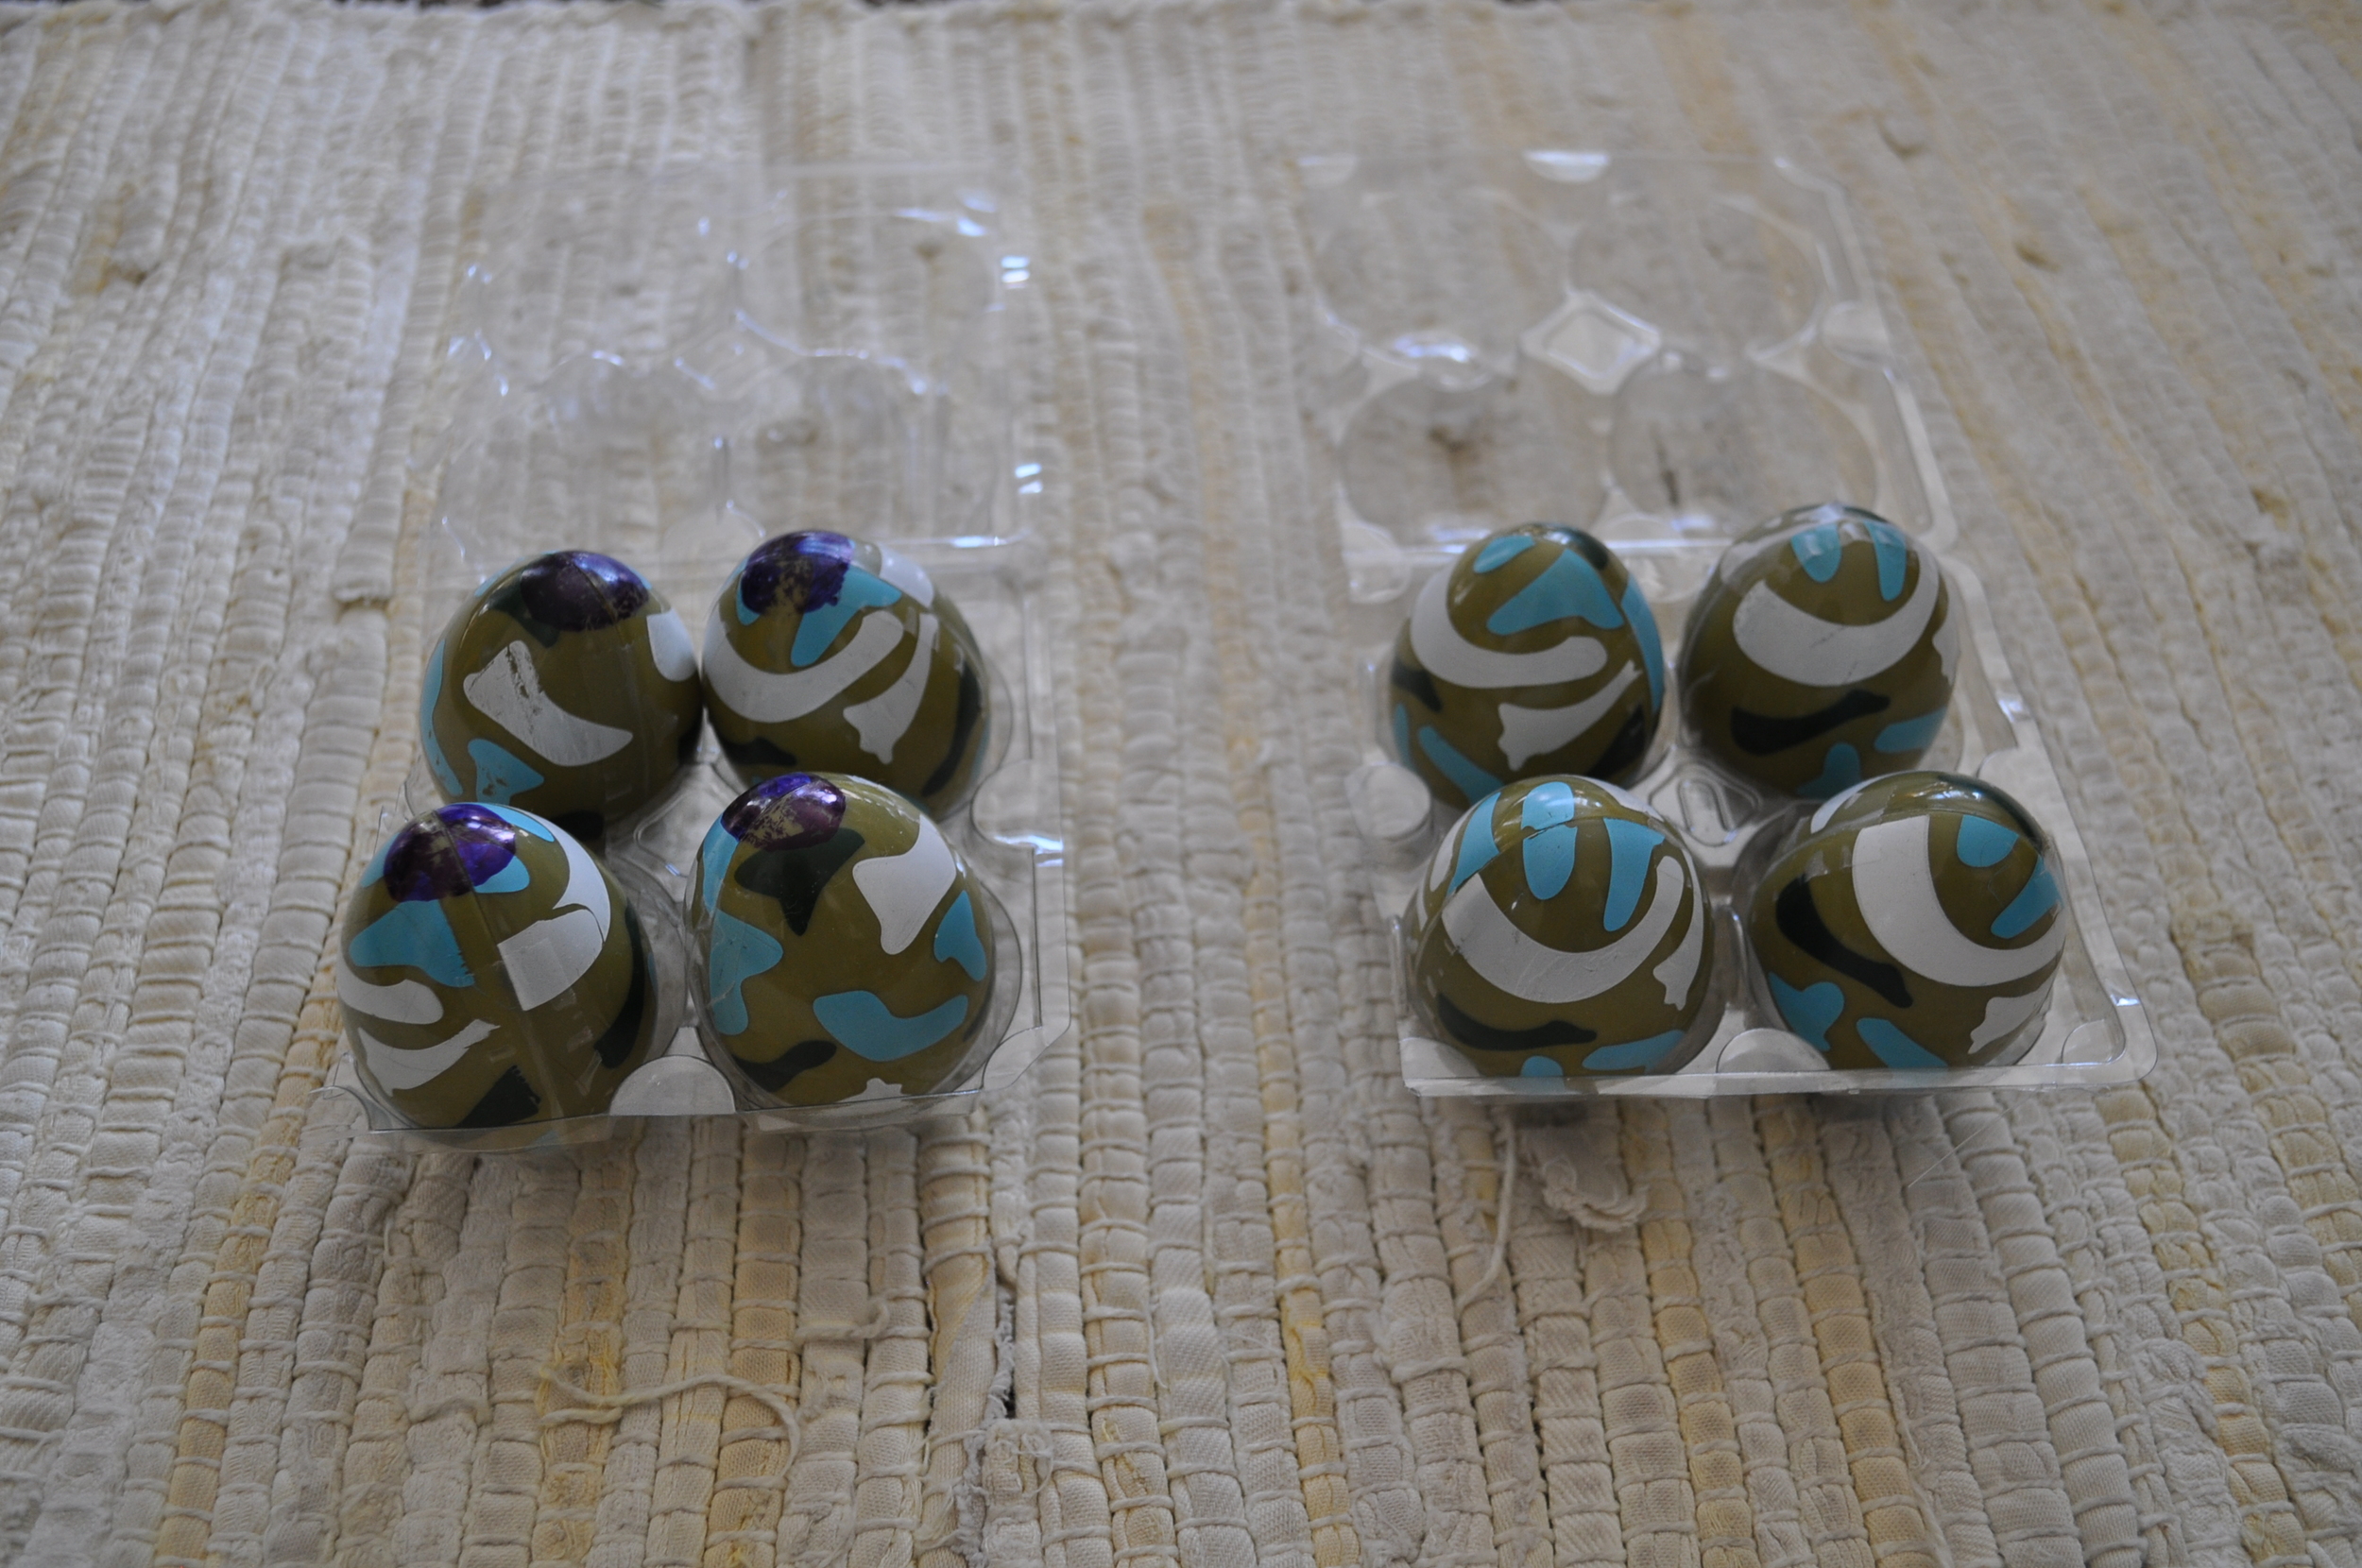
Sound cylinders are very easy to make. You just need twelve opaque containers with lids. Film canisters come to mind, but are harder to come by these days. I used Easter eggs for mine. They are easy to find at the right time of year and pretty cheap. I was a bit desperate to make them when I did and the only eggs I could find that were matching and in sufficient quantity were camo. A little bit distracting, but not too bad. To simplify the activity a bit, I only made four "cylinders" per set instead of six. To distinguish the two sets, I drew purple circles on one end of the egg with a permanent marker. Not my proudest DIY moment, but they work for us. I’m sure you can figure out something more sophisticated! We use egg cartons cut down to size to store them.

I then filled the eggs with four different fillings. My “loudest” filling is dried beans. My softest filling is salt. The two in the middle were some type of grains I had in my pantry. The exact filling doesn’t matter, you just need them to make four different sounds from loud to soft. You could use rocks, dirt, sand, coins, beads—whatever you can find in your house.

DSC_0732 I know. They're ugly.

To present the activity, take both groups of cylinders to a table or rug (when doing work on the floor, Montessori uses a rug to define the work space for the child). Place both sets next to each other. Take a cylinder from group one and shake it next to your ear. Do the same thing with the other three in that group. Let your child do the same. Take the loudest cylinder and shake it again. Then grab one of the cylinders from group two with your other hand and shake it. If they don’t match, put the group two cylinder back and try a different one. Go through all of group two until you find the one that matches. Set the pair aside and match the remaining three using the same procedure. Encourage your child to repeat the activity.

DSC_0728

Once your child has had some experience doing the first activity, you can do some extensions. You can teach vocabulary using the three period lesson and also grade the cylinders from loudest to softest. You can play different memory games by putting the groups on different rugs/tables with a little distance between them. You can ask the child to find a cylinder that is louder or softer than a specific cylinder. You can also do the activity blindfolded!

This is one of my favorite sensorial activities. I hope you and your child enjoy it, too!

Budgeting Hacks from a Freelancer Mom

So you’ve made a decision to be a stay-at-home mom. Despite all efforts to balance work-life, 24 hours just doesn’t seem enough for both family and career. You know that there are many other jobseekers waiting to take your job, but there is only one person who can best take care of your kids – and that’s you.


The whole idea just sounds liberating, but there are worries that go with the life ahead. You know that giving up your income means cutting down your savings too. Well there are always ways to balance income and spending. Here are 10 budgeting hacks for stay-home moms.


1. Income vs. Spending

Logically, the income you gave up from your career must equal your cuts in spending. Fortunately, not having to go to office has already saved you some money effortlessly – from transportation to designer clothing and commercial food. Now all you need is to find a few more sources of potential savings. Try searching in your credit card bill. You might find some habitual purchases that aren’t necessary after all.


2. Be creative

When cutting down on unnecessary purchases isn’t enough, it’s time to cut down on the basics. This doesn’t mean a complete turnaround in your lifestyle. It may only entail a little creativity, like redesigning your home to conserve energy and water. Consider these simple ways of achieving sustainable home designs:


·         Insulate your home. Insulating acts as a barrier to prevent heat from passing in during summer, and passing out during winter.


·         Use energy-efficient lighting, like LED and CFL bulbs.


·         Choose efficient appliances with positive product reviews.


·         Turning electrical appliances off, instead of leaving them in standby mode also saves on energy.


·         Collect rainwater for your plants.


3. Downsize a bit

You may also consider downsizing your house to a townhouse or condo. Find one that provides the right living space for your family. It can provide you the same comfort while saving on mortgage/rent and maintenance costs.


4. Do it yourself

As you spend more time at home, you may discover that there are services you formerly paid for that you can now do yourself like housekeeping and babysitting. Aside from saving money, you’ll see that sometimes, nobody can do the job better than the big boss.


5. Home cooking

Even a budget meal in a restaurant could not compare with the taste (and cost) of mama’s home cooking. This also allows you to choose the right food that satisfies your family’s nutritional needs.


6. Plan ahead

Of course, you don’t want to miss on birthday celebrations and family vacations. When big expenditures like these come along, it’s best to plan ahead. This keeps you from splurging, while keeping the occasion as special and memorable as you intend it to be.


7. Garage sale

Budgeting is not all about cutting on costs, but finding additional sources of income too. Why not try having a garage sale. As your kids grow, you’ll find lots of stuff that they’ve outgrown that are still worth selling.


8. Create and sell

Your old stuff may not be only thing worth selling. It’s time to look into things you can create that others cannot, or simply don’t have time to do. Beaded jewelry, arts and crafts, cakes and cookies – these may just be some things you can make and sell for extra income.


9. Online selling

Well it doesn’t have to be your own creation. You can source products worth selling to your neighbors and friends. Selling online further expands your market without requiring you to leave your home.


10. Establish a career at home

Being a stay-home mom does not necessarily mean the end of your career. As your kids grow, you’ll also find the need to grow and expand your horizon and establish a career at home. Good thing, there are home-based jobs, such as online careers that allow you to keep your talents useful.


As moms, we are always willing to make the necessary sacrifices for our kids’ physical and emotional wellbeing. But this doesn’t mean we need to sacrifice on our budget items and personal growth. It only takes a few adjustments to shift from career woman to stay-home mom. Once you’ve overcome the adjustments, you’ll be amazed to see that with the same 24 hours a day, attending to your kids, balancing you finances and using to your talents to earn extra income are all possible.


by Jona Jone

Jona Jone is a Washington Times Communities writer and a mother of 2 (going 3) kids.


Kanned Goods: DIY Natural Shampoo

Five months back, it finally happened.  I decided to go au natural  with my hair.  I had already reduced/cut chemicals, additives, and what-not in many areas of the home, but by golly I was holding on to my Garnier Fructis shampoo and mousse.  I still love the stuff, but have been more than pleased with the results of my homemade shampoo and yes…gel :). My first thought when people say they are going natural on their hair is the “No Poo” challenge, which basically means no shampoo, only baking soda and apple cider vinegar.  Well, there was some courage lacking in this department, so I thought I’d attempt an in-between.  I knew I didn’t want to pay for natural shampoos, so I decided to try a few recipes.

Easy, cheap, and effective shampoo

Of course, everybody’s hair is different, so the “no poo” might actually work for yours.  For some, my recipes might not work (although I think they’re pretty awesome).  Regardless of how healthy your hair is, there will be a transition period, especially if you use hair products regularly.  My transition period  took about a week.  Even if all you use on your hair is a store bought shampoo, you would be amazed at how much it still strips moisture from your hair (which is why so many people feel the need to then add a moisturizer).

I’m an all-or-nothing kind of gal, so I vowed not to put anything store bought in my hair for one month.  Yikes.  I was terrified.  I was expecting oily, flat, smelly hair that I would have to wrap in a bandana every day.  For the record, I’m not a bandana or hat person!

Nevertheless, I took the plunge.  I was honestly surprised at how painless it was.  And though I like it better now that my hair has fully adjusted, it really wasn’t so bad.  I used a blow dryer and brush and made it work.

Now, I spend hardly anything on my shampoo, and even less than that on my homemade gel (which I am LOVING! in this summer heat and humidity).

Shampoo Recipe 1:

If you feel your hair is damaged and could benefit from a gentle “stripping” shampoo, I would recommend this recipe for 1-4 weeks.  I used it for 3 weeks and it was very effective.  I personally wouldn’t recommend it for long term use due to how powerful castile soap can be when not diluted as much.  However, lots of people find it effective on their hair.

Mix:

¼ Cup Water

¼ Cup Liquid Castile soap (I use a scented Dr. Bronner’s)

½ Teaspoon Oil (like jojoba, olive, coconut, or grapeseed)

Shampoo Recipe 2:

This is my daily shampoo recipe that I use now.

Ingredients:

Note:  This is for a full recipe.  I usually halve it because I don’t want to store a gallon of shampoo

1 gallon of water

8 tea bags (I like a cheapo green tea best; you could just use water, as well)

1/2 cup baking soda

1/4 cup castile soap (I use a scented one-peppermint-so I don’t have to add essential oils)

3 tsp xanthan gum (for thickening; you could use cornstarch as well, but it tends to clump easier)

essential oils (about 30 drops-optional; I don’t use)

Instructions:

Place tea bags in large pot with water.  Bring just to boiling, then remove from heat, cover, and let steep for 10-15 minutes.

Remove tea bags and stir in baking soda.  It will fizz for a minute or so.

Mix in the xanthum gum, a little at a time, whisking vigorously.  Then add the castile soap.

After it cools completely you can stir in your essential oils (optional).

You can store the shampoo in an old washed out container. (I use a Homestead Creamery Jug.)  I put what I use daily in a spritz bottle.  This works really well for helping it foam, as homemade soaps don’t have all the foaming agents of store bought.

Gel recipe to come next month, and when my hair gets a little longer, I will begin experimenting with a detangling conditioner!

Recipe adapted from:  http://ashleyshomemadeadventures.wordpress.com/2012/01/24/homemade-shampoo/

Kanned Goods: DIY Paint Boards with Beeswax Polish

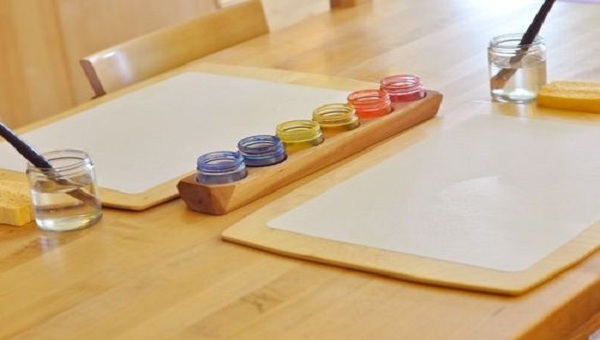
My son and I have really enjoyed adding Wet-on-Wet Watercolor to our list of weekly activities.  It’s cheap, simple, and super therapeutic.  I love watching him just explore the smooth movement of the color across the page. I’ve seen lots of moms use paint boards for art activities, especially watercolors.  They contain the mess and help the paper dry properly.  Plus, it’s something you can use over and over again (unlike just laying down extra paper).  The cheapest ones I came across were $10 plus shipping.  That’s not a horrible price, but in all honesty, they’re not much to look at.  They're just a piece of wood with rounded corners and a natural finish.   Since I’m a glutton for Googling tutorials, I did.  And of course—it wasn’t hard at all.  These instructions will make 2 paint boards plus smaller boards for use with watercolors/paints.  I also found a tutorial for making my own Beeswax Wood Polish.  I only had to buy $6 of supplies total.

Waldorf Style Paint Boards

Supplies: 1 piece of Birch Plywood (I got a 24” square piece for $5.49 at Lowe’s) 1-2 Tbsp. Beeswax (found at local health food store) ¼-1/2 cup olive oil (or coconut, joboba, walnut, etc.)*

Tools: Electric Saw Sandpaper or Sander

Instructions: Cut the piece of birch into 2 paint boards.  I made mine 12”x15” (to easily fit 11”x14” paper).  You can use the smaller pieces as well, or save them for a future project.

Slightly round the corners of all pieces so there aren’t sharp points.

Sand, sand, and sand.  Don’t want splinters in those baby fingers!

Finish the boards, front and back, with your homemade natural beeswax polish.

Homemade Beeswax Polish:

You will want a 1:4 ratio of beeswax to oil.  Grating the beeswax first is optional, but will make the melting faster.

Place beeswax and oil in a microwaveable dish and microwave in 30 second intervals, stirring in between, until beeswax has completely melted and dissolved.  You can add essential oils at this point if you want (make sure it is safe for wood and for toys that go in a child’s mouth).  I didn’t add any because I thought the beeswax smelled so amazing on its own.

Pour mixture into a container that allows for easy stirring.  I poured mine into a glass jar with a lid so I could store any leftover polish.

While the mixture cools, stir every once in a while to prevent separating.  It will thicken first around the edges, so make sure to scrape the sides.  You want to have an even, creamy blend at the end.

Once it’s cooled, rub it into paint boards (and any other wood you have in your house).  A little goes a long way.  Wipe away any excess with a towel, and rub any extra onto your hands and lips.  It’s wonderfully smooth and addicting.

Store any extra in an air-tight container out of direct sunlight.  Olive oil polish will last a year (joboba for 2 years) but refrigerating it will double the lifespan.

Our homemade paint boards are working wonderfully!  The watercolors wipe right off and the paper dries quickly.  You can always reapply the polish if you feel they need it.

*Note:  the olive oil finish will have a slightly yellower tinge to it than other oils, but this doesn’t show up on the wood

Kanned Goods: DIY Glass Etching

Our first Christmas married, I spent hours perusing websites for cheap crafts I could make for others that were beautiful, meaningful, practical, and, well, looked like something you’d buy in a store.  I stumbled across Glass Etching on Martha Stewart’s website, and it has been my go-to for lots of neat (and sometimes last minute) gifts.  That Christmas I etched everybody’s name on a glass mug (that I found for $2.50 at Wal-Mart). I promise it is not near as intimidating as it sounds and it takes a whopping 15 minutes.  I recently pulled my supplies out to etch a vase for some newlyweds we’re dining with.  We had bought them some fresh tulips, but wanted to make it the gift more personal.  I etched their names and wedding date on the vase—now it is something they can use over and over again.

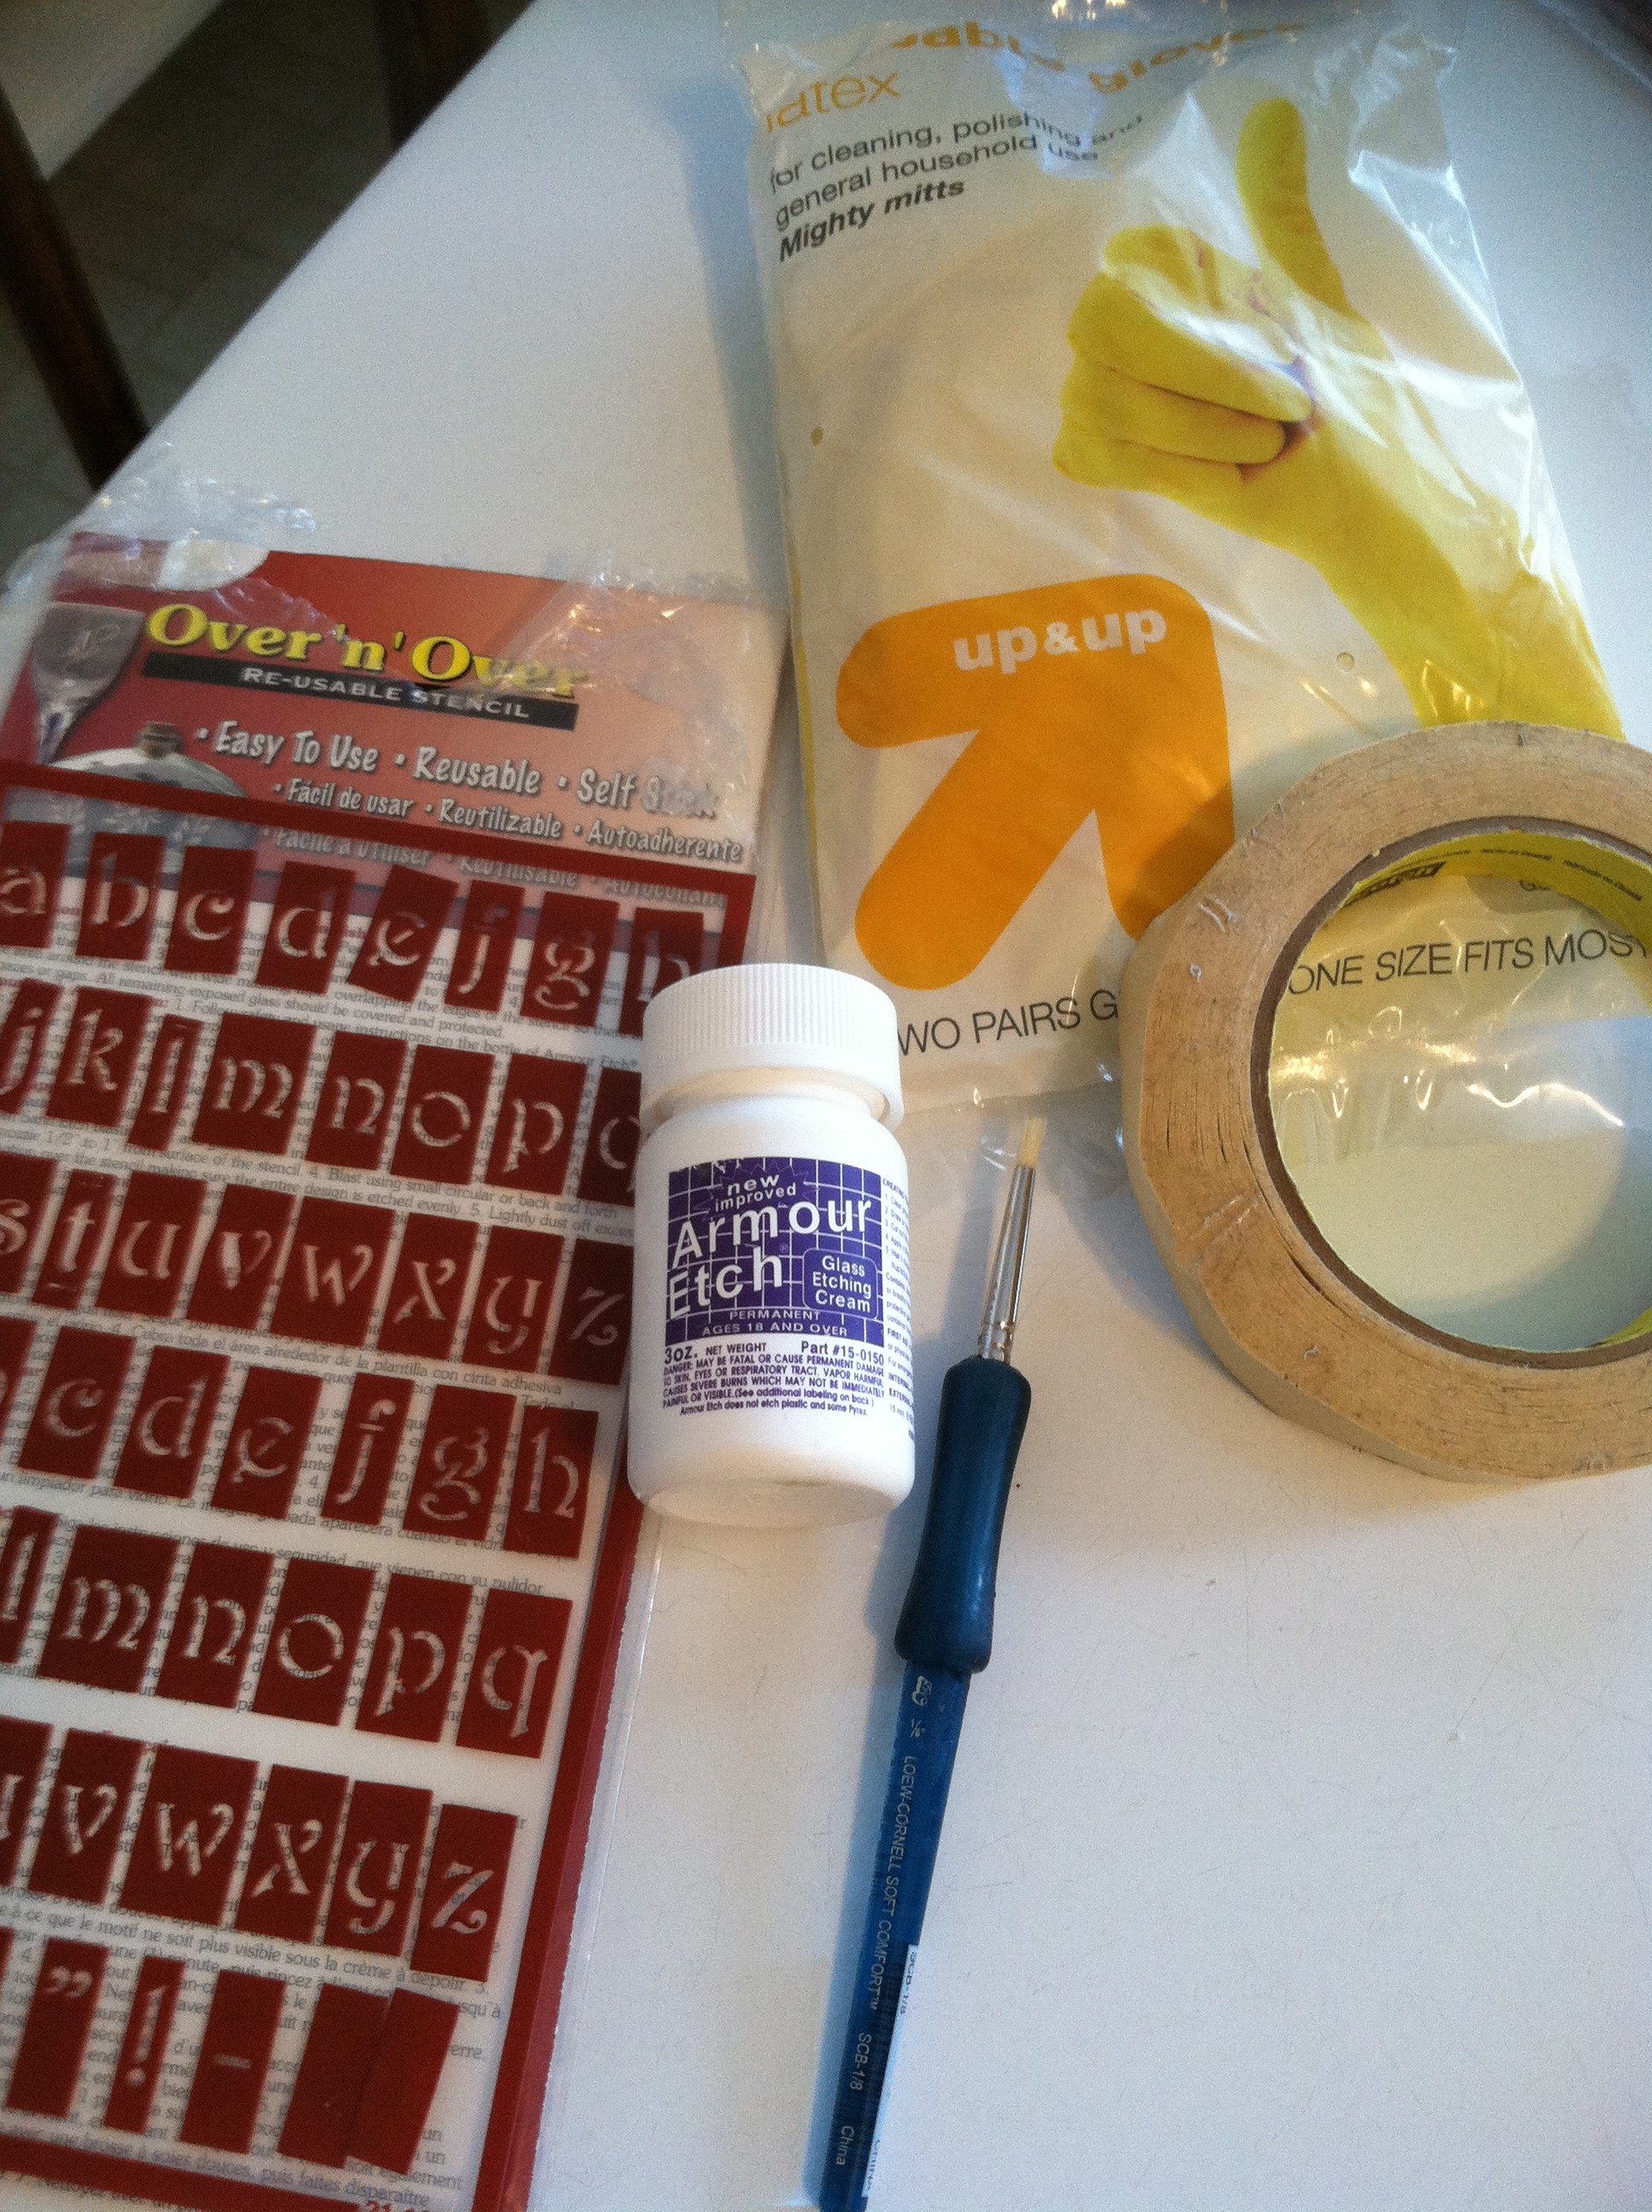
You will need to make a trip to your local craft store for the etching cream and stencils.  It’s a bit of an investment up front ($10-20), but it will last you through many projects!  I bought the smallest bottle of etching cream and reusable stencils, and I still have ¾ a bottle left.

Supplies:

Armour Etch Cream

Stencils (You can make your own or buy these handy-dandy Rub N’ Etch stencils. There is a special glass etching stencil display where you find your cream.)

Rubber gloves

Masking tape

An old paint brush

A glass vase, mug, plate, etc.


Warning:  The etching cream bottle is covered with cautionary procedures for using it.  You even have to be over the age of 18.  With that said, please follow all instructions.  Wear protective clothing, do the project outside, if possible, and ONLY work with the cream when your children are sleeping or someone can watch them.


I’ll give you a run down of what to do, but please read all instructions and labels before proceeding.  I do suggest practicing this once on something cheap to make sure you have all the instructions down and you know how your stencils are working.

First, you’ll want to make sure the glass surface you are etching is clean.

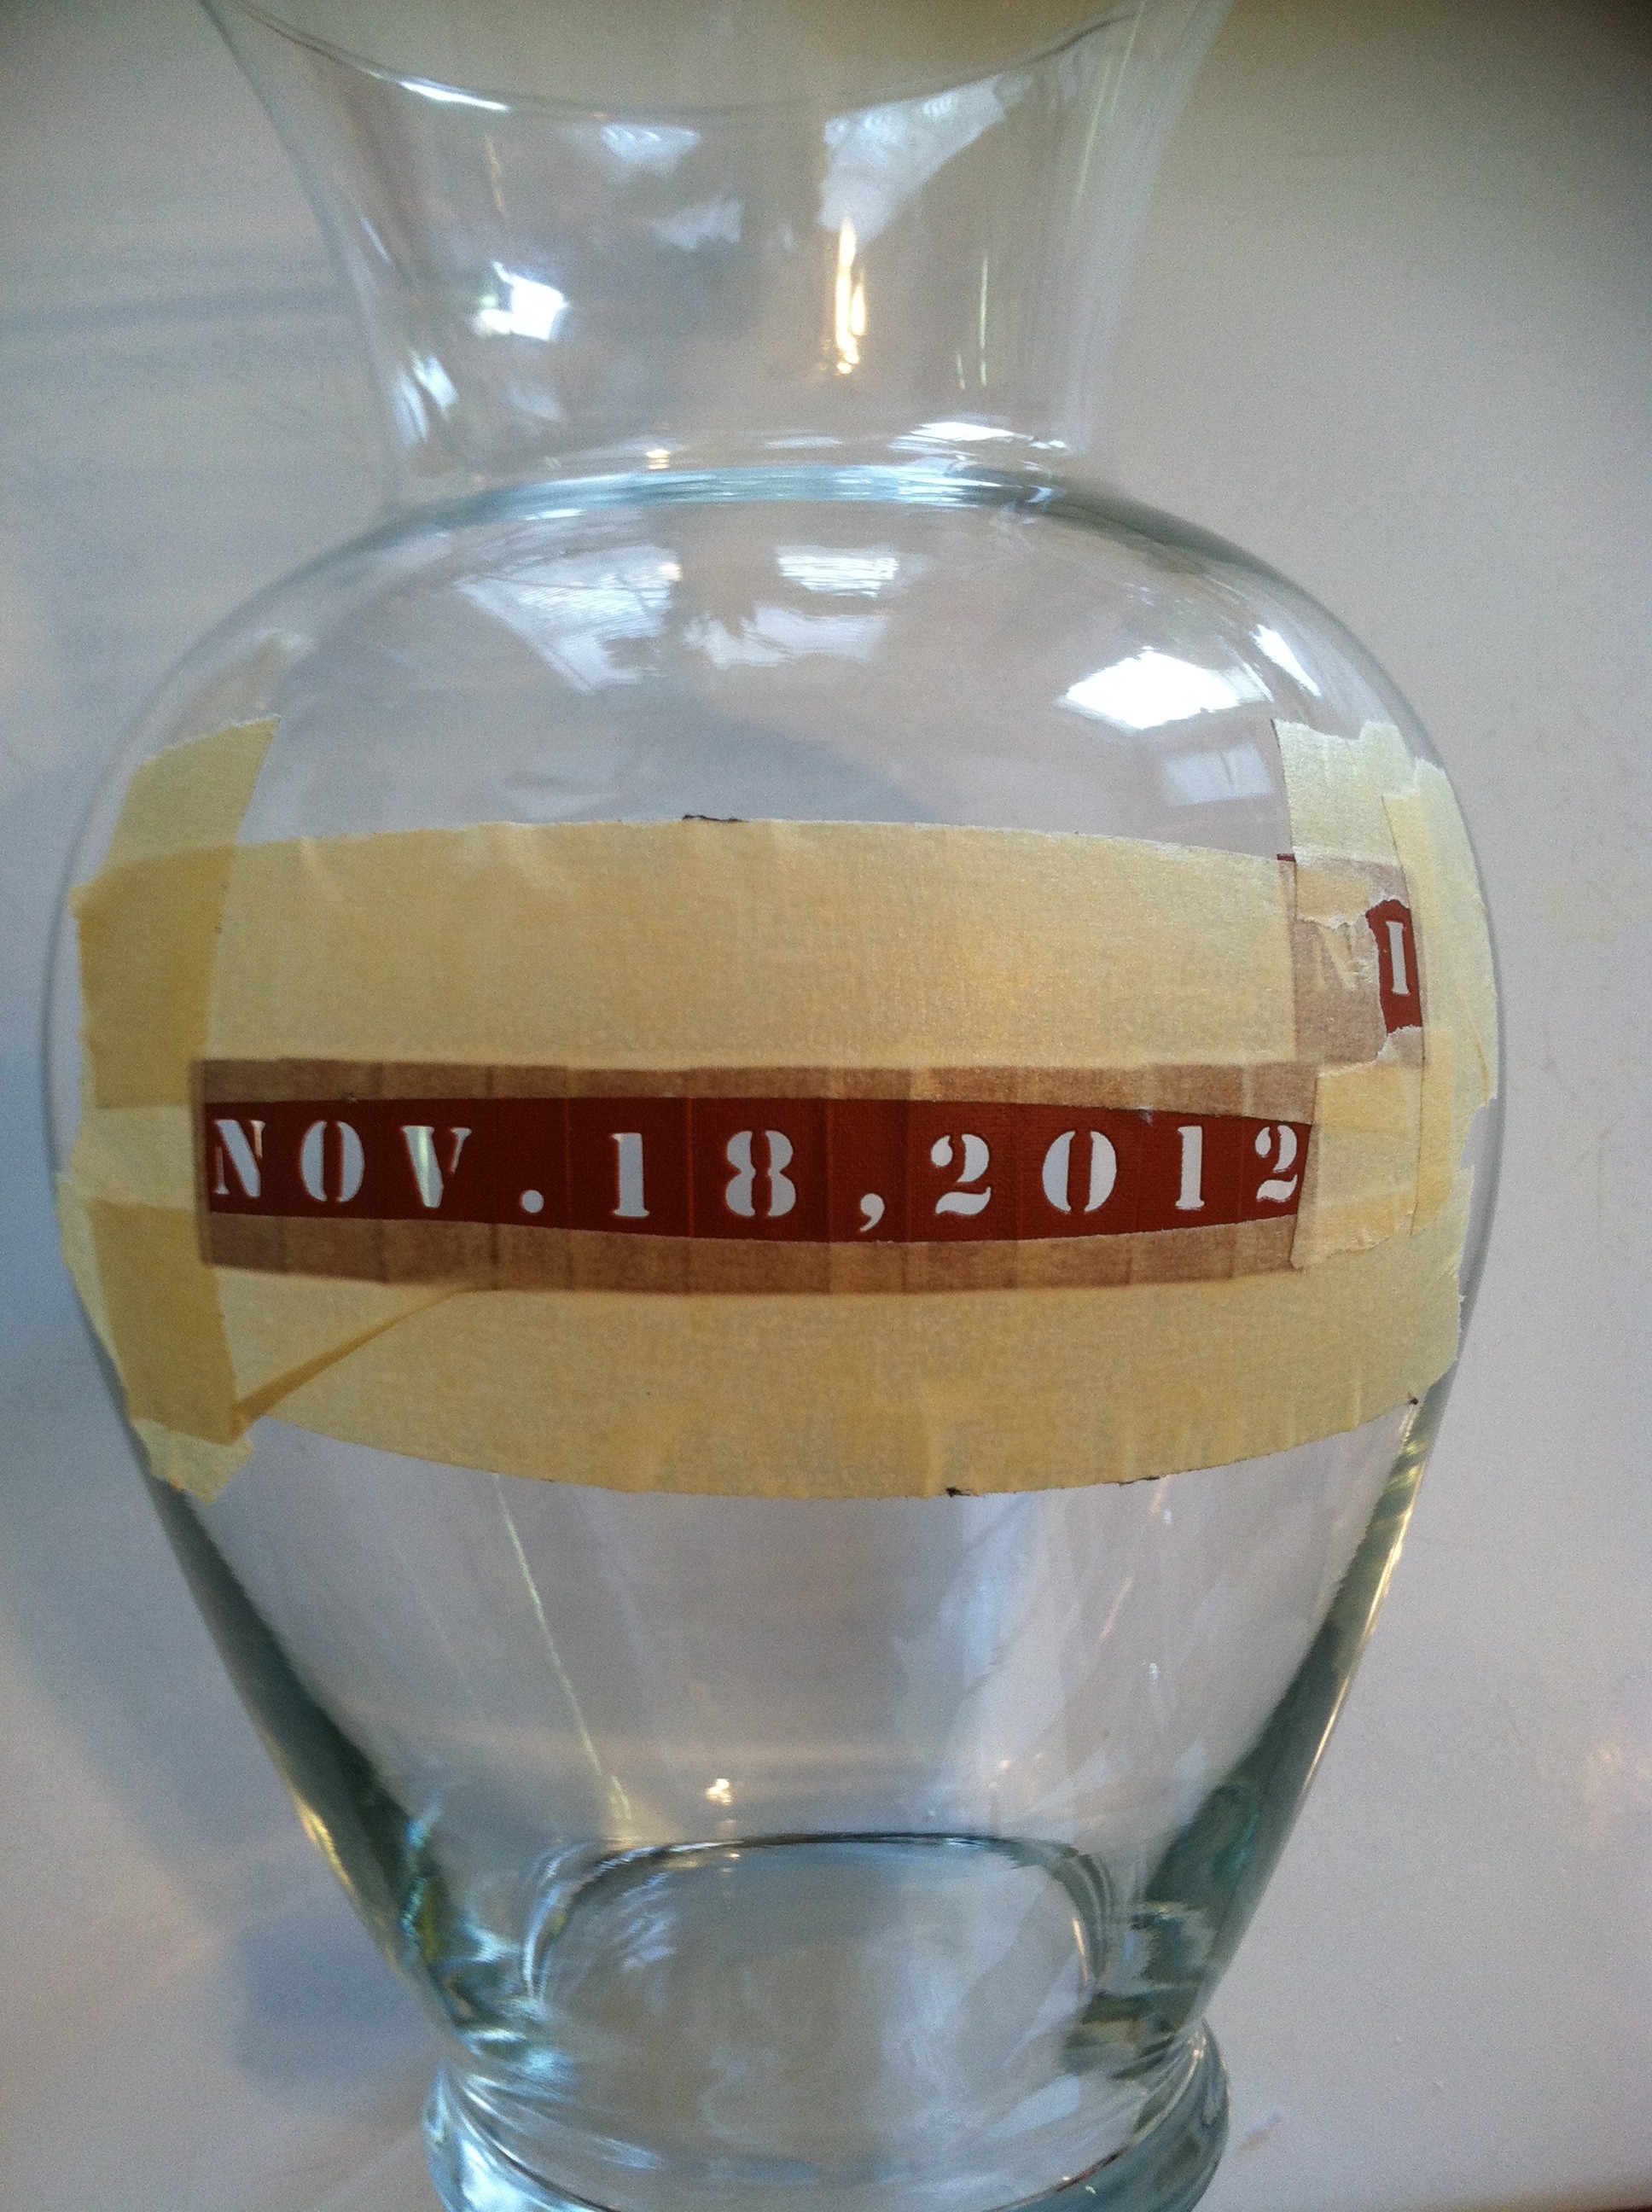
Second, you will want to arrange the stencils.  This is my least favorite part.  It takes forever to get letters lined up in a neat row.  Make sure that if you are placing multiple stencils together that there are no exposed edges or crevices.  Apply masking tape all around the stencil(s) to hold it firmly in place.

Third, make sure you have everything you need — glass with taped-on stencils, paint brush, etching cream, and watch/timer (if needed).  Also, wear protective clothing and eye gear in case of accidental spills.  Using the paintbrush, apply a thick layer of etching cream to the stenciled area, completely covering it.  If you’re using the Rub N’ Etch stencils, you only need to let the cream sit for 60 seconds.  If you’re using a different kind (the label should tell you), you will need to let it sit for 5 minutes.  Make sure to close your bottle of cream as you don’t need to be smelling it all that time!

Fourth, run the glass under warm water, washing all the cream away.  Remove stencil and masking tape.  You may not see the etch right away, but once you towel dry it,  it should appear nicely.   Let me tell you, it really feels like magic :).

The best part is the etching is very durable.  You can pretty much do whatever the glassware says is possible (dishwasher, microwave, etc.).

I hope this inspires some beautiful handmade gifts!  Feel free to share ways that you use glass etching for your crafting.

Kanned Goods: DIY Fall Wreath

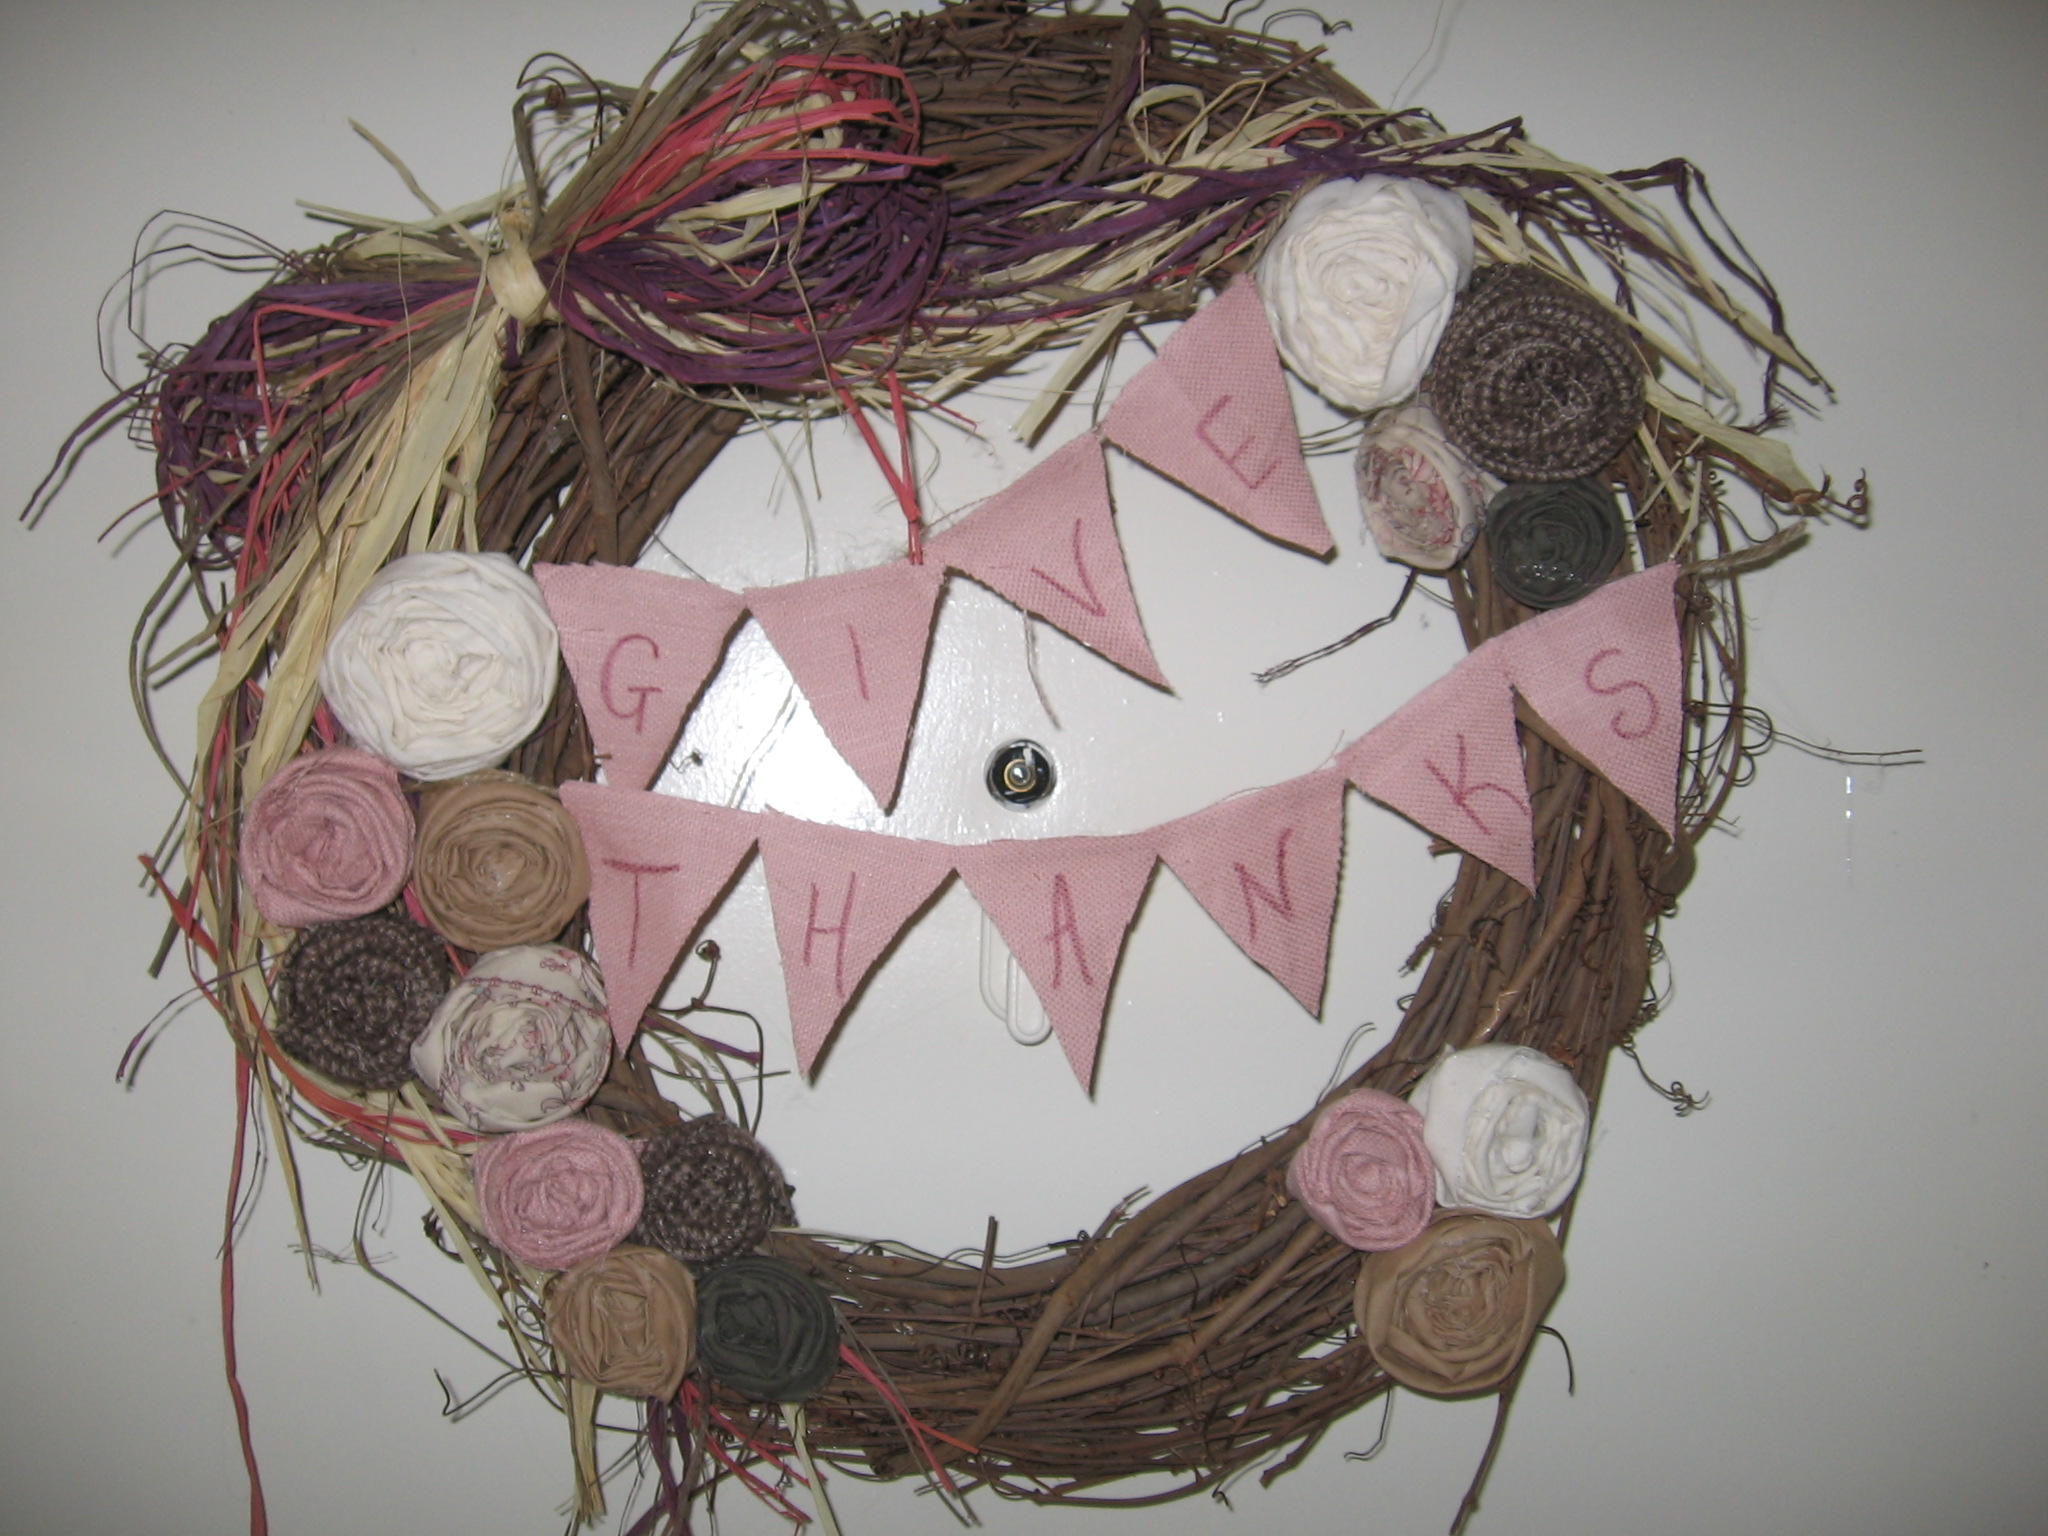
Fall comes around, and I once again find myself in the mood to make (yet another) wreath.  There’s something about the approach of the holiday season that needs to be met with festivity right at the entrance of my home. I have been very “fabricky” in my crafts the last few months, so I decided to use some of those scraps and make fabric flowers.  I do love the beautiful oranges, yellows, and reds of the autumnal season, but this time I went with deep maroons and purples.  I wanted the wreath to flow with the greens and pinks of my living room.  I used a giant raffia bow I made to add a fallish look.

You can find a million DIY on the internet for making these flowers, but I thought I would include the instructions just for the fun of it!  The best part about this wreath?  Only took me half of a morning nap to complete.

You will need:

Wreath Fabric Scraps (I used a combination of cotton, canvas, and wool) Felt circles—they can be any color as they won’t be seen, cut smaller than the flowers you’ll be making.  Confession?  Mine weren’t really circles.  Just free-hand shapes. Hot Glue Gun Miscellaneous embellishments—I used a raffia bow and a homemade banner (pictured at end of post)

  1. Plug in your hot glue gun so it can begin heating up.
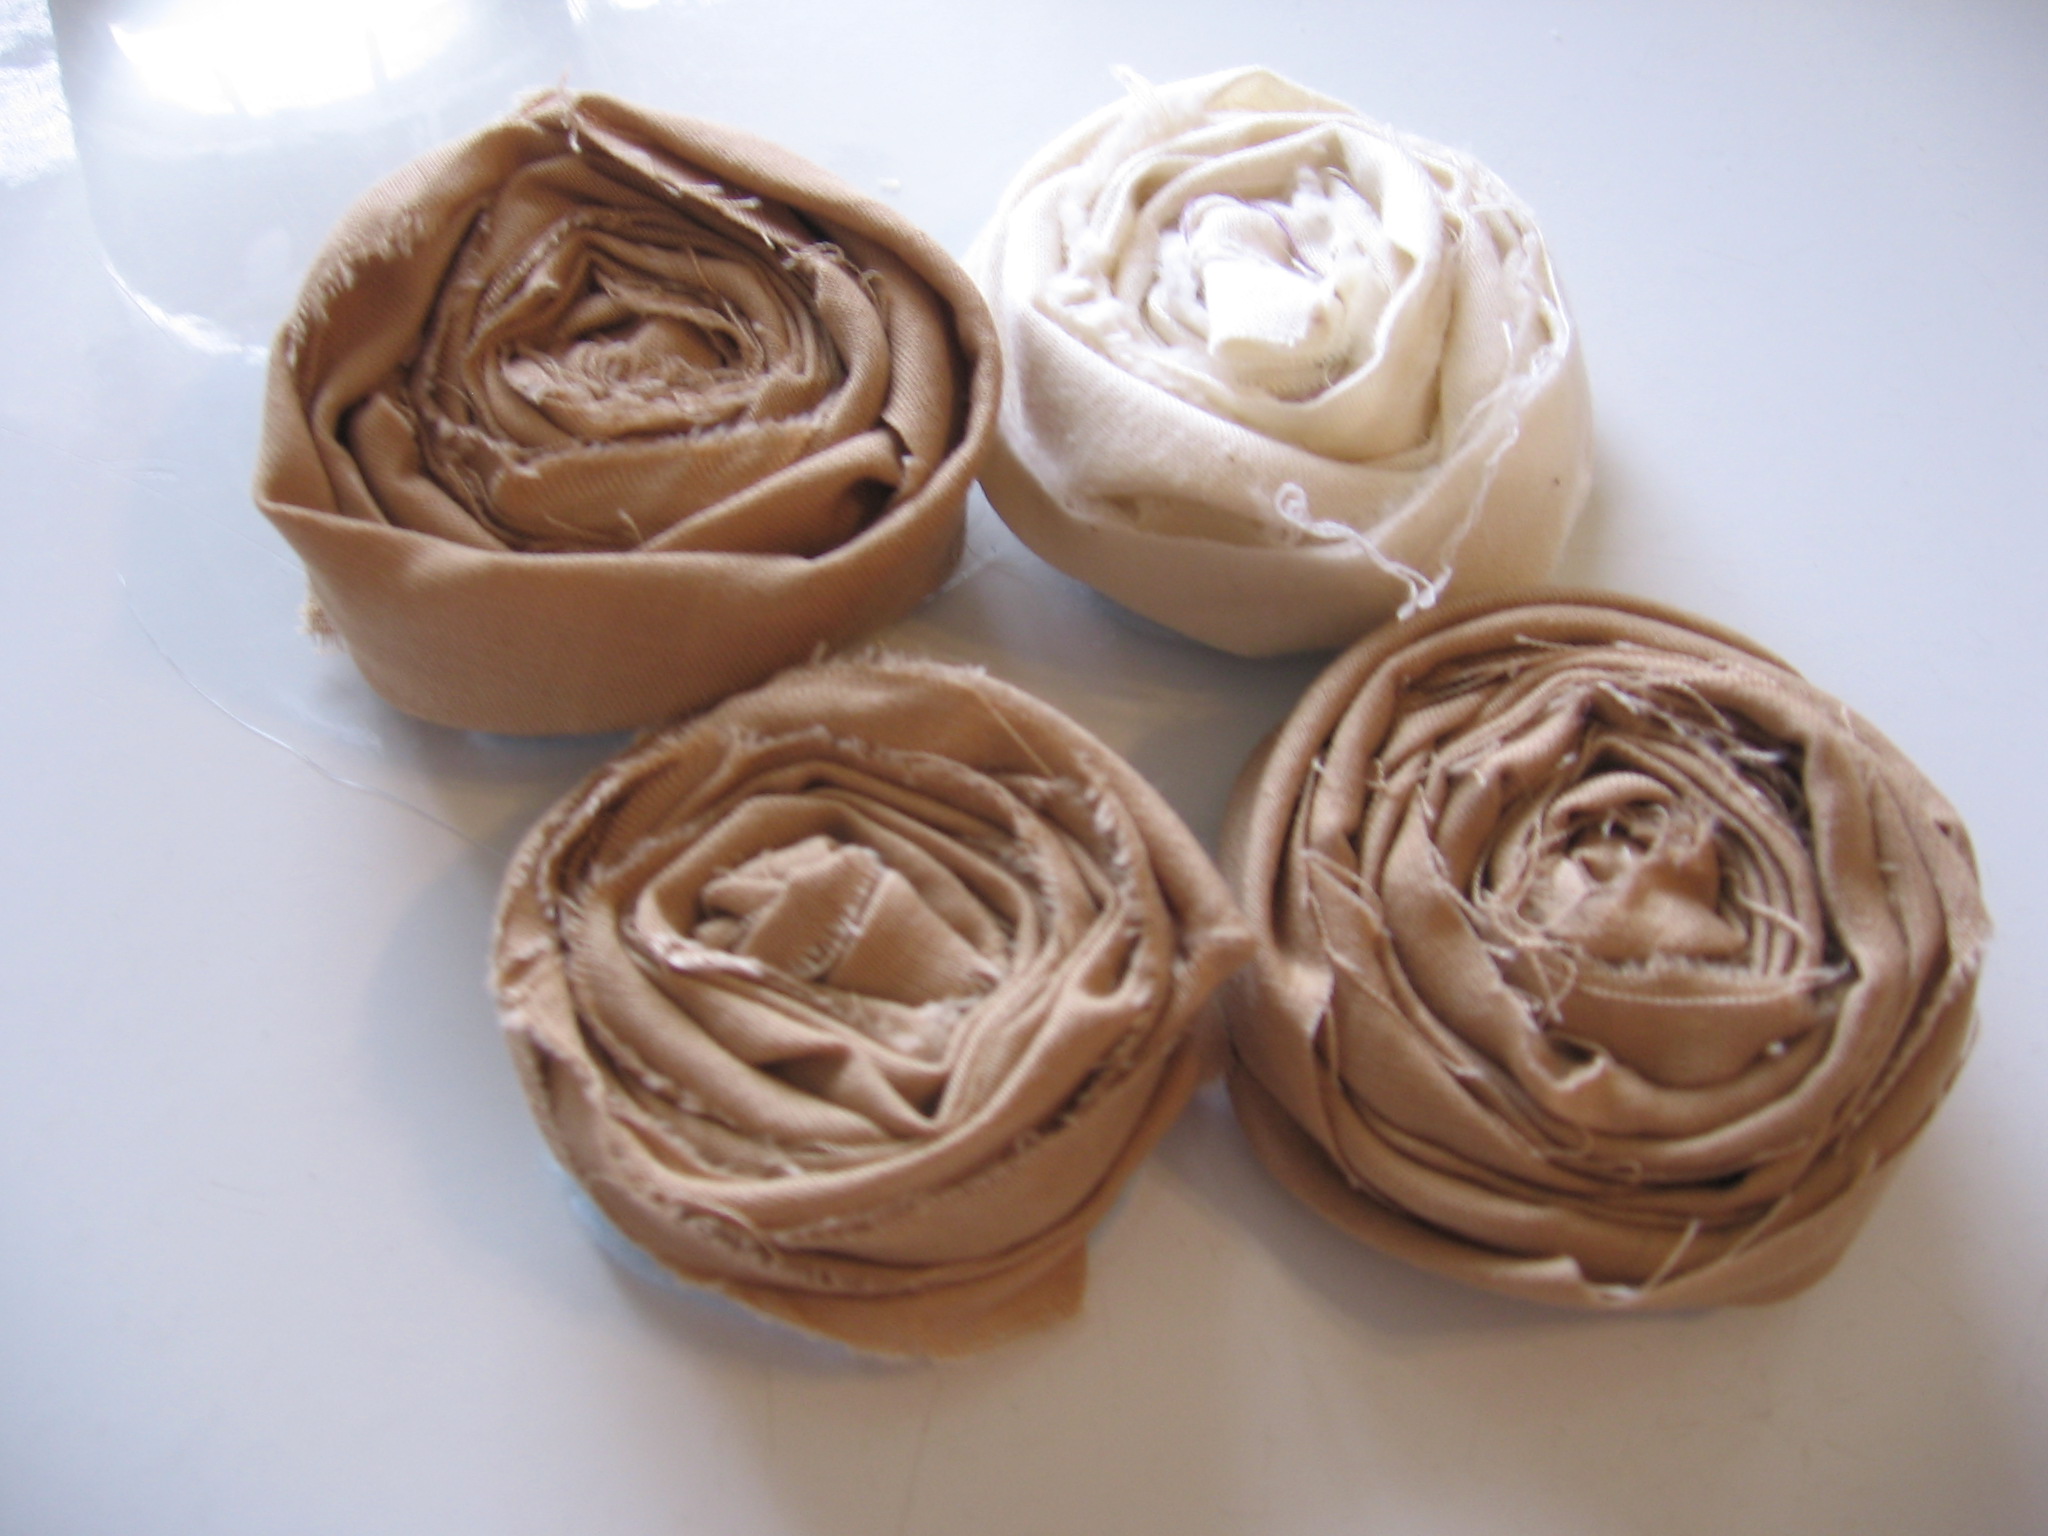
  2. Cut scraps of fabric about 1 ½ inches wide by however long you want (at least 18 inches).  Confession?  I just made a nitch at the top of the fabric and tore the strips.  They won’t stay perfect, but it adds to the scrappiness of the flower.  You can see I thought I would only want a neutral wreath (I love beiges way too much), but I was having so much fun that I ran to the closet for more fabrics!
  3. Make a knot in one end of the fabric piece.
  4. Holding the knot in your left hand, begin spinning the rest of the piece around the knot, fairly tightly, keeping the knot centered.  You will begin to see the flower take shape.  If you want, give the fabric piece a twist now and then, to add extra dimension.  When you get to the end of the piece, tuck it underneath.
  5. Grab a felt circle, put some glue on it, and place the bottom of the flower on top, and press firmly.
  6. That’s it!  Truly.  Assemble all your flowers, and begin arranging them and gluing them onto your wreath.
  7. I had so much fun with this, and when I was finished, I loved the look of it on my door!

I still didn’t feel like it had a super autumnal look, so I cut some freehand pendants out of canvas, wrote letters on them with a fabric marker, and glued it to some twine.  Now we have a beautiful reminder of this holiday season, every time we come home!

Salad Bar Parenting: Greener Cleaner Recipes

Salad Bar Parenting: A buffet of ideas, practices and products loved by a Motherhood Collective Mom. Depending on your season of parenthood or mothering philosophies, you may pile on what works for you or pass the salad tongs to the next Mom. House cleaning

I’ve made quite a few changes this year in the way I clean our apartment.  Many baby steps later, I find myself with nearly all homemade cleaners and virtually no paper towels!

My desire to change began when Gabriel would fall asleep in the baby carrier, and I desperately wanted to clean the bathroom.  But I didn’t want him to smell all the cleaners I was using.  A friend of mine said she had begun making her own cleaners.  I’m not going to lie—I’ve always thought that was a little weird.  I mean, do they really clean as well?  Don’t you need the smell of bleach to really know that toilet is clean?  And doesn’t that take a lot of time (which I don’t have)?

I didn’t want to pay for the “green” cleaners at Kroger, so I decided I would try just one thing – an All-Purpose cleaner.  I was shocked.  It was cheap (cheaper than I could have imagined), green, safe (if you really want to, you can drink it—no worries of Gabriel accidentally discovering it!), and it, well, REALLY WORKS!

All I had to do was buy 5 ingredients (and most of them, you might already have on hand):

Vinegar

Baking Soda

Borax (you can get this at Kroger and Wal-Mart)

Super Washing Soda (Kroger and Wal-Mart)

Liquid Castile Soap (health food store, Target, Wal-Mart)

Optional: a naturally disinfecting essential oil such as a peppermint, lemon, or lavender

With these five ingredients, I now make All-Purpose Cleaner, Liquid Dish Soap, and Dishwasher Soap.  When I run out of my laundry detergent, I have everything I need to make that as well!


All-Purpose Cleaner:  (I adapted this from one of the hundreds I found on the web)

Combine 1 cup vinegar, 4 cups water, 2-3 tsp. baking soda, and a few drops of an essential oil (optional).  Pour into a spray bottle, and spritz!  For more intense cleaning, like for the tub and toilet, I’ll just pour straight up vinegar, and then sprinkle baking soda or borax and let it sit for a few minutes before scrubbing.


Liquid Dish Soap:  (copied from http://frugallysustainable.com/2011/09/homemade-liquid-dish-soap-that-really/)

-1 ½ cup of hot water

-½ cup liquid castile soap (I usually use Dr. Bronner’s baby mild liquid soap, but feel free to use any scent just be sure to adjust/omit essential oils accordingly. You may want to use a variety that is already scented for a more frugal option.)

-1 tablespoon of white vinegar

-1 tablespoon of Arm&Hammer’s Super Washing Soda (used to thicken the soap)

-1/8 teaspoon of tea tree oil (optional)

Directions:

1. Combine all ingredients into a large bowl and then pour in 1 1/2 cups of very hot water. Be sure to whisk/stir this mixture until all ingredients are thoroughly blended (and the washing soda is melted).

2. Allow mixture to cool completely on the counter, stirring occasionally.

3. Store in any dish soap dispensing bottle and use as you would the commercial brands.

Note: You may choose to naturally increase the anti-bacterial qualities of the soap by adding 1/4 tsp. of lavender or eucalyptus essential oils.


Dishwasher Soap:  Place one Tablespoon of Borax and one Tablespoon of Baking Soda in the dispenser.  Voila!

I also mix 1 part vinegar to 4 parts water when I mop the floors.

I use those green scour pads first, and then I finish off with microfiber cloths—their woven fibers pick up and trap germs and debris.  It’s also nice to polish everything off, since the baking soda can sometimes leave streaks on chrome.  I then just throw the scrubbers and cloths in the washer every week, and I’m ready to begin again!


This is something that has really worked for me.  I love hearing about how others keep house.  What tips do you have?