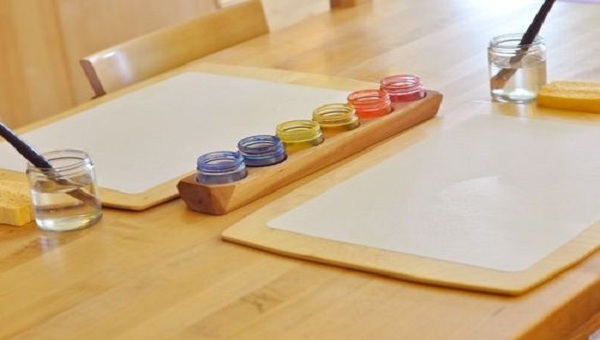
My son and I have really enjoyed adding Wet-on-Wet Watercolor to our list of weekly activities. It’s cheap, simple, and super therapeutic. I love watching him just explore the smooth movement of the color across the page. I’ve seen lots of moms use paint boards for art activities, especially watercolors. They contain the mess and help the paper dry properly. Plus, it’s something you can use over and over again (unlike just laying down extra paper). The cheapest ones I came across were $10 plus shipping. That’s not a horrible price, but in all honesty, they’re not much to look at. They're just a piece of wood with rounded corners and a natural finish. Since I’m a glutton for Googling tutorials, I did. And of course—it wasn’t hard at all. These instructions will make 2 paint boards plus smaller boards for use with watercolors/paints. I also found a tutorial for making my own Beeswax Wood Polish. I only had to buy $6 of supplies total.

Supplies: 1 piece of Birch Plywood (I got a 24” square piece for $5.49 at Lowe’s) 1-2 Tbsp. Beeswax (found at local health food store) ¼-1/2 cup olive oil (or coconut, joboba, walnut, etc.)*
Tools: Electric Saw Sandpaper or Sander
Instructions: Cut the piece of birch into 2 paint boards. I made mine 12”x15” (to easily fit 11”x14” paper). You can use the smaller pieces as well, or save them for a future project.
Slightly round the corners of all pieces so there aren’t sharp points.
Sand, sand, and sand. Don’t want splinters in those baby fingers!
Finish the boards, front and back, with your homemade natural beeswax polish.
Homemade Beeswax Polish:
You will want a 1:4 ratio of beeswax to oil. Grating the beeswax first is optional, but will make the melting faster.
Place beeswax and oil in a microwaveable dish and microwave in 30 second intervals, stirring in between, until beeswax has completely melted and dissolved. You can add essential oils at this point if you want (make sure it is safe for wood and for toys that go in a child’s mouth). I didn’t add any because I thought the beeswax smelled so amazing on its own.
Pour mixture into a container that allows for easy stirring. I poured mine into a glass jar with a lid so I could store any leftover polish.
While the mixture cools, stir every once in a while to prevent separating. It will thicken first around the edges, so make sure to scrape the sides. You want to have an even, creamy blend at the end.
Once it’s cooled, rub it into paint boards (and any other wood you have in your house). A little goes a long way. Wipe away any excess with a towel, and rub any extra onto your hands and lips. It’s wonderfully smooth and addicting.
Store any extra in an air-tight container out of direct sunlight. Olive oil polish will last a year (joboba for 2 years) but refrigerating it will double the lifespan.
Our homemade paint boards are working wonderfully! The watercolors wipe right off and the paper dries quickly. You can always reapply the polish if you feel they need it.
*Note: the olive oil finish will have a slightly yellower tinge to it than other oils, but this doesn’t show up on the wood

